
Ballerina pencil case with zipper Pattern


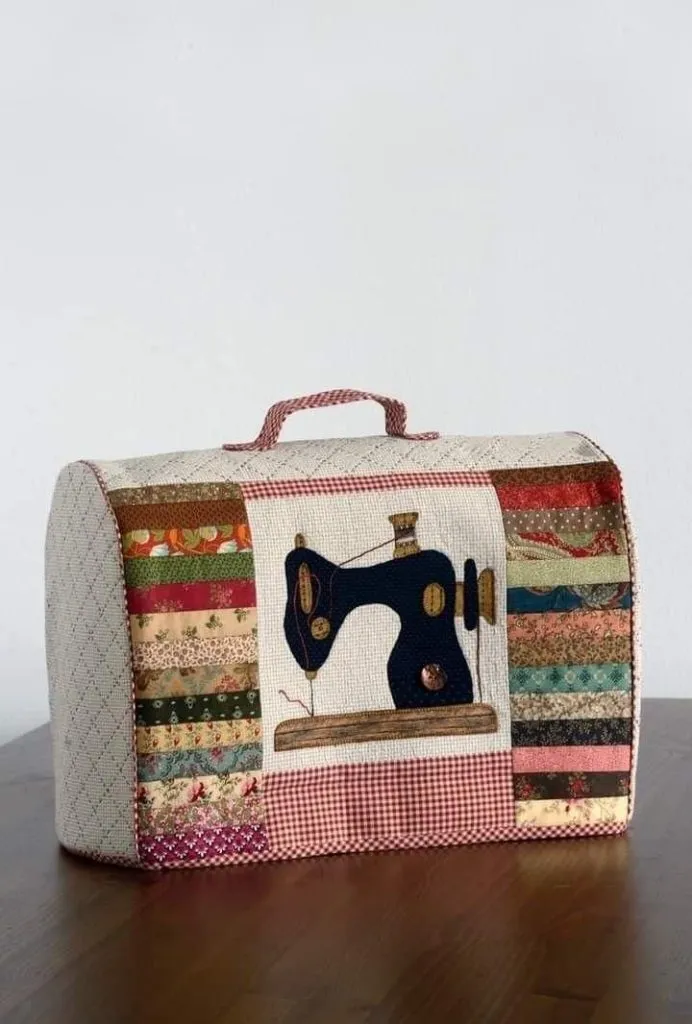
The Machine Cover Quilt Tutorial is an essential guide for anyone looking to protect their sewing machines while adding a touch of personalization to their workspace.
Whether you are a beginner or an experienced quilter, this Machine Cover Quilt Tutorial will provide you with valuable techniques and tips to complete your project efficiently.
This tutorial will guide you through these stages, making the process easy and enjoyable. From choosing the right batting to stitching perfect seams, every detail matters when aiming for a professional finish.
With this Machine Cover Quilt Tutorial, you will gain confidence in handling quilting projects and develop skills that can be applied to other creative sewing endeavors.
A Machine Cover Quilt Tutorial also emphasizes the importance of customization. You can choose fabrics that match your sewing room décor or reflect your personal style. Additionally, quilting patterns can be adapted to your preferences, creating a unique cover that is functional and aesthetically pleasing. By following this tutorial, you will not only protect your machine from dust and damage but also create a decorative piece that adds charm to your sewing space.
The first step in our Machine Cover Quilt Tutorial is gathering all necessary materials. You will need high-quality quilting fabrics, preferably cotton, for durability and ease of handling. Choose fabrics in complementary colors or patterns to make your machine cover visually appealing.
You will also need a sewing machine, of course, along with basic sewing tools such as scissors, pins, and a rotary cutter. A cutting mat is recommended for precise fabric cutting. Using these tools will make the quilting process smoother and more accurate.
Batting is another essential material for your machine cover quilt. Batting provides thickness and cushioning, protecting your sewing machine from scratches and minor bumps. Cotton or polyester batting works best, depending on your preference for texture and firmness.
Thread selection is also crucial. Use a strong, durable thread that can withstand regular handling and washing. Coordinating thread colors with your fabrics will enhance the overall appearance of your quilted cover.
Marking tools such as fabric pens or chalk help guide your stitching patterns. These tools ensure precision and help avoid mistakes while quilting.
Finally, consider including embellishments like applique pieces or embroidery designs if you want to personalize your machine cover quilt further. These decorative elements can make your quilted cover truly one-of-a-kind.
In this section of the Machine Cover Quilt Tutorial, we focus on cutting and preparing your fabrics. Accurate measurements are vital for ensuring that your quilt fits your machine perfectly. Start by measuring the height, width, and depth of your sewing machine.
Once measurements are taken, mark the dimensions on your fabric using a fabric pen or chalk. Ensure that you include seam allowances for proper stitching. Precision in this step will prevent uneven edges and misaligned seams.
Next, cut your batting slightly smaller than the fabric pieces to avoid bulk in the seams. This technique will help create smooth, professional-looking edges on your machine cover quilt.
Layer your fabric pieces with the batting in the center, creating a sandwich ready for quilting. Pin the layers together carefully to prevent shifting during stitching. Proper preparation ensures even quilting lines and a polished final product.
Consider pre-washing your fabrics to prevent shrinkage and color bleeding. Pre-washing also softens the fabric, making it easier to handle and quilt.
Finally, review all pieces and make sure they are correctly aligned before starting your sewing machine. Taking the time to prepare carefully sets the foundation for a successful machine cover quilt project.
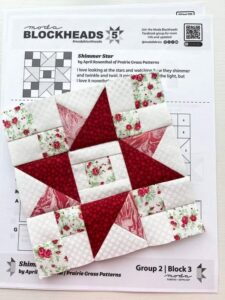
Quilting is the heart of the Machine Cover Quilt Tutorial. Start by selecting a simple quilting pattern if you are a beginner, such as straight lines or diagonal grids. These patterns are easy to follow and give a clean, structured look to your cover.
For more advanced quilters, free-motion quilting allows for creative designs like swirls, flowers, or geometric patterns. This technique adds texture and uniqueness to your machine cover quilt.
Ensure your sewing machine settings are appropriate for quilting thick layers. Adjust stitch length and tension to achieve smooth stitching without puckering. Proper machine settings are key to a professional finish.
Basting the quilt layers with temporary stitches or pins helps keep everything in place. This step prevents shifting and maintains even stitching throughout the quilting process.
When quilting around edges or corners, take your time to make precise turns. This attention to detail enhances the overall appearance of your machine cover quilt.
Finally, inspect your quilt regularly as you work. Fix any uneven stitches or misaligned patterns immediately to maintain a polished final result. Regular checks ensure your project stays on track.
After quilting, it’s time to assemble your machine cover quilt. Start by sewing the side panels to the top piece, carefully matching seams and corners. Precision in assembly ensures a perfect fit for your sewing machine.
Next, hem the edges to prevent fraying. A clean hem not only strengthens your cover but also gives it a professional appearance. Consider using bias tape or folded fabric for a polished finish.
Adding a lining to your quilted cover can increase durability and give a smoother interior surface. The lining also enhances protection, ensuring your sewing machine stays in pristine condition.
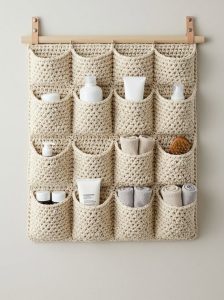
Attach any additional features such as handles or pockets if desired. These functional elements can make your machine cover quilt more practical for storage or carrying.
Once fully assembled, press your quilted cover with a warm iron. Pressing helps flatten seams, giving your cover a crisp, finished look.
Finally, test the cover on your machine to ensure a proper fit. Make any minor adjustments if needed. This final step guarantees that your machine cover quilt is ready for everyday use.
Q1: Can I use fabric scraps for my machine cover quilt?
Yes, using fabric scraps is a great way to create a colorful and eco-friendly machine cover quilt. Just ensure that pieces are large enough to maintain structure.
Q2: What type of batting is best for a machine cover quilt?
Cotton or polyester batting works well. Cotton provides a soft, natural feel, while polyester offers more resilience and thickness.
Q3: Do I need a sewing machine to quilt the cover?
While hand quilting is possible, a sewing machine speeds up the process and ensures more even stitching. This is especially helpful for beginners.
Q4: How can I clean my quilted machine cover?
Most quilted covers can be hand-washed or machine-washed on a gentle cycle. Avoid high heat to prevent shrinking or damage.
Q5: Can I customize the size of my machine cover quilt?
Absolutely. Measure your machine carefully and adjust the pattern dimensions accordingly for a perfect fit.
Q6: What quilting pattern is best for beginners?
Straight lines, grids, or simple diagonal patterns are ideal for beginners. They are easy to follow and produce a neat, professional look.
In this Machine Cover Quilt Tutorial, we have explored the complete process of creating a functional and beautiful quilted cover for your sewing machine.
From gathering materials and preparing fabrics to quilting techniques and final assembly, each step ensures that your cover is both protective and visually appealing.
Creating a machine cover quilt is more than just a protective accessory—it is a chance to showcase creativity, practice quilting skills, and enhance your sewing space. Take your time, follow the steps carefully, and enjoy the process of making something practical and beautiful.


