
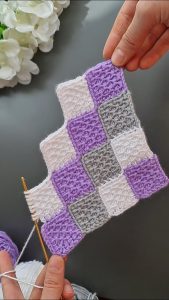
Ballerina pencil case with zipper Pattern


Heirloom Hearts Quilt – Tutorial is a beautiful and timeless project that combines creativity, precision, and the warmth of handmade craftsmanship.
Whether you are a beginner or an experienced quilter, this guide will walk you through every step to create your very own Heirloom Hearts Quilt – Tutorial.
Quilting is more than just sewing fabric together; it’s about preserving memories, expressing creativity, and sharing love through handmade artistry.

In this tutorial, you will learn about the essential materials, techniques, and tips needed to make your quilt not only functional but also a cherished piece of art.
The Heirloom Hearts Quilt – Tutorial focuses on creating heart-shaped patterns that symbolize love and tradition. Each heart in the quilt represents a story, making this project perfect for gifts, family heirlooms, or personal keepsakes. The process involves choosing the right fabric, cutting precise shapes, and piecing them together with care. By following this guide, you will gain confidence in your quilting skills and produce a quilt that reflects your dedication and creativity.
Moreover, the Heirloom Hearts Quilt – Tutorial emphasizes the importance of planning and patience. Quilting is a process that cannot be rushed, and attention to detail will ensure that the finished product is flawless. From selecting complementary colors to mastering stitching techniques, every step contributes to the quilt’s overall charm. By the end of this tutorial, you will not only have a finished quilt but also a deeper understanding of quilting artistry and design principles.
Creating a successful Heirloom Hearts Quilt – Tutorial begins with gathering all the necessary materials. Fabric selection is crucial because the colors, textures, and patterns will define the final look of your quilt. For this project, you will need a variety of cotton fabrics in soft pastels, rich tones, or patterns that complement the heart motif. Prewashing your fabrics is recommended to prevent shrinkage after the quilt is finished.
The next essential item is a rotary cutter and cutting mat. Precision in cutting is vital for the hearts to align perfectly. A quilting ruler is also necessary to ensure accurate measurements and straight lines. While traditional scissors can be used, a rotary cutter saves time and improves accuracy, especially for intricate heart shapes.
Thread is another important consideration. Choose high-quality cotton or polyester thread in a color that matches or complements your fabric. Using the right thread will prevent breakage and ensure your stitches are consistent. Additionally, pins, fabric glue sticks, and a seam ripper are helpful tools to keep your pieces in place and correct mistakes if needed.
Batting is a key component of the Heirloom Hearts Quilt – Tutorial, as it provides the quilt with softness and structure. Batting comes in different thicknesses and materials, such as cotton, wool, or synthetic blends. Select the type that suits your desired feel and warmth. The backing fabric should complement the front design and be large enough to cover the quilt completely, allowing for a small margin for finishing.
Sewing machines make the quilting process faster and more precise, but hand-sewing is also an option if you prefer a traditional approach. Make sure your machine is properly threaded, and the needle is suitable for quilting. A walking foot attachment can be helpful for even stitching, especially when working with multiple fabric layers.
Finally, an iron and ironing board are essential for pressing seams and ensuring your quilt lies flat. Pressing each seam as you go prevents puckering and keeps the quilt looking professional. Proper preparation and organization of all materials will make the Heirloom Hearts Quilt – Tutorial process smooth and enjoyable.
The heart shapes are the focal point of the Heirloom Hearts Quilt – Tutorial. Begin by selecting the fabrics for your hearts. Consider using contrasting colors to make the hearts stand out or coordinating shades for a more subtle effect. Templates or stencils are useful tools to trace uniform heart shapes onto your fabric.
Once traced, carefully cut out each heart using a rotary cutter or sharp scissors. Accuracy at this stage is crucial because any irregularities will affect the alignment when piecing the quilt. Take your time to ensure each heart is symmetrical and neat.
After cutting, organize the hearts according to your quilt layout. This step allows you to visualize the final design and make adjustments before sewing. Laying out all pieces on a flat surface or design board is recommended.
Some quilters like to apply interfacing to the hearts for extra stability. Interfacing helps maintain the shape of the hearts during stitching and prevents stretching. Choose a lightweight interfacing to avoid adding unnecessary bulk to your quilt.
Prepare the background squares or rectangles where the hearts will be sewn. Measure and cut these pieces precisely to match the size of your hearts plus seam allowances. Accurate background pieces ensure that the hearts are centered and aligned.
Finally, mark the stitching lines on each heart and background piece using a fabric pen or chalk. Clear markings guide your sewing and help maintain uniformity across the quilt, ensuring a polished and professional result.
Piecing is the process of sewing all your prepared pieces together. Start with the hearts and their corresponding background squares. Align the hearts carefully in the center of each square and pin them in place. Some quilters prefer using a basting stitch or fabric glue stick for added stability before machine stitching.
Sew the hearts to the background fabric using a straight stitch, keeping the seam allowance consistent. Backstitch at the beginning and end of each seam to secure the stitching. Precision is essential during this step to ensure the quilt pieces align correctly.
Once all hearts are attached to their background squares, arrange the squares according to your design layout. Play with color combinations and placement to achieve a visually appealing pattern. Adjust as needed before sewing the squares together.
Sew the rows of squares together, maintaining straight seams and consistent seam allowances. Press each seam after sewing to ensure the quilt lies flat. Proper pressing improves the overall appearance and helps with later quilting stages.
After all rows are sewn, join the rows to complete the quilt top. Ensure all corners meet neatly, and adjust any pieces that appear misaligned. A well-pieced quilt top sets the foundation for a professional-looking finished quilt.
Before moving on to quilting, add borders if desired. Borders frame your Heirloom Hearts Quilt – Tutorial and can enhance the design. Cut strips of fabric, sew them to the quilt edges, and press the seams carefully. Borders should complement the heart motifs and overall color scheme.
Quilting is the stage where the layers of the quilt are stitched together. Start by layering the backing fabric, batting, and quilt top. Smooth out wrinkles and pin or baste the layers to prevent shifting. A spray adhesive or safety pins can help keep everything in place.
Choose a quilting design that enhances the hearts without overwhelming them. Simple straight lines, echo quilting around the hearts, or free-motion quilting are popular options. The quilting stitches not only hold the layers together but also add texture and dimension.
Quilt each section carefully, maintaining even stitch lengths. Take breaks if needed to prevent fatigue and mistakes. Consistency is key for a professional finish.
Once quilting is complete, trim any excess batting and backing fabric to match the quilt edges. Prepare the binding strips by cutting fabric strips, folding, and pressing them. Attach the binding around the quilt edges using a straight stitch or hand-stitch for a polished look.
After the binding is sewn, inspect the quilt for loose threads or uneven seams. Make necessary adjustments to ensure a neat and secure finish. Proper finishing enhances the durability and appearance of your Heirloom Hearts Quilt – Tutorial.
Finally, give the quilt a final press to remove wrinkles and set the stitches. Your quilt is now ready to be used, displayed, or gifted, carrying the warmth and love imbued during its creation.
Q: What skill level is required for this quilt tutorial?
A: The Heirloom Hearts Quilt – Tutorial is suitable for beginners with basic sewing knowledge but also enjoyable for experienced quilters seeking a heart-themed project.
Q: Can I use fabrics other than cotton?
A: Yes, but cotton is recommended for ease of sewing and durability. Fabrics like linen or blends can be used with careful handling.
Q: How do I prevent the hearts from shifting while sewing?
A: Pinning, basting, or using a fabric glue stick can help keep the hearts in place during stitching.
Q: What type of batting is best for this quilt?
A: Cotton or cotton-blend batting provides softness and structure. Choose a thickness based on the desired warmth and feel.
Q: Can I machine quilt or should I hand quilt?
A: Both methods are suitable. Machine quilting is faster and ensures even stitches, while hand quilting adds a traditional handmade touch.
Q: How do I wash the finished quilt?
A: Wash the quilt gently in cold water with mild detergent and air dry or tumble dry on low heat. Prewashing fabrics can prevent shrinkage.
The Heirloom Hearts Quilt – Tutorial teaches you the step-by-step process of creating a beautiful, heart-themed quilt that combines skill, creativity, and tradition.
From selecting fabrics and cutting precise heart shapes to piecing, quilting, and finishing, each step contributes to a stunning finished product.
This project not only enhances your quilting abilities but also results in a meaningful handmade item that can be cherished for years. Share your experiences, leave a sincere opinion, and provide suggestions to help others enjoy the art of quilting just as much as you do.


