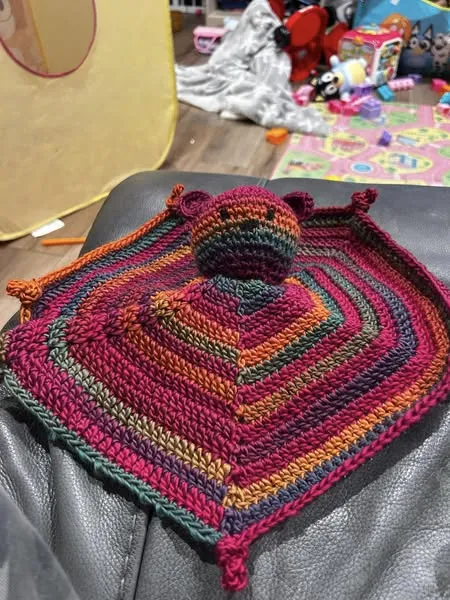
Crochet Pig In A Granny Square Blanket Pattern


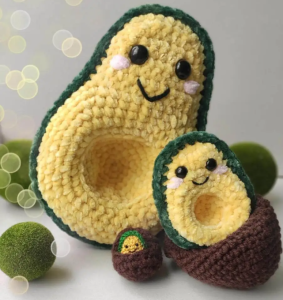
Granny Square Easter Eggs – Crochet Pattern: A Fun Spring Project is a charming and creative way to celebrate the beauty of spring and the joy of Easter crafting.
Crochet lovers all over the world adore granny squares for their versatility, color variety, and nostalgic design. Combining this traditional crochet technique with the cheerful shape of Easter eggs makes for an inspiring, decorative, and enjoyable project that’s perfect for both beginners and experienced crocheters.
These crochet Easter eggs bring a cozy handmade touch to your home decor, making them wonderful for Easter baskets, garlands, or even as thoughtful gifts.
Using granny squares to shape eggs may sound unusual, but it’s surprisingly simple when you follow the right pattern and color combinations. The result is a delightful collection of miniature crochet eggs that radiate springtime happiness and creativity.
In this tutorial-inspired guide, we’ll explore how to make your own Granny Square Easter Eggs – Crochet Pattern: A Fun Spring Project, the materials you’ll need, color ideas, assembly tips, and fun ways to display your finished creations. Whether you’re a seasoned crafter or just picking up a crochet hook for the first time, this project will fill your space with joy, color, and handmade warmth.
Before diving into the Granny Square Easter Eggs – Crochet Pattern: A Fun Spring Project, it’s essential to prepare your tools and understand the basic structure of granny squares. This project combines the timeless appeal of granny motifs with a festive twist that makes it stand out in your Easter decor.
Start by gathering your materials. You’ll need soft, lightweight cotton yarn in pastel shades like pink, lavender, mint, and yellow. These colors perfectly match the spring and Easter theme. A 3.5mm to 4mm crochet hook works beautifully for creating tight stitches that help maintain the egg’s shape. You’ll also need a darning needle for sewing pieces together and some fiberfill stuffing to give the eggs their soft, full look.
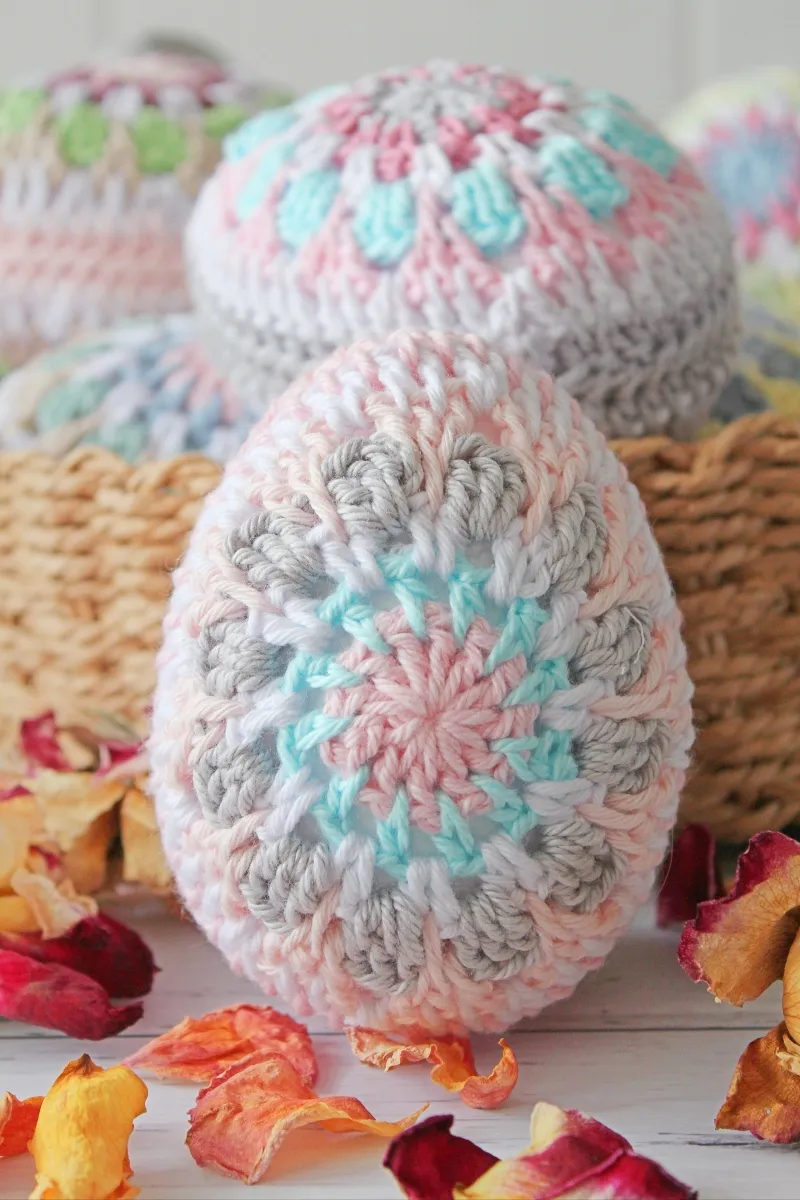
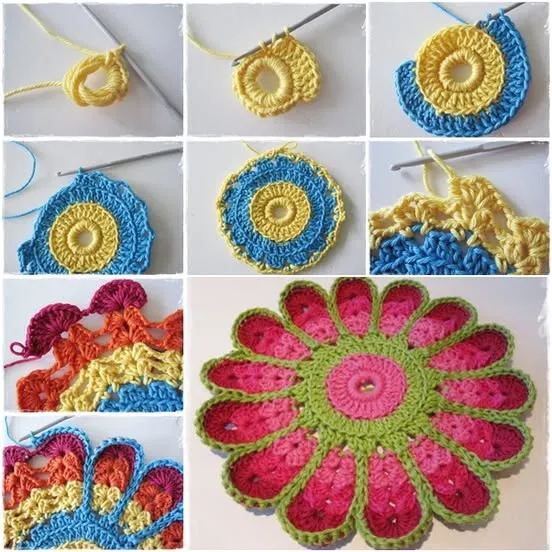
Once you have your supplies, you’ll begin by crocheting small granny squares. The trick here is to keep your squares compact—around 5 cm each—so they wrap neatly around the egg shape. Each square will represent a piece of the egg’s surface. Depending on your design, you can use three to five squares per egg.
To maintain symmetry, alternate colors while keeping the centers consistent. For instance, you might crochet a white center surrounded by pastel pink and lavender edges. This color contrast brings life and depth to the finished eggs, making them eye-catching yet delicate.
As you work through the Granny Square Easter Eggs – Crochet Pattern, focus on even tension. Consistent tension ensures your squares have the same size, which makes assembly easier and the finished egg smoother. If you’re new to granny squares, take your time practicing until you can produce squares that lie flat and uniform.
Finally, block your granny squares before assembling. Blocking helps the squares maintain shape and ensures the seams align neatly when joining them. This step is optional but highly recommended for achieving a professional and tidy look for your Granny Square Easter Eggs – Crochet Pattern: A Fun Spring Project.
Now that your squares are ready, it’s time to assemble them into the signature egg shape that defines this Granny Square Easter Eggs – Crochet Pattern: A Fun Spring Project. This is where creativity meets craftsmanship, as you’ll bring your small motifs together to form something both decorative and adorable.
Lay out your granny squares in the pattern you prefer before joining. This step allows you to visualize the final result and adjust color placement if needed. It’s often best to position lighter tones at the top and darker shades at the bottom to mimic natural shading, enhancing the egg-like illusion.
Begin joining your squares with a slip stitch or a whip stitch. Work carefully along the edges, keeping your seams consistent. You’ll soon see the shape taking form—somewhat like a sphere, but slightly elongated at the top. Leave a small opening at the end to insert the fiberfill stuffing.
Once you’ve added enough stuffing to give the egg a soft but firm texture, close the remaining gap with neat stitches. Take care not to overstuff, as this can distort the shape and stretch your stitches unevenly. The goal is to achieve a gentle, rounded contour that resembles a real egg.
If you want to add more flair to your Granny Square Easter Eggs – Crochet Pattern, consider using metallic or glitter yarn for some squares. These add a festive sparkle, perfect for Easter centerpieces or decorative bowls. You can also attach small ribbons at the top for hanging ornaments.
Lastly, check all seams for gaps and ensure the shape looks balanced. A small adjustment here and there can make a big difference in the final appearance. Once complete, you’ll have a charming set of handmade eggs ready to display or gift.
The beauty of the Granny Square Easter Eggs – Crochet Pattern: A Fun Spring Project lies in its versatility. These crochet eggs aren’t just crafts—they’re decor pieces that can brighten up any space during the Easter season. Let’s explore some creative ways to use and display them.
One popular idea is to place your crochet eggs in woven baskets filled with faux grass or shredded paper. This creates a traditional Easter display that evokes nostalgia and warmth. You can mix in real painted eggs or other crochet motifs like flowers and bunnies to complete the look.
For a more modern touch, string your granny square eggs into a garland. Attach them with pastel ribbons or twine and hang them across your fireplace mantel, staircase railing, or even in front of a window. The soft texture and colors will instantly make your home feel festive and inviting.
If you enjoy making personalized gifts, these crochet eggs are a thoughtful and eco-friendly alternative to plastic decorations. You can customize each egg with initials, small embroidered flowers, or beads. Wrap them in clear cellophane with a cute tag for a handmade gift that loved ones will cherish.
Another delightful option is to create a centerpiece. Arrange several Granny Square Easter Eggs in a glass bowl or tray surrounded by greenery, candles, or fresh flowers. The mix of crochet textures and natural elements adds an elegant yet cozy vibe to your table.
Finally, consider using these crochet eggs as keepsakes. Add a little lavender sachet or a drop of essential oil inside before closing the egg. Over time, they’ll release a gentle scent that enhances your space while serving as a reminder of your creative touch.
Every crocheter develops their own rhythm, and mastering the Granny Square Easter Eggs – Crochet Pattern: A Fun Spring Project comes with a few handy tips. The following insights can help you refine your work and enjoy the process even more.
First, choose yarn with consistent thickness. Uneven yarn can cause lumpy squares and distort the final egg shape. Cotton or lightweight acrylic yarns are best for these delicate projects because they hold their form well.
Second, pay attention to color harmony. Using too many shades can make your eggs appear busy. Instead, select a cohesive palette of three to five colors that complement each other. Soft pastels or earthy spring tones tend to work beautifully for Easter-themed crafts.
Third, experiment with joining techniques. While whip stitching gives a smooth finish, slip stitching can add a decorative ridge that enhances the handmade look. Try both to see which you prefer for your own Granny Square Easter Eggs.
If you’re creating these eggs as part of a classroom or family activity, simplify the pattern. Use larger hooks and thicker yarn so children can follow along easily. This turns crafting into a fun bonding moment that celebrates both learning and creativity.
You can also play with different shapes. Instead of traditional oval eggs, try experimenting with heart-shaped or mini egg designs. These variations keep the pattern fresh and give you more opportunities to express your style.
Lastly, remember to have fun. The best part of this Granny Square Easter Eggs – Crochet Pattern: A Fun Spring Project is the freedom to be creative. There’s no single right way—each egg is unique, just like the hands that made it.
1. Are Granny Square Easter Eggs suitable for beginners?
Yes! This pattern is beginner-friendly because it uses simple stitches and small pieces. If you can make basic granny squares, you can easily follow this Easter project.
2. What type of yarn is best for crocheting Easter eggs?
Soft cotton yarn works best since it provides structure and vibrant colors without stretching too much. Acrylic yarn is also a good, affordable alternative.
3. How many granny squares do I need for one egg?
Typically, three to five small squares are enough for one egg, depending on your preferred size and how tightly you join them.
4. Can I wash crochet Easter eggs?
Yes, but only handwash them gently in cold water. Avoid wringing or twisting to maintain shape and color.
5. What can I do if my eggs lose shape?
Re-block the granny squares or lightly restuff the egg. Consistent tension while crocheting helps prevent uneven shapes.
6. Can I sell the eggs I make from this pattern?
Absolutely! Handmade crochet items are popular in markets and online shops. Just remember to mention that your design was inspired by a Granny Square Easter Eggs – Crochet Pattern project.
Creating Granny Square Easter Eggs – Crochet Pattern: A Fun Spring Project is more than just a craft—it’s an experience filled with creativity, relaxation, and the joy of handmade artistry. From choosing colors and assembling squares to proudly displaying your finished eggs, every step allows you to express your unique style.
This spring, take time to celebrate renewal and creativity through crochet. Whether for decor, gifts, or simple fun, these granny square eggs will add a heartfelt touch to your Easter celebrations.
We hope you enjoyed this complete guide! Please share your honest opinions and suggestions—your feedback helps make future crochet projects even better.


