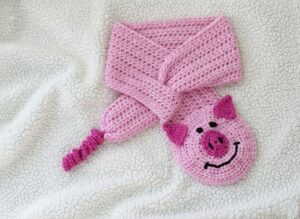
Crochet Pig In A Granny Square Blanket Pattern


The Triple Puff Granny Square – Free Pattern is a delightful and textured crochet design that adds depth, charm, and warmth to any project. Whether you’re crafting a cozy blanket, a decorative pillow cover, or even a handmade bag, this triple puff stitch pattern creates a soft and dimensional look that stands out.
Its fluffy texture and rhythmic stitches make it a favorite among both beginners and experienced crocheters who love patterns with visual appeal. The best part? It’s easy to learn, highly customizable, and perfect for using up your leftover yarns.
If you’ve been searching for a free crochet pattern that looks advanced but is actually simple to make, this is the perfect choice.
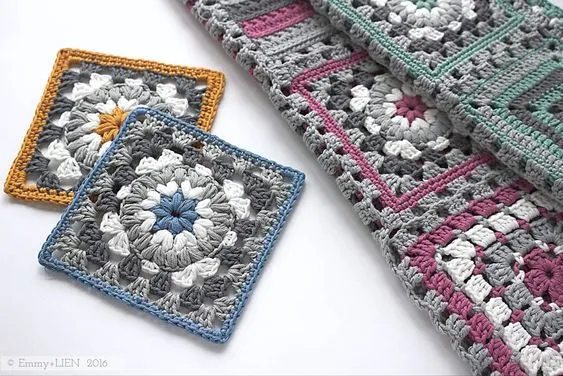
The Triple Puff Granny Square combines the traditional charm of granny squares with the modern flair of puff stitches, giving your crochet projects a unique and contemporary feel. With just a few basic stitches and a bit of patience, you’ll be able to create something beautiful and timeless.
In this guide, you’ll learn how to crochet this stunning Triple Puff Granny Square – Free Pattern step by step. From the materials you need to the techniques used, everything is broken down clearly so that even beginners can follow along with ease. By the end, you’ll not only have a gorgeous square but also the confidence to incorporate this stitch pattern into future crochet creations.
To get started with your Triple Puff Granny Square – Free Pattern, you’ll only need a few basic materials commonly used in most crochet projects. Gathering everything beforehand helps make your crocheting process smooth and enjoyable.
First, you’ll need yarn. The ideal yarn for this pattern is medium-weight (category 4) cotton or acrylic yarn. Cotton yarn offers a clean and defined puff stitch texture, while acrylic adds warmth and softness. Choose the color combinations that match your personal style or project goals.
Next, you’ll need a crochet hook that matches your yarn size. Typically, a 4.0 mm (G-6) or 4.5 mm hook works perfectly for this pattern. Make sure to check your tension, as tighter stitches can make the puffs less pronounced.
You’ll also need a yarn needle for weaving in ends once your square is complete. Scissors are essential for cutting the yarn cleanly at the end of your project. Lastly, it’s helpful to have a stitch marker handy, especially if you’re a beginner and want to keep track of your rounds.
Once all your tools are ready, find a comfortable space with good lighting. Now it’s time to dive into the fun part – making those beautiful triple puff stitches that give this square its unique charm.
The heart of the Triple Puff Granny Square – Free Pattern lies in the puff stitch technique. This stitch is what makes the square so fluffy and eye-catching. If you’re new to the puff stitch, don’t worry—it’s simple once you get the rhythm right.
To make a puff stitch, yarn over and insert your hook into the stitch space, then yarn over again and pull up a loop. You’ll have three loops on your hook. Repeat this two more times (for a total of three yarn-overs and pull-ups). Finally, yarn over and pull through all loops on your hook, securing the puff with a chain stitch. That’s one puff complete!
The “triple” in Triple Puff Granny Square refers to making three puff stitches in the same corner or space, giving it a fuller and more decorative effect. Between each puff, you’ll usually chain one to keep the pattern balanced and airy.
Practice a few puff stitches before starting your square. You’ll quickly notice how satisfying it is to see each puff pop up, creating that beautiful texture unique to this pattern.
Once you’ve mastered the stitch, you’re ready to start building your granny square round by round, layering puffs and chains to form a balanced and symmetrical piece.
Now that you’re familiar with the puff stitch, it’s time to begin your Triple Puff Granny Square – Free Pattern. The following steps guide you through from start to finish.
Your square is now complete! The mix of puff stitches and traditional granny style gives your piece an elegant 3D effect.
The versatility of the Triple Puff Granny Square – Free Pattern makes it one of the most enjoyable crochet designs to experiment with. Once you’ve made a few squares, the possibilities are endless.
One popular way to use these squares is by joining multiple pieces together to create a cozy crochet blanket. The puff texture gives the blanket extra warmth and softness—perfect for chilly evenings or as a decorative throw on your couch.
You can also use these squares to make decorative pillow covers. Mixing various colors for each square creates a stunning patchwork effect that instantly brightens any room.
Another creative option is crafting a granny square tote bag. The triple puff stitches add both beauty and structure, making your bag stand out as a handmade statement piece.
If you love smaller projects, try using individual squares as coasters, pot holders, or even table mats. They’re quick to make and add a handmade touch to your home décor.
And for fashion lovers, consider connecting your squares into a crochet vest or cardigan. The puffed design brings texture and style, creating something that’s both trendy and timeless.
As you work on your Triple Puff Granny Square – Free Pattern, there are a few tips to ensure that each square comes out even, soft, and professional-looking.
First, pay attention to your tension. Puff stitches naturally require more yarn and can tighten your work if pulled too hard. Keep your loops loose so the puffs can stand out beautifully.
Second, make sure you’re counting your stitches and chains in each round. Missing or adding an extra stitch can make your square uneven. Using a stitch marker at the beginning of each round helps you keep track.
Third, experiment with color changes. Switching yarn colors between rounds creates a stunning layered effect that enhances the puff texture even more.
Another useful tip is to block your finished squares. This process involves lightly wetting your crochet square, shaping it, and letting it dry flat. It ensures all your squares are the same size and lie perfectly flat when joined.
Lastly, when joining your squares, use a slip stitch or invisible join method for a clean finish. It keeps the focus on the beautiful puffs rather than the seams.
With these tips, your Triple Puff Granny Square will look professional and cohesive every time.
1. Is the Triple Puff Granny Square pattern suitable for beginners?
Yes! While it looks advanced, the pattern only uses basic stitches like chains, double crochets, and puff stitches. Beginners can easily master it with a bit of practice.
2. What type of yarn is best for this pattern?
Medium-weight cotton or acrylic yarn works best. Cotton provides clean stitch definition, while acrylic gives a soft, cozy texture.
3. How big should each granny square be?
It depends on your project. Typically, squares range from 5 to 8 inches, but you can adjust the number of rounds to fit your needs.
4. Can I use multiple colors for this pattern?
Absolutely! Color changes between rounds make the puff stitches stand out more and give your project a vibrant, eye-catching look.
5. How do I connect multiple squares together?
You can join them using a slip stitch, whip stitch, or a decorative join-as-you-go method. Each gives a different finish depending on your style preference.
6. Can I make this square with leftover yarn?
Yes, this is a great stash-buster project! The small amount of yarn needed for each square makes it perfect for using up scraps.
The Triple Puff Granny Square – Free Pattern is a beautiful blend of tradition and creativity, combining the timeless appeal of granny squares with the luxurious texture of puff stitches.
This guide has shown you how to make the pattern step by step, offering ideas for customization and creative uses. Whether you’re making a blanket, bag, or home décor item, this pattern is versatile, fun, and beginner-friendly.
Now that you’ve learned how to crochet your own Triple Puff Granny Square, give it a try and see how satisfying it is to watch each puff form under your fingers.
Don’t forget to share your thoughts—leave a sincere opinion and suggestions about this pattern. Your feedback helps inspire even more creative crochet tutorials for everyone to enjoy!


