Crochet Pig In A Granny Square Blanket Pattern


If you’re looking for a charming and beginner-friendly project that combines the nostalgic beauty of granny squares with the cuteness of amigurumi, this Granny Bunny Free Crochet Pattern is the perfect choice.
This project is both fun and relaxing, allowing you to create an adorable bunny made from colorful granny squares that can be customized in endless ways.
Whether you’re a beginner exploring your first crochet toy or an experienced crafter looking for a sweet weekend project, this guide will walk you through every step with ease.
The beauty of the Granny Bunny Free Crochet Pattern lies in its simplicity and creativity. You can use leftover yarns from other projects to bring your bunny to life, making it a wonderful stash-busting pattern.
The traditional granny square technique gives it a cozy, vintage look, while the bunny shape adds a modern, whimsical touch. Plus, it’s a perfect handmade gift for children, friends, or anyone who appreciates the magic of handmade crafts.
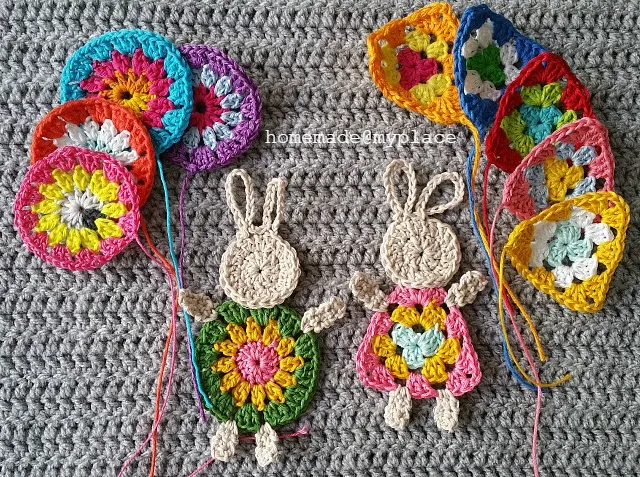
Before diving into the stitches, it’s important to gather your materials and understand the structure of this project. The Granny Bunny Free Crochet Pattern is typically made from six to eight small granny squares that are stitched together to form the body, head, and ears. Once assembled and stuffed, the bunny transforms into an adorable keepsake that’s sure to warm hearts and homes alike.
To begin your Granny Bunny Free Crochet Pattern, you’ll need a few basic materials that are easily available and affordable. The beauty of this project is that you can customize it with any yarn and color scheme you like, from pastel tones for a soft look to bright hues for a playful style.
When selecting your yarn, think about contrast and color harmony. Using three to four complementary shades will give your Granny Bunny Free Crochet Pattern a balanced, attractive look. You can experiment with traditional granny square color transitions or keep it simple with a monochrome palette.
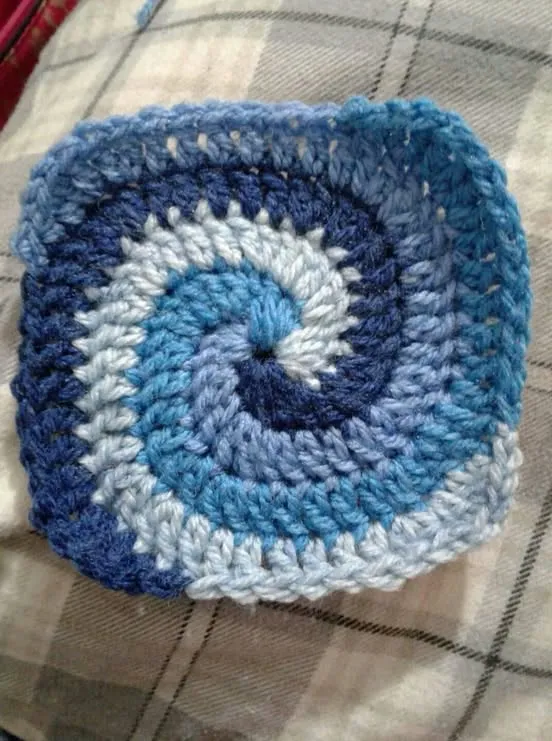
Each bunny starts with the same foundation: the granny squares. These are small, decorative motifs made by repeating chains, double crochets, and slip stitches. The process is easy, rhythmic, and ideal for beginners who want to improve their consistency and tension control.
Start with a magic ring and work three double crochets followed by a chain, repeating this sequence four times to form the first round. Each corner is separated by chain spaces, which create the signature square shape. Continue building the square by adding more rounds until it reaches your desired size, usually about 3–4 inches per piece.
Once you’ve completed the required number of squares—typically six for a small bunny or eight for a larger one—you can block them to ensure they are even. This will make the assembly smoother and the final shape more polished. The beauty of the Granny Bunny Free Crochet Pattern is that you can make each square unique by mixing colors, patterns, or even adding a bit of texture like popcorn stitches.
After all squares are ready, gently weave in all loose ends before starting to join them. A tidy base will make your bunny look professional and durable.
Now comes the most exciting part of the Granny Bunny Free Crochet Pattern—assembling your adorable creation. Lay out your granny squares on a flat surface and visualize how they will come together. Usually, four squares form the body, two form the head, and the remaining pieces are used for the ears and tail.
Begin by joining the squares with a whip stitch or single crochet seam. Whip stitching gives a seamless finish, while single crochet adds a visible ridge that can be decorative. Whichever method you choose, ensure your joins are secure but not too tight, allowing some flexibility for shaping.
Once the body and head are assembled, stuff them gently with fiberfill to achieve the desired firmness. Be careful not to overstuff, as it may distort the shape. Next, close the seams completely, leaving only the spaces where you’ll attach the ears and tail.
For the ears, fold two squares diagonally to form triangles, then stitch them to the top of the head. For the tail, you can crochet a small pom-pom or use a mini granny circle for a creative twist. Attach it securely to the back, completing your bunny’s signature look.
The final step in your Granny Bunny Free Crochet Pattern journey is adding personality. This is where your creativity truly shines. Use embroidery thread or small safety eyes to create an expressive face. For a gentle and safe option, especially if the bunny is for a child, embroidered eyes and nose are perfect.
You can add accessories like a bow, a scarf, or even a tiny flower crown to give your bunny a unique charm. Experiment with colors and details to make each one special. If you plan to gift your bunny, consider sewing a small tag with your name or a message, turning it into a personalized keepsake.
Before finishing, give your bunny a final check—trim any excess yarn, adjust the stuffing, and shape it by hand. The finished result should be soft, symmetrical, and full of handmade love. Your Granny Bunny Free Crochet Pattern project is now complete and ready to bring joy wherever it goes!
If this is your first time working with granny squares, don’t worry. The Granny Bunny Free Crochet Pattern is incredibly forgiving and ideal for practice. Here are some extra tips to make your crafting experience smoother:
With patience and practice, you’ll find yourself making not just one bunny but an entire collection in different colors and sizes.
Q: Can I use leftover yarn for this pattern?
A: Absolutely! The Granny Bunny Free Crochet Pattern is perfect for using up small amounts of leftover yarn. Mixing colors can make your bunny look even more charming and unique.
Q: What is the best yarn for a soft bunny?
A: Acrylic yarn gives a soft, fluffy texture, while cotton provides a firmer structure. For a cuddly feel, use a blend of both.
Q: How many squares do I need?
A: Typically, six to eight granny squares are enough for a small to medium-sized bunny. You can add more if you want a larger version.
Q: Can I make this pattern with beginners’ crochet skills?
A: Yes, this pattern is beginner-friendly. If you know how to make chains, double crochets, and slip stitches, you can easily complete it.
Q: How do I clean my crochet bunny?
A: Hand wash gently with mild soap, reshape while damp, and let it air dry. Avoid machine washing to maintain its shape and texture.
Q: Can I sell bunnies made from this pattern?
A: Of course! You can sell your handmade creations as long as you credit that it’s based on a Granny Bunny Free Crochet Pattern design.
The Granny Bunny Free Crochet Pattern is a delightful and creative project that brings together the best of both worlds—traditional granny squares and the lovable charm of handmade toys. Whether you’re making it as a gift, a decoration, or a personal keepsake, it’s an enjoyable and rewarding experience from start to finish.
By following this guide, you’ve learned how to crochet, assemble, and personalize your bunny, creating something truly special.
Don’t forget to share your thoughts—leave a sincere opinion or suggestion about your experience with this pattern. Your feedback helps inspire more crochet lovers to start their own handmade adventures!


