
Ballerina pencil case with zipper Pattern


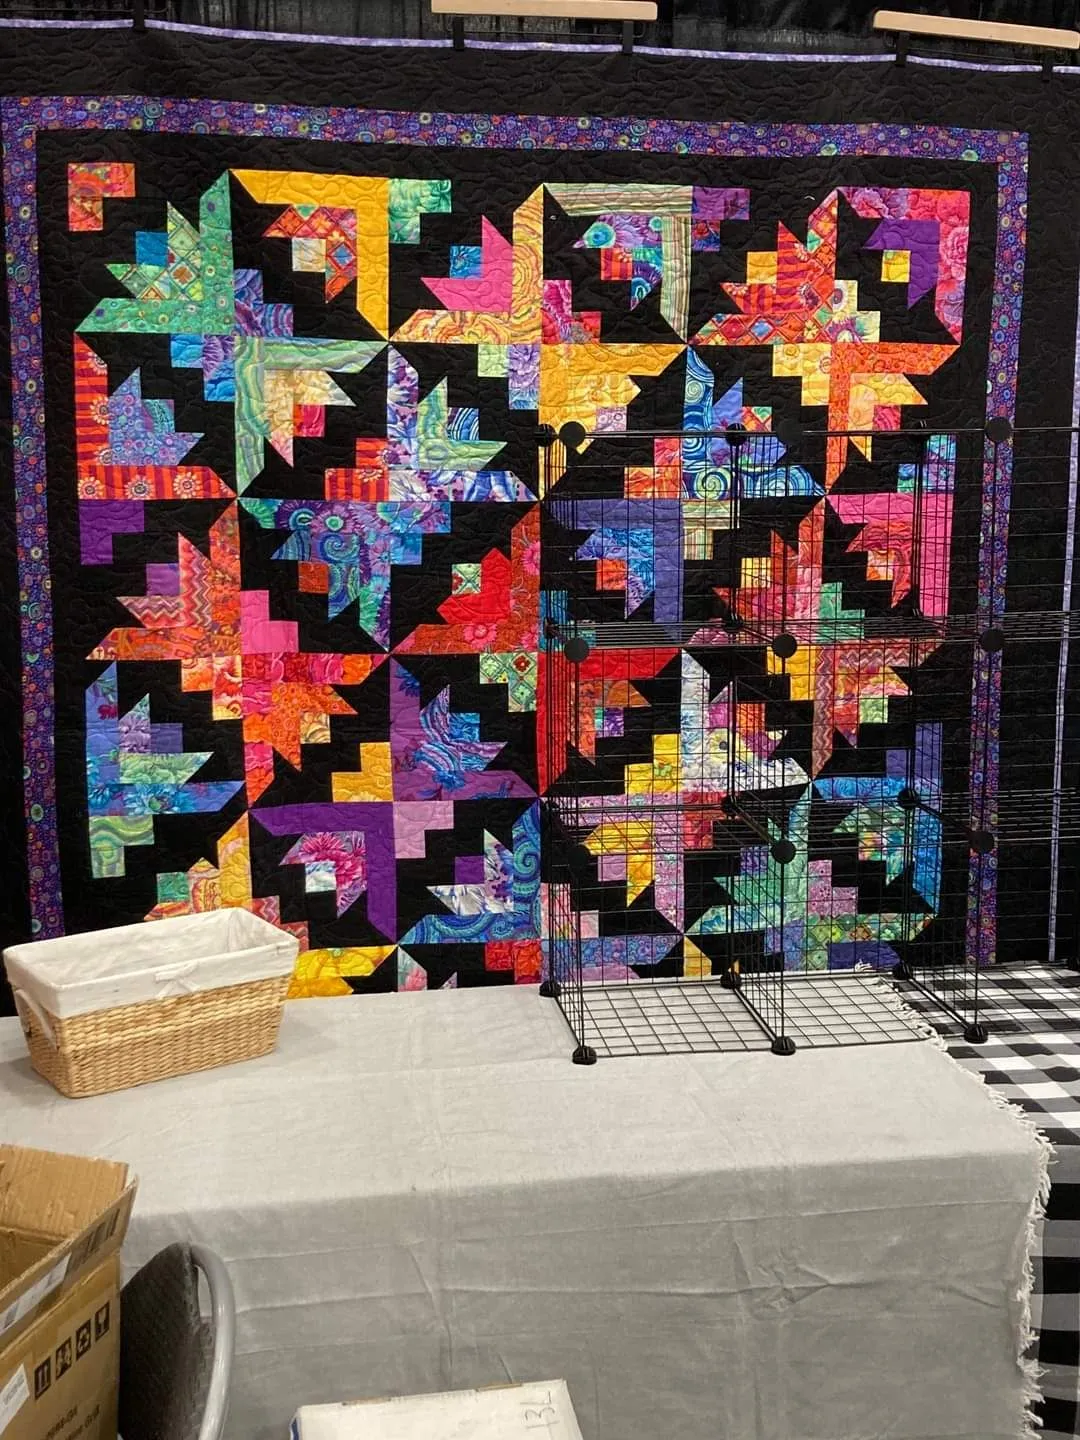
The Butterfly Blooms – Cozy Quilt Designs Pattern is a beautiful quilting project that combines elegance, color harmony, and creativity. If you love creating handmade quilts that bring both comfort and charm to your home, this pattern is perfect for you.
The butterfly-inspired motifs symbolize transformation, beauty, and lightness, making this quilt a wonderful gift or personal treasure.
With its soft textures and vivid fabric combinations, this pattern allows quilters of all skill levels to explore their artistic side while enjoying a relaxing sewing experience.
What makes the Butterfly Blooms – Cozy Quilt Designs Pattern so special is its balance between simplicity and sophistication. Even if you’re new to quilting, you’ll find this pattern enjoyable and approachable.
The design is structured to guide you through each step with clarity—from fabric selection to the final stitches. Each butterfly block can be customized with different fabrics, letting your imagination flow freely. The finished result is a cozy, radiant quilt that brightens any room and makes a heartfelt statement of handmade artistry.
Before diving into this creative journey, take a moment to prepare your materials and visualize your design. The Butterfly Blooms – Cozy Quilt Designs Pattern gives you the freedom to mix colors, prints, and textures that reflect your personal taste. Whether you prefer soft pastels, bold florals, or modern geometric patterns, the result will always be unique and inspiring. Now, let’s explore step-by-step how to bring your own Butterfly Blooms quilt to life.
Selecting the right fabric is the foundation of a successful quilt. For the Butterfly Blooms – Cozy Quilt Designs Pattern, fabrics with a mix of light and dark tones create beautiful contrasts that make the butterflies “pop.” Cotton is the most recommended fabric because it’s easy to cut, press, and sew. Choose a soft background fabric that allows the butterfly shapes to stand out.
Once you’ve chosen your fabric, think about the color palette. Butterflies naturally inspire a wide range of hues—from gentle pinks and purples to sunny yellows and blues. You can experiment with color gradients or stick to a cohesive scheme for a more polished look. Pre-cut fabric squares (fat quarters or charm packs) work well for this project, saving you time and helping you maintain uniform block sizes.
Texture is also an important consideration. Mixing plain fabrics with prints adds depth and visual interest to your quilt. Small floral or polka-dot prints can enhance the delicate wings of the butterflies. Always wash and iron your fabrics before cutting, as this will prevent shrinkage and ensure a smooth, professional finish.
A tip for beginners: label each fabric piece as you cut it. This organization will make it easier to assemble your quilt blocks later. Remember, the Butterfly Blooms – Cozy Quilt Designs Pattern is about creativity, so don’t be afraid to experiment with combinations that express your style.
Finally, keep your fabric scraps—they can be repurposed for smaller projects like matching pillow covers or mini quilts. These details add a coordinated touch to your décor and help minimize waste.
Each butterfly block in the Butterfly Blooms – Cozy Quilt Designs Pattern is made up of simple geometric shapes—mainly squares and triangles. Precision is key here, so take your time to measure carefully and use a sharp rotary cutter. A cutting mat and a clear ruler will help you maintain straight lines and consistent sizes.
Start by cutting the background squares, followed by the butterfly wings. You’ll need four smaller triangles to form each butterfly’s wings and one rectangle for its body. Once all pieces are ready, lay them out on your workspace before stitching. Visualizing your block before sewing ensures that your colors are balanced and that the butterfly shape is clear.
When piecing the blocks, use a quarter-inch seam allowance and press the seams flat after each step. This will help your blocks align perfectly when joined together. Chain piecing—sewing multiple pieces in a continuous line—can save time and thread while maintaining consistency.
As you complete each butterfly block, place it on a design wall or table to view your progress. This helps you see the overall pattern and adjust color placement if necessary. The Butterfly Blooms – Cozy Quilt Designs Pattern becomes truly captivating when each butterfly looks distinct yet harmonizes with the rest of the quilt.
If you want to add an extra touch, consider sewing decorative stitches along the wings. This not only enhances the texture but also gives your quilt a unique handcrafted feel.
Once all your blocks are done, trim them evenly to the same size. This step is crucial for the final assembly, ensuring a neat and balanced layout.
Now that your butterfly blocks are ready, it’s time to assemble the quilt top. Arrange your blocks in a grid pattern, alternating colors to create a dynamic flow. The Butterfly Blooms – Cozy Quilt Designs Pattern often looks best when the butterflies appear to be “flying” in different directions. Play with block rotation until you find a layout that feels right.
Sew the blocks together row by row, carefully aligning seams as you go. Press each row before attaching the next to keep your quilt top smooth. When the quilt top is complete, you can choose to add borders for a finished look. Borders not only frame the design beautifully but also help increase the quilt’s size if desired.
For a soft, cozy feel, choose a border fabric that complements your main design—perhaps a subtle floral print or a gentle pastel shade. Use mitered corners for a clean and professional appearance. If you prefer a more rustic charm, scrappy borders made from leftover fabric pieces can add a lovely handmade touch.
Once your top and borders are joined, give the quilt top a final press. This step ensures all seams lay flat before layering. The Butterfly Blooms – Cozy Quilt Designs Pattern really begins to shine at this stage, revealing the harmony between each butterfly and the background.
Before moving on, check the measurements of your quilt top and trim any uneven edges. This preparation makes quilting and binding much easier later on.
Now comes the most rewarding part—quilting your creation. Layer your quilt top, batting, and backing fabric, smoothing each layer to remove wrinkles. Pin or baste the layers together to prevent shifting. For beginners, straight-line quilting works beautifully with the Butterfly Blooms – Cozy Quilt Designs Pattern, enhancing the symmetry and flow of the butterflies.
If you have more experience, free-motion quilting offers endless creative possibilities. You can trace delicate swirls or floral motifs around the butterflies, adding depth and personality to the piece. Choose a thread color that complements your fabrics without overpowering them.
Once quilting is complete, trim the excess batting and backing fabric, then prepare your binding. The binding frames your quilt and gives it a polished finish. Use a coordinating or contrasting fabric strip, fold it in half lengthwise, and sew it around the edges. Hand-stitch the back of the binding for a clean, invisible finish.
For an extra special touch, sew a label on the back with your name and the date the quilt was completed. Handmade quilts like the Butterfly Blooms – Cozy Quilt Designs Pattern become heirlooms—small acts like labeling add sentimental value and preserve your creative story.
Give your finished quilt a gentle wash and air dry it to soften the fabrics and enhance the cozy texture. Then, step back and admire your beautiful work of art—a butterfly garden brought to life through fabric and stitches.
1. What skill level is required for the Butterfly Blooms – Cozy Quilt Designs Pattern?
This pattern is suitable for beginners and intermediate quilters. The step-by-step structure makes it accessible, while more experienced crafters can explore creative variations.
2. What fabric is best for this quilt?
Cotton is the ideal fabric for this pattern because it’s easy to handle, durable, and provides a smooth finish. Pre-washed cotton fabrics ensure the quilt retains its shape.
3. Can I make the quilt in a smaller or larger size?
Absolutely! The size depends on how many butterfly blocks you create. Add or remove rows and columns to achieve your desired dimensions.
4. How should I wash the finished quilt?
Use cold water on a gentle cycle and mild detergent. Air drying or tumble drying on low heat will preserve the colors and softness.
5. How long does it take to complete the Butterfly Blooms quilt?
Depending on your experience and available time, this project can take anywhere from a weekend to a few weeks.
6. Can I use scraps instead of full fabric pieces?
Yes! Scraps make each butterfly unique and add a charming patchwork effect to your quilt.
The Butterfly Blooms – Cozy Quilt Designs Pattern is more than just a sewing project—it’s a creative expression of color, warmth, and beauty.
Through simple shapes and thoughtful color combinations, you can create a masterpiece that reflects your personality and love for quilting. From fabric selection to the final stitches, every step contributes to a meaningful and relaxing crafting experience.
Now that you’ve learned how to make this beautiful quilt, we’d love to hear from you! Share your thoughts, experiences, and suggestions about this tutorial. Your feedback helps inspire others and makes the quilting community even more creative and connected.


