Crochet Pig In A Granny Square Blanket Pattern


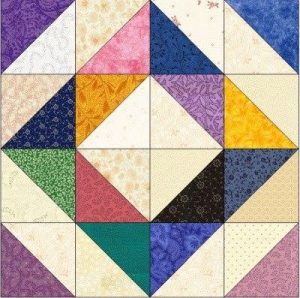
The Victorian Dream Square – Free Pattern is a beautifully intricate crochet and quilt design that captures the elegance of the Victorian.
Perfect for crafters of all skill levels, this free pattern allows you to create a decorative square that can be used in blankets, pillows, wall hangings, or even as part of a larger quilt.
The Victorian Dream Square combines detailed motifs, delicate textures, and classic symmetry to produce a piece that is both timeless and visually captivating.
Using the Victorian Dream Square, crafters can explore traditional stitch techniques while adding their own personal touch to each square.
This pattern emphasizes precision, color harmony, and layering techniques to make each motif stand out. Whether you’re a beginner or an experienced crocheter or quilter, this free pattern offers an opportunity to create a unique, heirloom-quality piece.
The beauty of the Victorian Dream Square lies in its versatility. Each square can stand alone or be joined with others to form a larger project. With the free pattern, crafters can experiment with different yarns, threads, or fabrics to achieve the desired texture and depth, ensuring that every finished piece reflects personal creativity.
This tutorial focuses on helping you master the Victorian aesthetic while maintaining accessibility for modern crafters. By following the step-by-step instructions, you can craft a square that blends elegance with practicality, perfect for gifts or home décor.
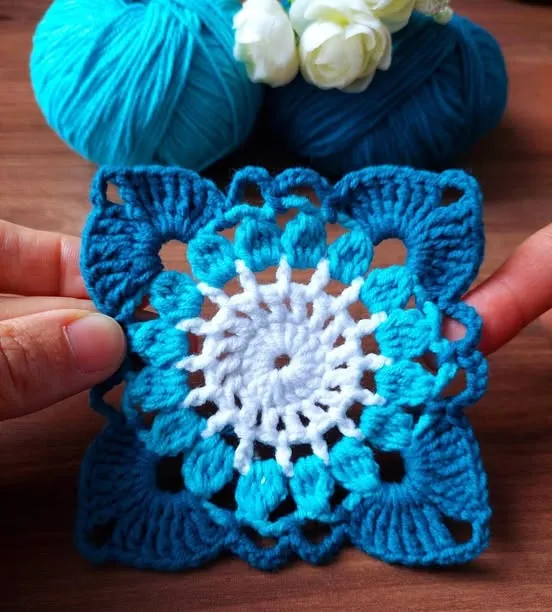
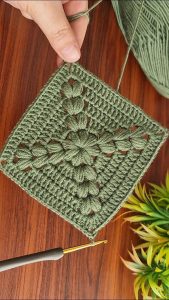
The Victorian Dream Square is characterized by its intricate floral motifs, layered patterns, and balanced geometric design. Each square typically features a central motif surrounded by symmetrical layers that create depth and visual interest.
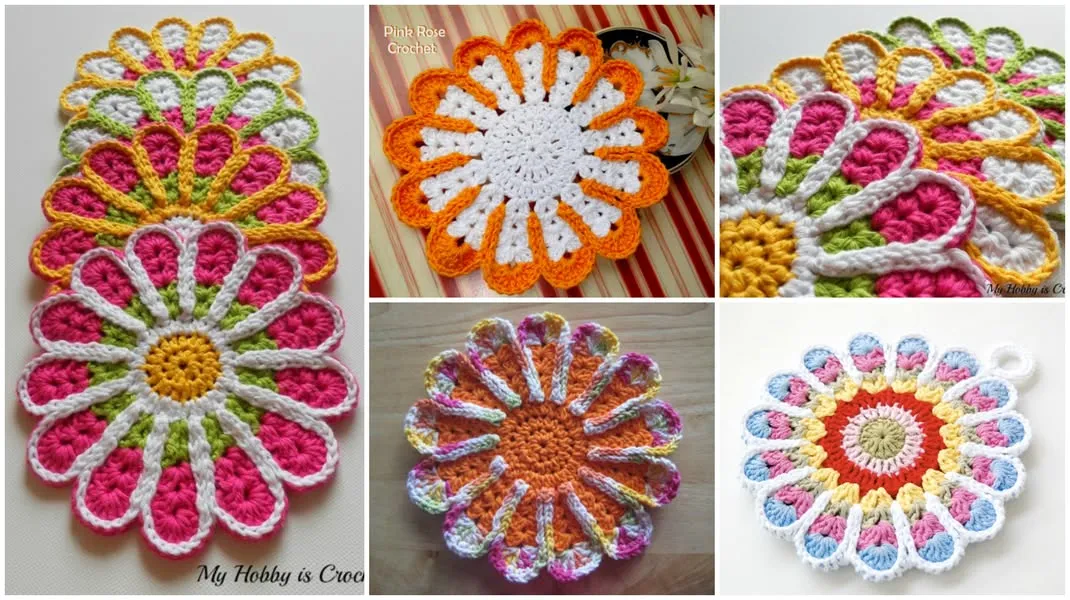
Attention to color is crucial. The pattern often uses muted tones, pastel shades, and complementary hues to highlight the details of the design. Using the right color combinations enhances the Victorian-inspired elegance and ensures that the square stands out.
Stitch choice plays a significant role in achieving the final effect. Combining basic stitches like chains, single crochet, and double crochet with more advanced techniques such as picots, shells, and clusters adds texture and dimension to the square.
The free pattern is designed for adaptability. You can adjust the square size, yarn type, and hook size to suit your project, whether you’re creating a small motif for a pillow or a large square for a blanket.
Layering is a hallmark of the Victorian Dream Square. Each round or section builds upon the previous one, gradually forming a complex and elegant motif that is both visually appealing and satisfying to create.
Finally, these squares are perfect for practicing precision and attention to detail. Accurate stitch placement, tension control, and careful finishing are key to producing a professional-looking square.
To begin your Victorian Dream Square, gather your materials. Choose a fine cotton or soft yarn, a hook suitable for your thread weight, and a tapestry needle for finishing.
Step 1: Create a foundation ring using chains or a magic circle. This central ring will anchor your motif and determine the starting size.
Step 2: Work the first round of stitches to form the central motif. Pay close attention to stitch placement to maintain symmetry.
Step 3: Add subsequent layers according to the pattern, incorporating shells, clusters, and picots. Each layer builds complexity while maintaining the square’s structure.
Step 4: Continue adding rounds, alternating stitch types and colors if desired. Ensure even tension to maintain the square shape and prevent distortion.
Step 5: Block your square to flatten and shape it. Wet-blocking or steam-blocking helps define motifs and smooth uneven areas.
Step 6: Repeat the process to create additional squares if forming a larger project, maintaining consistent tension and color patterns across all squares.
Step 7: Join squares using your preferred method, such as slip stitch, whip stitch, or joining-as-you-go, ensuring alignment and symmetry.
Step 8: Add borders if desired. Borders frame the squares, enhance the overall aesthetic, and provide stability to the finished piece.
Step 9: Weave in all ends neatly to complete the square. Clean finishing enhances the durability and visual appeal of your project.
Step 10: Optionally, embellish with embroidery, beads, or appliqué to add a personal touch to your Victorian Dream Square.
Accuracy is key. Measure your stitches, maintain consistent tension, and follow the pattern carefully to produce a polished square.
Use quality yarn or thread. High-quality fibers hold shape better, look more refined, and provide a lasting result.
Color planning enhances the visual effect. Choose complementary colors or gentle contrasts to emphasize the layered motifs without overwhelming the design.
Blocking each square is essential. Proper blocking flattens motifs, sharpens stitch definition, and ensures uniformity across multiple squares.
Experiment with different stitch textures. Mixing smooth and textured stitches adds depth and dimension, enhancing the Victorian-inspired elegance.
Take your time. Detailed patterns like the Victorian Dream Square require patience, but the result is a sophisticated, heirloom-quality square.
These squares can be joined to form blankets, afghans, or quilt tops. Repeating the motif creates a cohesive yet dynamic design.
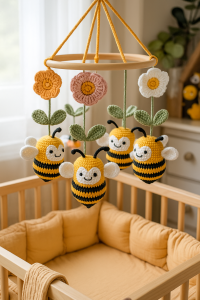
Miniature squares are perfect for pillows, coasters, or decorative wall hangings. They provide a quick project with instant gratification.
Combine different color schemes or yarn types for eclectic, modern adaptations of the classic design.
Use the squares as appliqués on clothing or accessories. Adding them to tote bags, scarves, or jackets brings Victorian charm to everyday items.
Layer squares with lace or fabric inserts for unique textures and mixed-media effects.
Finally, gift completed squares individually or as part of a larger project to share the beauty and craftsmanship of the Victorian Dream Square.
Q: Is the Victorian Dream Square suitable for beginners?
A: Yes, although it involves intricate details, the free pattern includes step-by-step instructions suitable for beginners willing to practice basic crochet techniques.
Q: What yarn is best for this pattern?
A: Fine cotton or soft yarn works best to highlight the intricate details and maintain the square’s shape.
Q: Can I adjust the size of the square?
A: Absolutely. Adjust hook size or yarn weight to create smaller or larger squares as needed.
Q: How do I join multiple squares?
A: Use slip stitch, whip stitch, or joining-as-you-go methods for neat and consistent connections.
Q: Should I block each square?
A: Yes, blocking ensures uniformity, defines the motifs, and prevents distortion.
Q: Can I add embellishments?
A: Yes, embroidery, beads, or appliqué can be added to personalize each square.
Q: How should I care for finished squares or projects?
A: Wash gently in cold water, dry flat or tumble dry low, and avoid high heat on delicate stitches.
The Victorian Dream Square – Free Pattern is a timeless and versatile design that combines intricate craftsmanship with creative freedom. By following this pattern, you can create beautiful squares that can be used individually or joined into larger projects. Each square offers an opportunity to explore stitch techniques, color harmony, and layered design, resulting in heirloom-quality pieces.
We encourage you to try this free pattern, experiment with colors and textures, and share your creations. Your feedback, suggestions, and ideas can inspire others to explore the elegance and creativity of the Victorian Dream Square.


