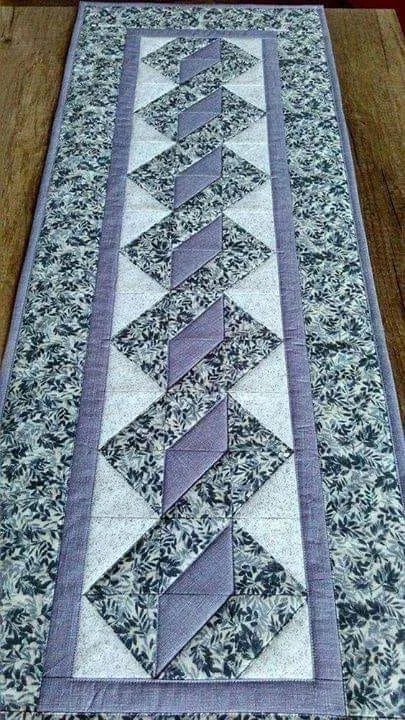
Crochet Pig In A Granny Square Blanket Pattern


Mitered Granny Square – Complete Tutorial is an essential guide for anyone looking to master the art of crocheting mitered granny squares, a versatile and stylish pattern perfect for blankets, pillows, and other creative projects.
This tutorial will take you step by step through the process, ensuring that even beginners can follow along and achieve professional-looking results.
By understanding the techniques behind the mitered granny square, you can elevate your crochet projects and create beautiful, geometric designs that are both functional and decorative.
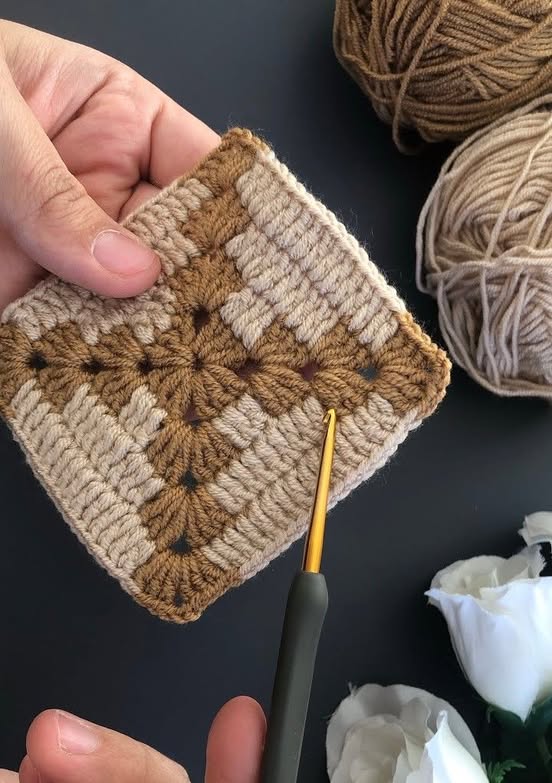
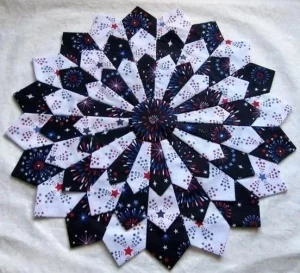
Crocheting a mitered granny square involves shaping your squares diagonally, giving your finished project a unique look compared to traditional granny squares.
This method allows for creative color combinations, giving depth and dimension to your work. By mastering the mitered granny square – complete tutorial, you can produce consistent, symmetrical squares that fit together perfectly, whether you are making a blanket, scarf, or cushion cover.
One of the advantages of learning the mitered granny square technique is its adaptability. You can use it to create projects of any size, from small coasters to large throws. The technique encourages experimentation with colors, textures, and yarn types, making it an ideal choice for personalized gifts or home décor. With this complete tutorial, you will gain confidence in your crochet skills and learn how to construct neat, professional-looking squares every time.
The mitered granny square is distinct because it forms a diagonal or triangle-like shape within the square, which creates a visually striking pattern when multiple squares are joined together. Each square is constructed by working in turns, decreasing stitches at the corners to shape the square precisely.
To begin, select your yarn and hook size appropriate for your project. The yarn thickness and hook choice affect the tension, appearance, and size of the finished square. Choosing contrasting colors can highlight the unique geometry of the mitered granny square.
Start with a slip knot and chain a small number of stitches to form the center of the square. Typically, four to six chains are sufficient, joined into a loop to begin the first round.
Work the first round of stitches, usually double crochet, into the loop, placing the stitches evenly and leaving spaces for corners. The key to a neat mitered granny square is maintaining consistent stitch height and spacing throughout.
As you progress to subsequent rounds, you will begin the mitering process by decreasing stitches at the designated corners. This forms the diagonal shape that distinguishes the mitered granny square from traditional squares.
Finally, continue adding rounds until your square reaches the desired size. Block your square if necessary to achieve a uniform shape and crisp edges. Proper blocking ensures that all squares will align perfectly when assembled.
Selecting the right yarn and color scheme is crucial for the aesthetic appeal of your mitered granny square projects. Soft, washable yarns are ideal for blankets and home décor, while luxurious or textured yarns can create striking, tactile pieces.
Consider color theory when combining shades. Complementary or analogous colors work well to enhance the geometric patterns created by the mitered granny square technique. This approach allows each square to stand out while maintaining a cohesive look.
Lighter colors in the center of the square can create a glowing effect, while darker colors on the outer edges add depth and visual interest. Experimenting with variegated yarns can also produce unexpected, beautiful results in your squares.
The weight of the yarn affects both the texture and the drape of the finished project. For a soft, cozy blanket, medium-weight yarn is recommended, while fine yarns can be used for delicate or decorative pieces.
Using a consistent yarn type throughout your project ensures uniformity. Mixing yarns with drastically different thicknesses can distort the shape of your mitered granny squares and make assembly more challenging.
Lastly, consider the intended use of your project when selecting yarn. Machine-washable yarns are practical for items that will be frequently used, while specialty or luxury yarns are perfect for decorative projects or gifts.
Start with a slip knot and chain four stitches, joining into a loop with a slip stitch. This forms the foundation for your mitered granny square.
Round one: Chain three to count as the first double crochet, then work two more double crochets into the loop, chain two for the corner, and repeat two more sets of three double crochets with chain-two corners, ending with a slip stitch to join.
Round two: Chain three, then work two double crochets into the same space, chain one, skip one stitch, and work three double crochets into the next corner. This creates the diagonal shaping central to the mitered granny square.
Subsequent rounds: Continue adding sets of double crochets separated by chain stitches in the corners, decreasing or adjusting as needed to maintain the mitered shape. The key is to consistently decrease stitches in the diagonal center to form the iconic triangle within each square.
Change colors at the beginning of any round by joining a new color with a slip stitch in the first chain space. Fasten off and weave in ends neatly to prepare for assembly.
Repeat this process until you have enough squares for your intended project. Each mitered granny square should be uniform in size and tension to ensure smooth assembly.
Once you have crocheted all your mitered granny squares, lay them out to determine your preferred arrangement. Planning the layout in advance ensures a visually appealing final product.
Squares can be joined using slip stitch, single crochet, or a tapestry needle with yarn for sewing. The joining method affects the overall look and flexibility of the project.
Ensure that corners are aligned correctly when joining squares, as misaligned corners can disrupt the diagonal pattern characteristic of mitered granny squares.
After assembly, consider adding a border around the project to provide a clean finish and strengthen the edges. A simple single crochet or double crochet border works well.
Block the completed project to smooth out edges, even stitches, and enhance the geometric design of the mitered granny squares. Proper blocking makes a significant difference in the final appearance.
Finally, inspect the entire project for loose ends, uneven stitches, or tension inconsistencies. Make final adjustments to ensure your mitered granny square project looks polished and professional.
What is a mitered granny square?
A mitered granny square is a crochet square with a diagonal or triangle pattern achieved by decreasing stitches at specific corners. This creates a geometric design that differs from traditional granny squares.
Can beginners make mitered granny squares?
Yes, with this complete tutorial, beginners can follow the step-by-step instructions to create consistent and symmetrical mitered squares. Patience and attention to stitch counts are key.
What yarn should I use for mitered granny squares?
Medium-weight, soft, and washable yarns are ideal for blankets, while fine or specialty yarns can be used for decorative pieces. Consistent yarn throughout ensures uniform squares.
How do I join mitered granny squares?
Squares can be joined using slip stitches, single crochet, or sewing with a tapestry needle. Alignment of corners is crucial for maintaining the diagonal pattern.
Do I need to block mitered granny squares?
Blocking is recommended to smooth edges, even out tension, and achieve crisp corners, especially if the project will be displayed or used regularly.
Can I use mitered granny squares for other projects besides blankets?
Absolutely! They are versatile for pillows, bags, scarves, coasters, and decorative wall hangings, offering both aesthetic appeal and functionality.
The Mitered Granny Square – Complete Tutorial provides a comprehensive guide to mastering this versatile crochet technique. By following the step-by-step instructions, choosing the right yarn and colors, and carefully assembling your squares, you can create beautiful, professional-looking crochet projects.
Mitered granny squares offer endless possibilities for customization and creative expression. Take the time to experiment with colors and layouts, and don’t hesitate to share your creations.
We encourage you to leave your honest opinions and suggestions to help improve future tutorials and inspire fellow crocheters.


