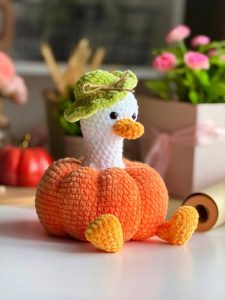
Crochet Pig In A Granny Square Blanket Pattern


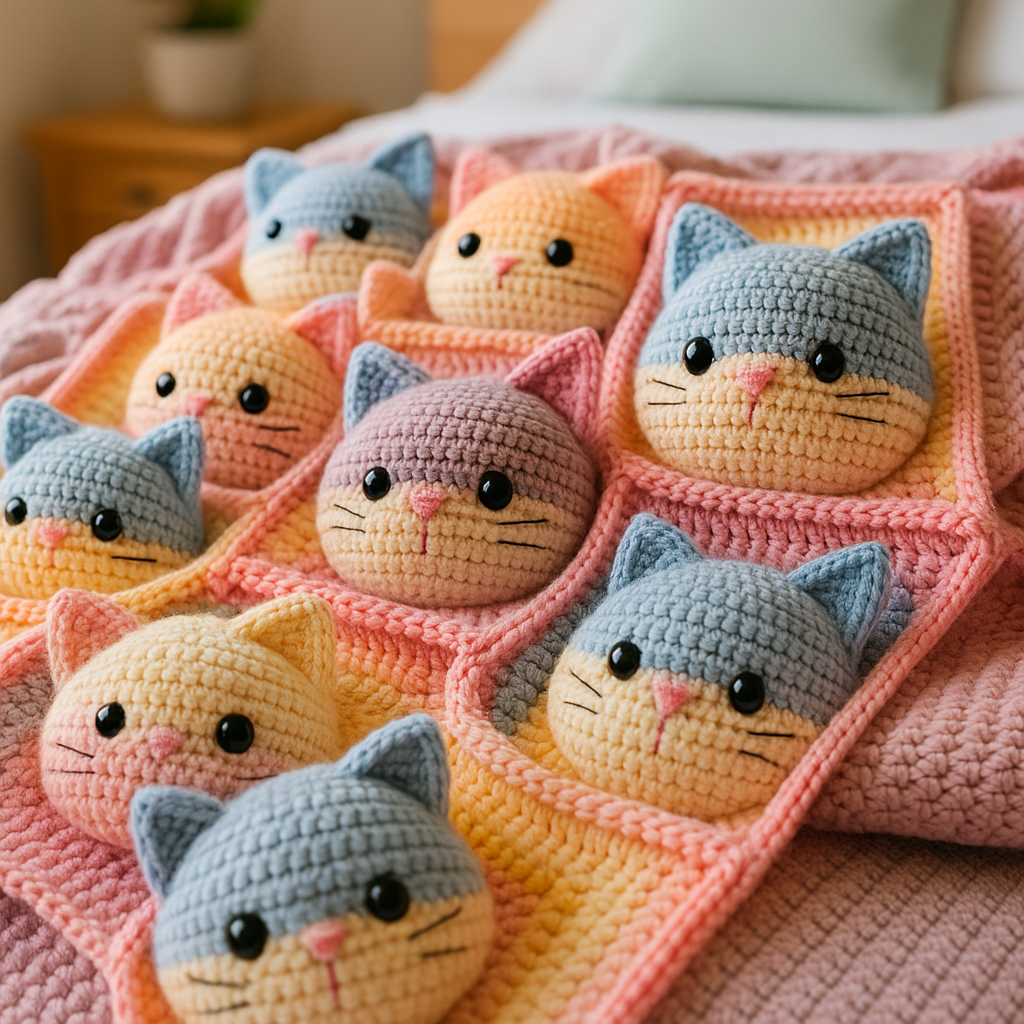
Cat Face Crochet Blanket – Beginner Tutorial is a delightful project for anyone looking to combine fun designs with cozy comfort. This beginner-friendly tutorial will guide you through creating a cute cat face pattern on a crochet blanket, perfect for gifting or adding a whimsical touch to your home.
Using simple stitches and clear step-by-step instructions, you’ll be able to craft a blanket that is both functional and visually appealing.
Creating a cat face crochet blanket allows you to explore different yarn colors and textures, helping you develop your crochet skills while making something adorable.
This tutorial focuses on simplicity, ensuring that even beginners can follow along without feeling overwhelmed. By the end of this project, you will have a handmade blanket that showcases your creativity and attention to detail.
Beyond its aesthetic appeal, making a crochet blanket is a therapeutic activity. The repetitive stitching can help reduce stress, improve concentration, and provide a sense of accomplishment. Following this beginner tutorial, you will not only create a beautiful blanket but also enjoy the meditative benefits of crochet.
To start your Cat Face Crochet Blanket – Beginner Tutorial, gather all the necessary materials. You will need soft yarn in multiple colors, including shades for the cat’s face, eyes, and whiskers. A crochet hook suitable for your yarn is essential, along with scissors, a yarn needle, and stitch markers to help keep your work organized.
Choose yarn that is soft and durable, especially if the blanket will be used frequently. Acrylic or cotton blends work well for beginners because they are easy to handle and come in a variety of colors. Selecting contrasting colors for the cat face details will help your design stand out and look more vibrant.
Having all your materials ready ensures a smooth and enjoyable crocheting experience. It also prevents interruptions that could affect your stitching consistency. By preparing properly, you set yourself up for success in following this beginner-friendly tutorial.
Using the right crochet hook size is crucial for maintaining consistent tension throughout the blanket. A hook that is too small may make stitches tight, while one that is too large can cause uneven loops. Refer to the yarn label recommendations and consider practicing a small swatch before starting the full blanket.
Scissors and a yarn needle are used to trim and weave in ends neatly. Proper finishing ensures your blanket looks polished and professional. Stitch markers can help you mark important points, such as the start of each row or the corners of the cat face, making it easier to follow the pattern accurately.
Organizing your workspace with all materials within reach helps maintain focus and reduces the risk of losing small tools or threads. A comfortable seating area with good lighting will also make your crocheting sessions more enjoyable.
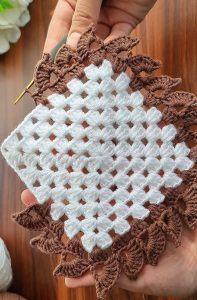
Start your Cat Face Crochet Blanket – Beginner Tutorial by creating a foundation chain that matches your desired blanket width. The cat face will be formed by working different colored squares or rectangles into your blanket, depending on your chosen design.
Follow a granny square or color block method to incorporate the cat face. Change yarn colors at precise points to outline the ears, eyes, nose, and mouth. This approach ensures that the cat’s features are clearly defined and visually appealing.
Begin crocheting the cat’s ears at the top corners of the designated area. Use triangular shaping techniques to create pointed ears that stand out from the blanket background. Pay attention to stitch counts to maintain symmetry on both sides.
For the eyes, use small rounds or ovals in contrasting colors. Position them carefully to give the cat a friendly, expressive appearance. Embroider details like pupils or highlights to add depth and character to the face.
The nose and mouth can be created using simple embroidery stitches or small crochet motifs. Ensure they are proportionate to the eyes and ears, so the cat face looks balanced and cute. Adjust placement as needed before securing the yarn.
Finally, add whiskers using a contrasting yarn. Straight stitches or slip stitches work well for this detail. Make sure the whiskers are evenly spaced and secure the ends neatly at the back of the blanket.
When following this Cat Face Crochet Blanket – Beginner Tutorial, take your time and practice each section before moving on. Mistakes are part of the learning process, and it’s easier to correct them early rather than later.
Keep your tension consistent throughout the blanket. Uneven stitches can distort the cat face, so try to maintain a relaxed, steady hand while crocheting.
Use stitch markers to track your progress. They help you stay aligned with the pattern and prevent counting errors, especially in complex areas like the cat’s face.
Experiment with colors, but avoid using too many contrasting shades at once. A clear, cohesive color palette will make the cat face design pop and prevent it from looking chaotic.
Remember to take breaks during long crocheting sessions. Stretching your hands and fingers will reduce fatigue and help maintain your focus.
Practice patience and enjoy the process. Crochet is as much about creativity and relaxation as it is about producing a final product. Celebrate small milestones, like completing the ears or eyes, to stay motivated.
Once your Cat Face Crochet Blanket – Beginner Tutorial is complete, weave in all yarn ends carefully. Trim any excess threads to give the blanket a neat finish.
Block your blanket if necessary. Blocking helps even out stitches, shape the cat face properly, and make the blanket lie flat. Follow the yarn’s care instructions when wetting or pinning it.
Wash the blanket gently according to the yarn type. Most acrylic and cotton blends can be hand washed or machine washed on a gentle cycle. Avoid harsh detergents to maintain the softness and color integrity.
Dry the blanket flat to prevent stretching or misshaping. Avoid hanging it, as this may distort the cat face design and blanket edges.
Store your blanket in a cool, dry place when not in use. Proper storage protects the yarn from dust, pests, and fading from sunlight exposure.
Rotate use and display of your blanket to reduce wear on specific areas. Regularly fluffing or lightly washing can help maintain the blanket’s texture and appearance over time.
Q: How long does it take to make a cat face crochet blanket?
A: Time depends on blanket size and your skill level. For beginners, it may take several days to a couple of weeks, working a few hours per day.
Q: Can I use different yarn types for the blanket?
A: Yes, you can mix yarns, but ensure similar thickness and texture for uniform stitches and tension.
Q: Do I need to know advanced crochet techniques?
A: No, this tutorial is beginner-friendly. Simple stitches like single crochet, double crochet, and color changes are enough.
Q: How do I make the cat face look symmetrical?
A: Use stitch markers and plan the design on graph paper or a digital chart. Count stitches carefully and mirror features on both sides.
Q: Can I make this blanket bigger or smaller?
A: Yes, adjust the foundation chain and row counts according to your preferred blanket size while keeping the cat face proportionate.
Q: How do I care for the blanket without damaging the cat face design?
A: Hand wash or use gentle machine cycles, lay flat to dry, and avoid stretching the cat face area.
Creating a Cat Face Crochet Blanket – Beginner Tutorial allows you to combine creativity, relaxation, and practical skills into one enjoyable project.
From choosing the right materials to following step-by-step instructions for the cat face design, you now have all the tools to make a cozy and charming blanket.
By practicing patience, keeping tension consistent, and carefully planning your design, you can achieve a professional-looking result that reflects your style.
Share your creations, leave your honest feedback, and offer suggestions for future crochet projects. Your input can inspire others and help improve tutorials for fellow crocheters.


