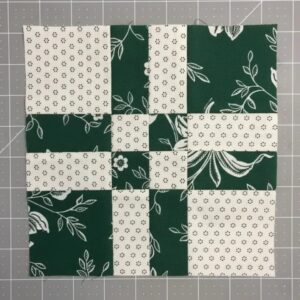
Crochet Pig In A Granny Square Blanket Pattern


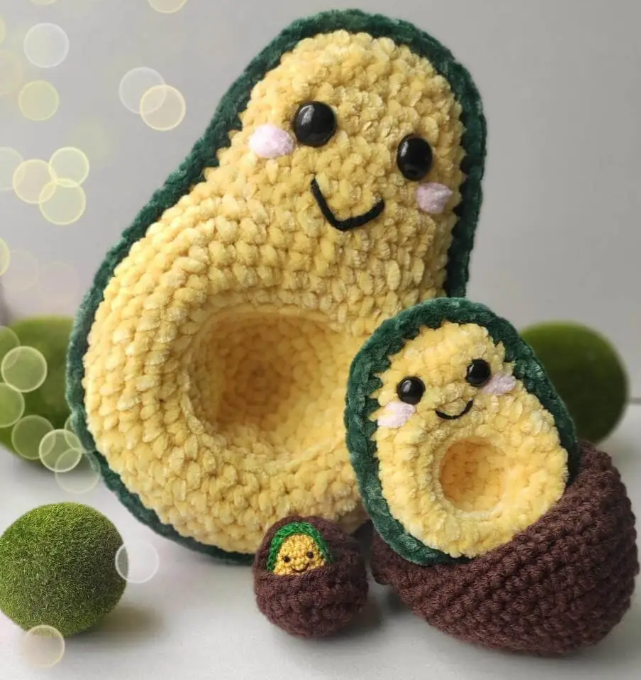
If you’ve ever wanted to create a fun and charming handmade toy, this Amigurumi Avocado Crochet Pattern is perfect for you. Making your own crochet avocado combines creativity, relaxation, and the satisfaction of completing a cute project.
Even if you are a beginner in crochet, this step-by-step guide will walk you through each stitch and assembly technique to produce a soft, squishy avocado plush that everyone will adore.
The beauty of this Amigurumi Avocado Crochet Pattern is its simplicity and versatility. You can customize the size, colors, and even facial expressions to give your avocado personality.
It’s an ideal project for using leftover yarn from other projects, turning scraps into something playful and functional. Additionally, crocheted avocados make fantastic gifts for friends, family, or even as decorative items for your home.
In this Amigurumi Avocado Crochet Pattern, you will learn to crochet the body, pit, and optional facial features. Each part is designed to be beginner-friendly, and you’ll gain confidence in basic crochet techniques like single crochet, increasing, decreasing, and working in rounds. By the end of this tutorial, you’ll have a complete, adorable amigurumi avocado ready to display or gift.
To start your Amigurumi Avocado Crochet Pattern, gather a few essential supplies. You’ll need medium-weight yarn in green for the avocado body, brown for the pit, and optional white or cream for the inner section. Choose soft, durable yarn to ensure your finished toy is cuddly and long-lasting.
A crochet hook that matches your yarn weight is necessary to achieve the correct tension. Beginners often find a slightly larger hook easier to work with, while experienced crocheters can use the recommended size for a tighter finish.
A yarn needle is important for sewing pieces together and weaving in ends neatly. Blunt-tipped needles prevent yarn splitting and make assembly easier.
Safety eyes or embroidery thread can be used to create cute facial expressions. These details give your amigurumi avocado character and charm.
Polyester fiberfill or stuffing is needed to fill your avocado and pit, giving it a soft and squeezable texture. Avoid overstuffing to maintain shape flexibility.
Scissors are essential for trimming yarn tails during the construction process. Keeping your workspace organized ensures a smoother and more enjoyable experience.
The body is the main part of this Amigurumi Avocado Crochet Pattern. Start by forming a magic ring or chaining four and joining with a slip stitch to make a loop. Work six single crochet stitches into the ring to create the base.
Continue working in rounds, increasing evenly to shape the avocado. Follow the pattern to form a rounded bottom and slightly pointed top, resembling a real avocado. Keep stitches tight and consistent to maintain a smooth appearance.
After achieving the desired size, begin decreasing evenly to close the top. This creates the classic avocado silhouette with a slightly tapered shape. Don’t fasten off yet; you’ll attach the pit and optional inner layer before finishing.
Stuff the body lightly with fiberfill. Ensuring even stuffing helps your avocado maintain its shape without lumps. You can add more or less stuffing depending on your preference for firmness.
If you want to include a lighter green or cream inner section, crochet a small oval piece and attach it to the body opening before sewing the top closed. This detail mimics the real avocado flesh and adds visual appeal.
Weave in all yarn ends securely to prevent unraveling. A neat finish enhances the overall look and durability of your amigurumi.
The pit is an essential part of this Amigurumi Avocado Crochet Pattern. Using brown yarn, start with a magic ring and crochet six single crochets inside. Work in rounds, increasing slightly to form a small, rounded oval.
Stuff the pit lightly and sew it into the center of the avocado body. Secure stitching ensures the pit remains in place even during handling. This creates the classic avocado look with a protruding pit.
Adding facial features is optional but highly recommended for charm. Use safety eyes, embroidery, or small felt pieces to create a friendly face. Placement above the pit is ideal to maintain proportion and balance.
Experiment with different expressions, such as smiles, winks, or rosy cheeks. These small touches give your amigurumi personality and make it more endearing.
Secure all facial features properly to prevent accidental detachment, especially if making the toy for children. Safety is always a priority when crafting toys.
Finally, trim any loose threads and check all attachments. Ensure the body, pit, and face are all properly aligned for a professional-looking amigurumi avocado.
Now that the avocado body and pit are complete, assemble your Amigurumi Avocado Crochet Pattern by attaching all pieces neatly. Use a yarn needle and matching yarn to sew any remaining parts securely.
Adjust stuffing as needed to ensure the avocado retains a soft, squishy shape. Avoid overstuffing, which can distort the final silhouette.
Check symmetry and alignment. The pit should sit centered, and any facial features should be balanced to create an appealing look.
Optional accessories can enhance the design. Add a tiny leaf or crochet a mini flower for decoration. These embellishments make your amigurumi avocado unique.
For a final polish, gently shape and smooth the avocado with your hands. Light pressing or steaming can help even out stitches and improve appearance.
Your amigurumi avocado is now ready to display, gift, or play with. Its soft texture and charming design make it a delightful addition to any collection.
This Amigurumi Avocado Crochet Pattern can be personalized in numerous ways. Change the size by using different yarn weights or hook sizes to create mini or jumbo versions.
Use variegated yarn to add texture and color variation to the avocado body. This creates a more realistic or playful look depending on your preference.
Experiment with facial expressions and accessories. Crocheted or felt leaves, tiny bows, or stitched mouths add character and fun.
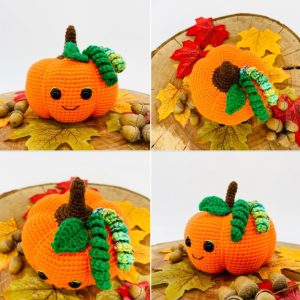
Combine with other fruit amigurumi to create a themed set. A basket of crochet fruits makes a lovely gift or decorative display.
Try using eco-friendly or organic yarns for a sustainable approach. These yarns are soft, durable, and gentle on the skin.
Finally, document your variations with photos and notes. This helps replicate successful designs and inspires future projects.
1. Is this pattern suitable for beginners?
Yes. The Amigurumi Avocado Crochet Pattern is designed to be beginner-friendly, with simple stitches and clear instructions.
2. What type of yarn is recommended?
Medium-weight cotton or acrylic yarn is ideal for durability, softness, and ease of handling.
3. Can I adjust the size of the avocado?
Yes. Use larger hooks or thicker yarn for bigger avocados, and smaller hooks or thinner yarn for miniature versions.
4. How do I make the pit stay in place?
Stuff the pit lightly and sew it securely into the center of the avocado body with a yarn needle.
5. Are facial features necessary?
No, but they add personality. You can use safety eyes, embroidery, or felt pieces to create expressions.
6. Can this be made as a toy for children?
Yes, but ensure all small parts like eyes are safely attached or embroidered to prevent choking hazards.
7. How do I care for the finished amigurumi?
Hand wash gently in cold water with mild soap and lay flat to dry to maintain shape and softness.
Creating your own Amigurumi Avocado Crochet Pattern is a fun and rewarding experience. You’ve learned how to crochet the body, pit, and optional facial features, assemble the pieces, and customize your avocado to make it truly unique. This project is perfect for beginners and experienced crocheters alike, offering both relaxation and creativity.
Once you’ve completed your avocado, share your experience, feedback, and creative variations. Your insights help inspire others and allow everyone to enjoy the charm of handmade amigurumi. Happy crocheting!


