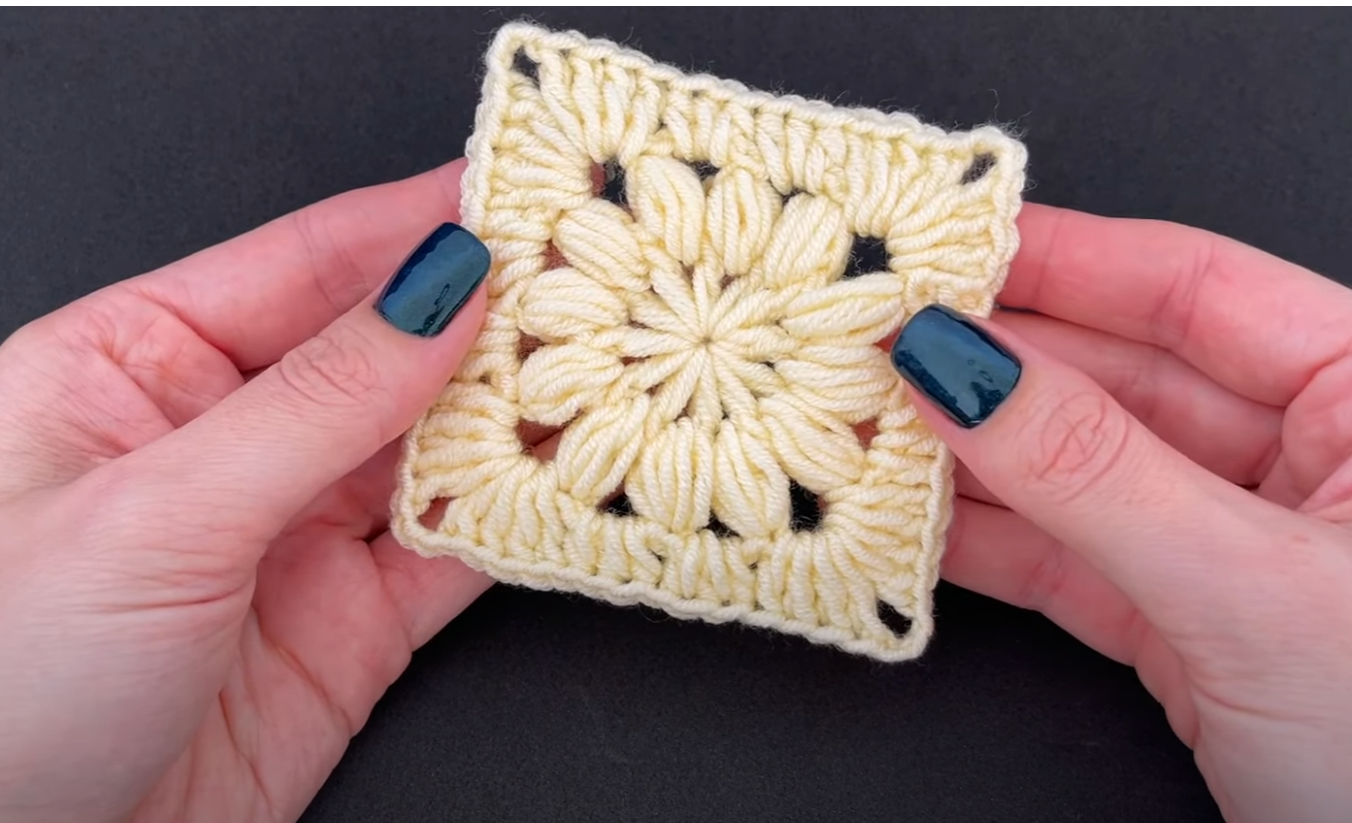
Crochet Pig In A Granny Square Blanket Pattern


CROCHET SQUARE: A Comprehensive Guide for Beginners is the perfect place to start your crochet journey. Whether you are completely new to crochet or just looking to expand your skills, learning how to make crochet squares opens a world of possibilities.
These versatile little pieces are the foundation for countless projects—from blankets and scarves to bags, cushions, and garments. Crochet squares are not just simple shapes; they are creative building blocks that allow you to design anything your imagination can dream up.
The best part about crochet squares is that they are easy to learn, fun to make, and perfect for practicing basic stitches. Even if you’ve never held a crochet hook before, you can create beautiful squares by following a few simple steps.
As you gain confidence, you can play with colors, textures, and patterns to make your designs more unique and expressive. Plus, crochet squares are excellent small projects that you can work on anywhere—ideal for relaxing moments or travel time.
In this CROCHET SQUARE: A Comprehensive Guide for Beginners, you’ll learn everything you need to know—from materials and basic stitches to joining techniques and creative project ideas. Each section is designed to help you progress easily and confidently. By the end of this guide, you’ll not only master the classic crochet square but also understand how to use it as the foundation for countless creative possibilities.
Before you begin, you’ll need a few basic materials. One of the wonderful things about crochet squares is that they require minimal supplies, and you can start with what you already have. Choosing the right yarn, hook, and accessories ensures that your work will be smooth, even, and visually appealing.
Start by selecting your yarn. For beginners, a medium-weight yarn (commonly labeled as size 4 or “worsted weight”) is a great choice because it’s easy to see your stitches. Cotton and acrylic yarns are both excellent options—cotton for a clean, sturdy look and acrylic for soft, cozy projects. Try to avoid very thin or fluffy yarns at first, as they can make it harder to see where to insert your hook.
Next, choose a crochet hook that matches your yarn. Most medium-weight yarns recommend a 5.0 mm (H/8) hook, but you can check your yarn label for guidance. Using the right hook helps maintain consistent stitch tension, making your crochet square even and professional-looking.
You’ll also need scissors to trim your yarn and a yarn needle for weaving in ends when you finish. Optional tools include stitch markers to keep track of your rounds and a tape measure to ensure your squares are the same size—especially useful if you plan to join them later.
Having all these materials ready before you start ensures a smooth and enjoyable crochet experience. Once you’re set up, you can move on to mastering the basic stitches that form the foundation of every crochet square.
To create a perfect crochet square, you’ll need to become comfortable with a few essential stitches. Don’t worry—these are simple to learn and form the basis for almost every crochet pattern you’ll encounter. The main stitches used in crochet squares are the chain stitch, slip stitch, single crochet, and double crochet.
Start with the chain stitch (ch). This is usually the first stitch in any project and creates the foundation chain. To make it, create a slip knot on your hook, yarn over, and pull through. Repeat this process until you have the number of chains required.
Next, practice the slip stitch (sl st). This stitch is used to join rounds or move your yarn to another position in your work. To make a slip stitch, insert your hook into the stitch, yarn over, and pull through both loops on your hook.
The single crochet (sc) stitch is one of the most fundamental crochet stitches. Insert your hook into the stitch, yarn over, pull up a loop, yarn over again, and pull through both loops. This stitch creates a tight and solid texture, great for sturdy squares.
The double crochet (dc) stitch adds height and flexibility to your work. Yarn over, insert your hook into the stitch, yarn over again, pull up a loop, yarn over, pull through two loops, yarn over once more, and pull through the remaining two. It’s often used in the classic granny square pattern.
Once you master these stitches, you’ll be ready to create different types of squares—from solid blocks to intricate designs. Practicing them regularly will help improve your speed, control, and tension, making every future project easier and more enjoyable.
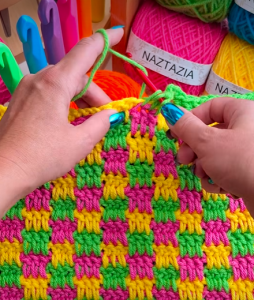
Now that you know the basics, it’s time to make your first crochet square. There are many variations, but the most popular one for beginners is the granny square. It’s easy to follow, works up quickly, and looks beautiful with multiple colors.
Step 1: Make the Foundation Ring. Start by chaining four stitches and joining the last chain to the first with a slip stitch to form a ring. This small circle will be the center of your square.
Step 2: Create the First Round. Chain three (this counts as your first double crochet), then make two more double crochets into the ring. Chain two to form the corner, then make three more double crochets. Repeat this sequence—three double crochets and two chains—until you have four sets of clusters. Slip stitch to the top of the beginning chain to close the round.
Step 3: Build the Next Rounds. Each new round begins with a chain three and continues with clusters of three double crochets separated by chain spaces. In each corner space, make three double crochets, two chains, and three more double crochets to keep the square shape.
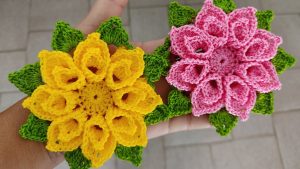
Step 4: Add Colors and Texture. You can change yarn colors between rounds to make your square vibrant and eye-catching. Use contrasting shades for a traditional look or matching tones for a modern feel.
Step 5: Finish and Secure. Once your square reaches the desired size, cut your yarn, leaving a small tail. Pull it through the last loop and tighten gently. Use your yarn needle to weave in the ends neatly on the back side.
Making crochet squares is incredibly satisfying, and once you’ve completed one, you’ll likely want to make many more. The repetition of stitches combined with color play makes this process both meditative and rewarding.
Once you’ve mastered the basics of crochet squares, the creative possibilities are endless. These versatile pieces can be joined together or used individually to create a wide variety of projects that are both practical and decorative.
You can start by joining multiple squares to make a cozy blanket or throw. Simply crochet around each square and connect them using slip stitches or whip stitches. Try alternating colors or patterns to add visual interest.
Crochet squares also make wonderful pillow covers. You can create a simple two-panel design—one for the front and one for the back—and sew them together, leaving an opening for a pillow insert. It’s a great way to brighten up your living space with handmade charm.
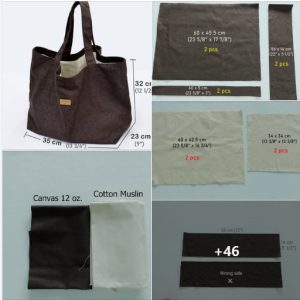
For smaller projects, consider making coasters, placemats, or mug rugs. These are quick to finish and make excellent gifts. You can even turn your squares into wearable art by creating scarves, tops, or tote bags.
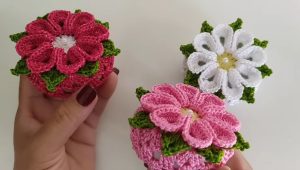
If you enjoy home décor, frame your favorite crochet square as wall art or use it to embellish items like baskets or jars. The possibilities are limitless, and every new project helps refine your skills.
Experiment with textures, stitches, and colors to discover your personal style. The more you create, the more confident and creative you’ll become with each new crochet square.
1. What is the easiest type of crochet square for beginners?
The classic granny square is the easiest and most popular for beginners. It uses simple stitches and is worked in rounds, making it easy to learn and customize.
2. How do I keep my crochet square from curling or warping?
Make sure your tension is even, and use the recommended hook size for your yarn. Blocking your finished square can also help it lay flat and look professional.
3. Can I mix different yarn types in one square?
It’s best to use the same yarn type and weight throughout your project to ensure even texture and size. Mixing yarns can affect the shape and feel of the square.
4. How can I join multiple crochet squares together?
You can use several methods such as slip stitch join, whip stitch, or continuous join-as-you-go techniques. Each gives a different look and finish.
5. How do I make sure all my squares are the same size?
Count your stitches carefully and maintain consistent tension. Blocking each square after finishing helps ensure uniform sizing.
CROCHET SQUARE: A Comprehensive Guide for Beginners has shown you how simple and enjoyable it is to create crochet squares from start to finish.
You’ve learned about the materials, essential stitches, and step-by-step techniques that make this craft both relaxing and creative. With time and practice, you can transform basic squares into beautiful blankets, garments, and accessories.
Now that you know the basics, it’s time to pick up your hook, choose your favorite yarn, and start experimenting. Every square you make brings new opportunities to learn and express your creativity.
If you enjoyed this guide, leave a sincere opinion and share your suggestions—I’d love to hear about your experience and see how your crochet journey unfolds!


