Crochet Pig In A Granny Square Blanket Pattern


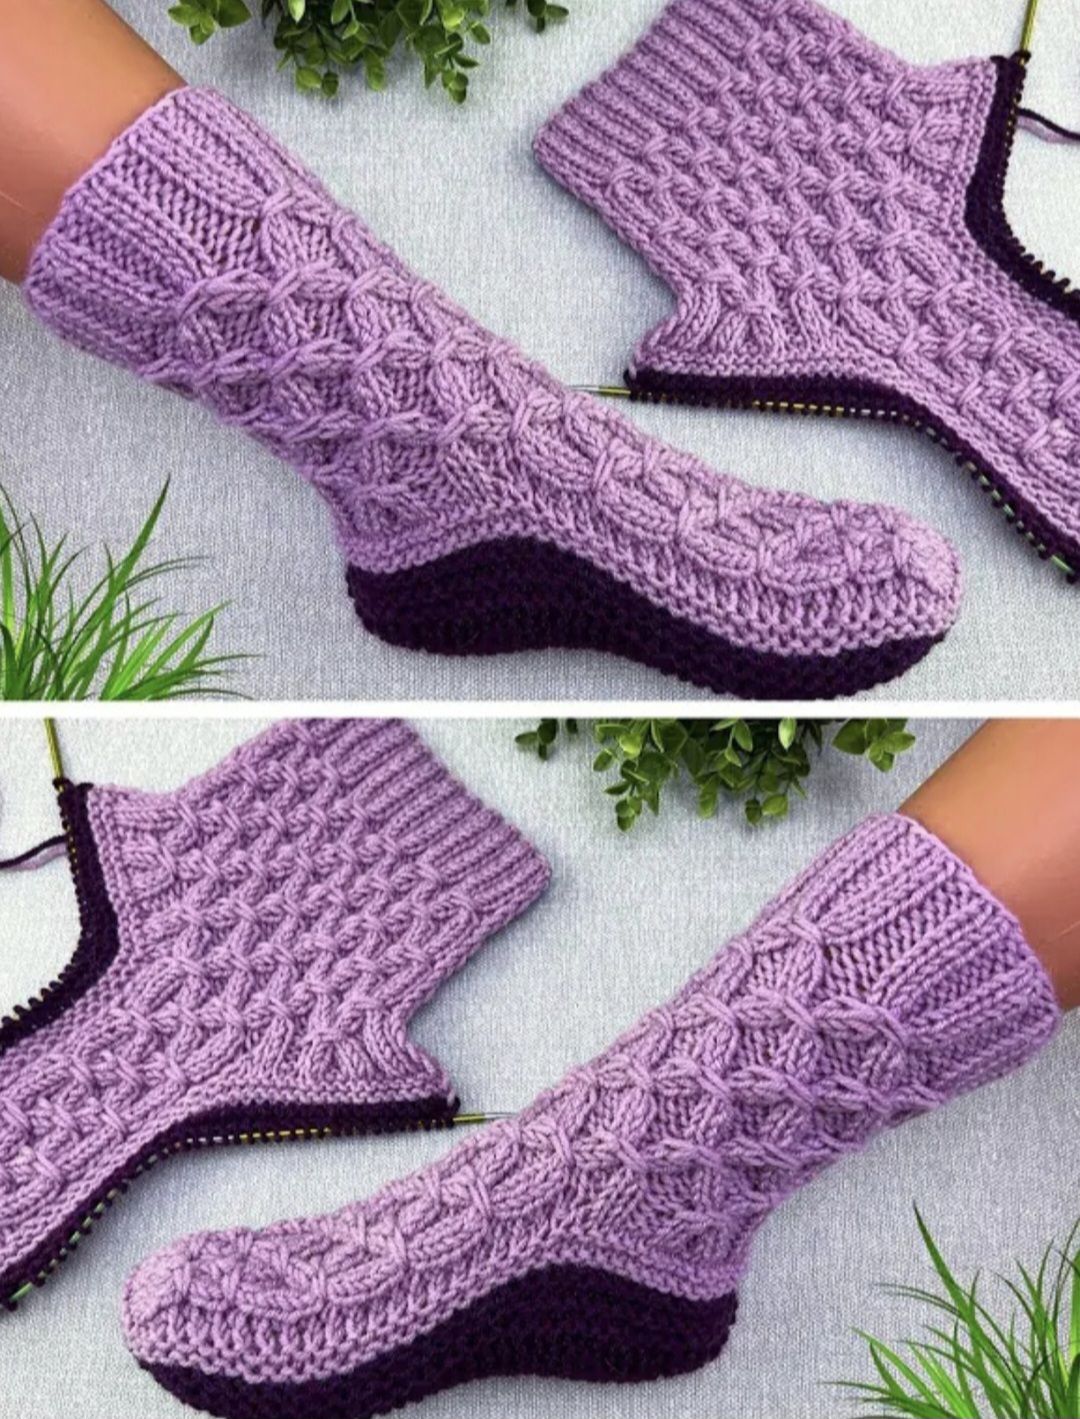
Knitting beautiful slippers is a satisfying project that combines practicality and creativity. Handmade slippers are not only cozy and warm but also customizable in terms of size, color, and style.
Whether you want a simple pair for everyday wear or a decorative, intricate design for gifting, these slippers can be adapted to suit your taste.
Knitting slippers allows you to experiment with various yarn textures and stitch patterns. You can create soft, plush slippers using acrylic or wool blends, or lightweight versions with cotton yarn.
Adding embellishments like buttons, braids, or contrasting borders can transform a simple pair into a stylish, eye-catching accessory.
The beauty of knitting slippers lies in their flexibility. You can adjust the size for children or adults, make open-heel or closed-heel designs, and create patterns ranging from plain stockinette to cables, seed stitch, or lace. With some patience and attention to detail, you can produce a pair of slippers that are both functional and fashionable.
To knit your slippers, gather soft, durable yarn. Worsted weight yarn is a popular choice because it balances warmth with ease of handling. You’ll also need knitting needles appropriate for your yarn—usually US size 7–9 (4.5–5.5 mm) for worsted yarn.
Additional tools include a tapestry needle for sewing seams, scissors, and stitch markers to keep track of your pattern. For beginners, using circular needles or double-pointed needles can make knitting in the round easier, especially for the foot and heel sections.
Optional embellishments such as buttons, ribbons, or embroidery thread can enhance the slippers’ design. Having a measuring tape handy ensures the slippers will fit the intended foot comfortably, allowing adjustments in length and width if needed.
The knitting needles you choose matter. Most slipper patterns use US size 7 to 9 (4.5 mm to 5.5 mm) needles. Check the label on your yarn for the recommended size to ensure a good match. Straight needles are typically used for beginners, but circular needles can also work depending on the design.
In addition to yarn and needles, you’ll need a pair of scissors and a yarn needle. The yarn needle is essential for sewing seams and weaving in loose ends, giving your slippers a clean finish.
Consider using stitch markers if the pattern involves specific counts or sections. They help keep track of increases, decreases, and pattern changes, making the process easier.
Start by measuring the foot of the wearer. Determine the length from heel to toe and the width across the ball of the foot. This ensures a snug but comfortable fit.
Cast on the number of stitches recommended for your size. Beginners can use a simple ribbing (K1, P1) to make the edge stretchy and comfortable. The ribbed cuff prevents the slipper from slipping off while adding a polished look.
Mark the beginning of the round if knitting in the round or place stitch markers if working flat. Proper preparation here will make the rest of the project much easier.
Measure as you go to match the foot length. You can add stitch patterns such as seed stitch, cables, or lace to make the slippers more visually interesting. Ensure the fabric is soft but dense enough to provide warmth and durability.
Work in ribbing for about 1–2 inches (2.5–5 cm) for the cuff, depending on how high you want it. Ribbing adds elasticity, keeping the slipper securely on the foot.
For a decorative touch, alternate colors in the ribbing or add a simple cable stitch pattern. The cuff is the foundation of your slipper’s overall style, so feel free to get creative while maintaining the stretch needed for comfort.
Once the cuff is complete, continue in stockinette stitch (knit one round, purl one round if working flat, or knit all stitches in the round) to form the foot portion.
Measure as you go to match the foot length. You can add stitch patterns such as seed stitch, cables, or lace to make the slippers more visually interesting. Ensure the fabric is soft but dense enough to provide warmth and durability.
For a closed-heel slipper, divide the stitches to work the heel flap separately. Use short rows or a traditional heel flap method, knitting back and forth to create a pocket that comfortably fits the back of the foot.
Once the heel is formed, pick up stitches along the sides and knit the foot until you reach the toe. For open-heel designs, simply continue in pattern, and leave the heel section as a flexible, slip-on edge.
To shape the toe, gradually decrease stitches at the tip. Decrease evenly on each side of the foot until only a few stitches remain.
Close the toe using the Kitchener stitch for a seamless finish, or gather the remaining stitches and sew neatly with a tapestry needle. Proper shaping ensures the slipper fits snugly without excess bulk at the toe.
Weave in all loose ends carefully to prevent unraveling. Block the slippers lightly if needed to smooth stitches and improve the shape.
Add decorative touches such as buttons, bows, or embroidered patterns. You can also add a soft sole lining using felt or fleece for extra warmth and comfort. These finishing touches make your knitted slippers both beautiful and functional.
Use soft, washable yarn for practicality. Wool or acrylic blends work well for warmth and durability.
Maintain consistent tension for a smooth, professional-looking fabric. Uneven stitches may affect the fit and appearance.
Try the slipper on as you knit, adjusting length and width for the perfect fit.
Consider making matching pairs for family members or gifts—they are quick, rewarding projects with a personal touch.
Experiment with colors and stitch patterns for a unique design every time.
Keep your needles and tools organized to prevent losing small accessories like stitch markers or tapestry needles during the process.
What yarn is best for slippers? Medium-weight acrylic or wool blends provide warmth, softness, and durability.
Can beginners knit slippers? Yes, simple stockinette or ribbed patterns are beginner-friendly.
How do I adjust the size? Measure the foot and adjust the number of stitches cast on and the length of the foot section.
Can slippers be machine-washed? This depends on the yarn; check yarn care instructions. Wool may require hand washing, while acrylic is usually machine washable.
How long does it take to knit a pair? Depending on skill level, a pair can take a few hours to a couple of days.
Can I add decorations? Yes, buttons, embroidery, bows, or contrasting stitch patterns can make your slippers unique.
Knitting beautiful slippers is a fun and rewarding project that combines creativity, skill, and practicality. By following these steps—measuring, casting on, knitting the cuff, foot, heel, and toe, and finishing with embellishments—you can create slippers that are warm, stylish, and perfectly fitted.
Handmade slippers are versatile, allowing for endless customization in color, stitch patterns, and decorative details.
With patience and attention to detail, your knitted slippers can become a cherished gift, a personal favorite, or a family keepsake. Share your results, feedback, and suggestions to inspire others to enjoy the satisfaction of creating their own beautiful slippers.


