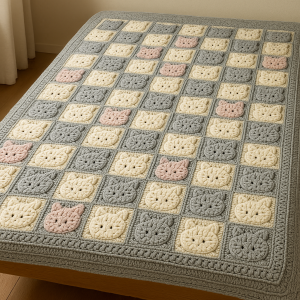
Crochet Pig In A Granny Square Blanket Pattern


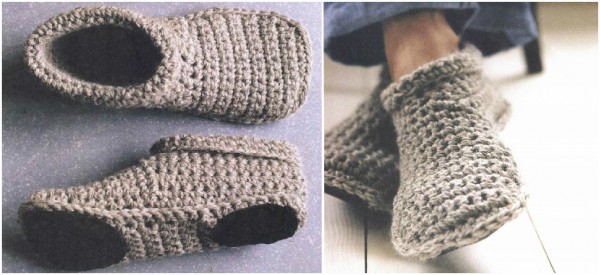
A Slipper Boots Free Crochet Pattern is one of the most enjoyable and practical crochet projects for all skill levels. These cozy slipper boots combine comfort and style, making them the perfect accessory for cold days at home.
Handmade with love, they offer the satisfaction of creating something both beautiful and functional. Whether you’re a beginner or an advanced crocheter, slipper boots are an excellent way to practice your craft while making something useful and stylish.
Crocheting slipper boots allows you to choose your favorite yarn, color combinations, and design details. You can make them thick and plush for winter or light and breathable for cooler evenings.
Unlike store-bought slippers, handmade ones can be perfectly tailored to fit your feet and personal style. They make great gifts for friends and family, and they’re always a hit during holidays or special occasions.
A Slipper Boots Free Crochet Pattern not only saves money but also opens the door to creativity. You can experiment with textures, stitch patterns, and embellishments to create something unique. Crochet slipper boots can have cuffs, buttons, pom-poms, or even faux fur trims to give them a luxurious touch. Making them from scratch is not only relaxing but also rewarding, as you end up with a handmade product that feels warm and personal.
To create your Slipper Boots Free Crochet Pattern, you’ll need a few essential materials. Start with a soft, thick yarn—acrylic, cotton blends, or chunky wool are all good choices. Thicker yarns give the slippers more structure and warmth. You’ll also need a matching crochet hook, usually in the 5mm to 6.5mm range depending on your yarn weight. A yarn needle will help you weave in ends neatly, and a pair of scissors is always essential.
A stitch marker can be helpful to track rounds, especially if your pattern involves crocheting in the round. For added comfort and durability, you might add a felt or leather sole to the bottom of your slipper boots, especially if you plan to wear them frequently. Optional decorations like buttons, bows, or embroidery can add a fun, personalized touch.
Before you start, it’s helpful to make a small swatch to check your tension. Consistent tension ensures both slipper boots will match in size and shape. Preparing all your materials ahead of time makes the crocheting process smoother and more enjoyable.
To begin your Slipper Boots Free Crochet Pattern, start by making the sole. Chain the number of stitches needed to match your foot length, then work in rounds around the foundation chain, increasing evenly at the ends to create an oval shape. Continue until the sole is the desired width and length. The sole provides the foundation for the boot’s comfort and fit.
Next, start working up the sides of the slipper. You’ll crochet in the back loops only for one or two rounds to create a defined edge. Then continue in regular rounds or rows, depending on your pattern. This step forms the sides and base of your slipper boots, giving them structure and shape.
Once the sides reach the desired height, start shaping the toe area. This usually involves decreasing stitches evenly at the front to create a rounded toe. Be sure to try the slipper on occasionally to ensure a comfortable fit. Crocheting the toe too tightly can make it uncomfortable, while leaving it too loose may cause slipping.
After finishing the toe, move to the ankle and cuff sections. For added warmth and a stylish look, you can create a ribbed or fold-over cuff. Ribbing is typically made by alternating front and back post double crochet stitches. The cuff gives your slipper boots a snug fit and polished finish.
Finally, add decorative touches. Sew on buttons, attach a faux fur trim, or crochet small flowers for a feminine look. If you want non-slip soles, apply a bit of fabric paint or glue small silicone dots to the bottom. Finish by weaving in all yarn ends neatly with your needle.
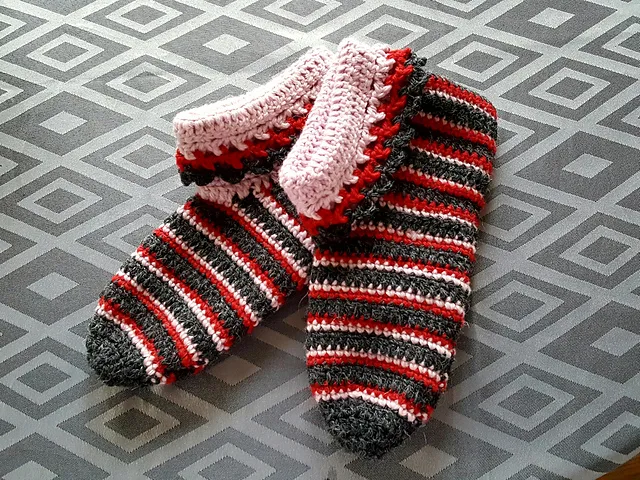
The beauty of a Slipper Boots Free Crochet Pattern lies in its versatility. You can design them in many styles, from ankle boots to knee-highs. Try color-blocking with contrasting shades or create striped versions using leftover yarns. Add cozy elements like fleece lining or faux fur edging to make them extra soft and warm.
If you prefer a minimalist look, stick with solid neutral colors like cream, gray, or brown. For kids, choose fun colors like pink, blue, or rainbow patterns. You can even make themed slipper boots, such as Christmas-inspired red and white pairs or bunny-ear designs for Easter. The possibilities are endless.
For more structure, use tighter stitches or double up your yarn. This will create sturdier slipper boots that hold their shape over time. Adding a leather or crocheted strap around the ankle can make them look more like real boots, while maintaining comfort and flexibility.
Always measure your feet or the recipient’s feet before starting. Each Slipper Boots Free Crochet Pattern may vary slightly depending on yarn type and stitch tension. Adjust your foundation chain or stitch count accordingly for a perfect fit.
Keep your stitches even, and count frequently to avoid mistakes. If your slippers feel too loose, try going down a hook size; if too tight, go up a size. Test your sole before moving on—it should comfortably fit your foot length and width.
Blocking can help shape your finished slipper boots and give them a professional appearance. Lightly dampen and pin them to your desired shape, then let them dry naturally. Always secure decorative pieces firmly, especially if the slippers are for children.
What is a slipper boots crochet pattern?
It’s a crochet pattern that allows you to make cozy, boot-style slippers that fit snugly and keep your feet warm.
Can beginners make slipper boots?
Yes, many Slipper Boots Free Crochet Patterns are beginner-friendly, using simple stitches like single and double crochet.
What yarn should I use?
Thick, soft yarns like acrylic, wool blends, or cotton blends work best for comfort and warmth.
Can I make them non-slip?
Yes, add rubber dots, fabric glue, or sew on leather soles for better traction.
How long does it take to crochet slipper boots?
Depending on your skill level, a pair can take between 4 and 8 hours to complete.
Can I wash crochet slipper boots?
Most are washable by hand or on a gentle machine cycle if you use washable yarn. Always check yarn labels.
Can I adjust the size?
Absolutely. Simply adjust your stitch count or add more rounds to the sole for a larger fit.
A Slipper Boots Free Crochet Pattern is one of the most enjoyable crochet projects to make, combining functionality, warmth, and creativity. With just a few materials and a bit of time, you can craft cozy slipper boots that look adorable and feel incredibly comfortable.
Whether you create them for yourself or as gifts, these handmade slipper boots are sure to impress. Experiment with colors, textures, and embellishments to make each pair uniquely yours.
Enjoy the process of crocheting, take pride in your handmade work, and don’t forget to share your thoughts and suggestions about this Slipper Boots Free Crochet Pattern—your feedback inspires others to create beautiful, cozy projects too.


