Crochet Pig In A Granny Square Blanket Pattern


Creating a square crochet design for a table cover is one of the most enjoyable and versatile crochet projects. Whether you’re a beginner or an experienced crafter, this type of project allows you to explore your creativity while making something beautiful and functional.
A square table cover can easily transform a dining or coffee table into a centerpiece of charm, showcasing the intricate beauty of handmade crochet.
From choosing yarn and hook sizes to learning the best techniques for joining squares, this guide covers every detail you need to create a stunning square crochet table cover.
Before beginning your crochet project, it’s important to select the proper materials. The quality and texture of your yarn, along with the right hook size, can make a significant difference in the overall look of your table cover. For table covers, lightweight yarns like cotton or cotton blends are ideal.
Cotton yarn provides a smooth texture, is easy to clean, and holds its shape beautifully — perfect for detailed square motifs. You can choose from mercerized cotton yarn for durability and shine, acrylic yarn for affordability and color variety, or bamboo blends for a soft, eco-friendly finish. For a classic and elegant look, use neutral shades like white or beige. For something bold, combine teal, mustard, or coral tones.
The hook size depends on your yarn’s weight. Usually, for light cotton yarn, a 2.5 mm to 3.5 mm hook works perfectly. Always check your yarn label for recommendations. You’ll also need scissors, a tapestry needle for weaving ends, and blocking tools to shape your squares. Having everything prepared will make your project smooth and enjoyable.
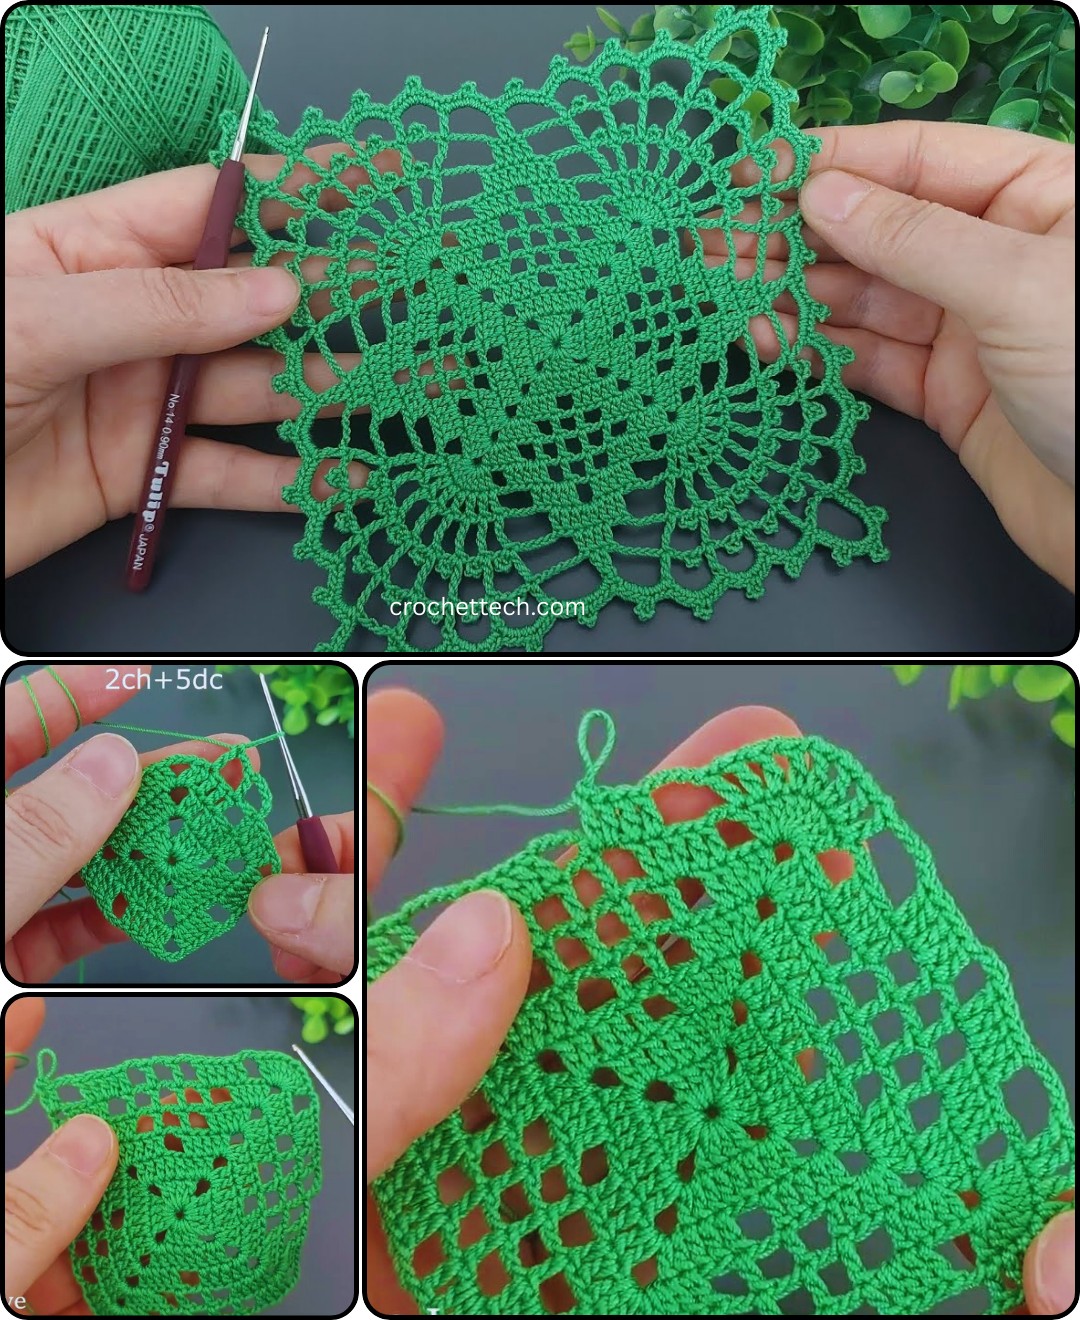
Once you have your materials ready, it’s time to start creating your square crochet motifs. The classic granny square is a great place to begin, but you can also experiment with floral or geometric patterns depending on your preference.
Start with a magic ring, or chain 4 and join with a slip stitch to form a circle. Chain 3 (this counts as your first double crochet). Inside the ring, work 2 double crochets, then chain 2 to form a corner. Repeat 3 double crochets and 2 chains three more times, then join the last stitch to the top of the first chain-3 with a slip stitch. You now have the first round of your square — four sets of 3 double crochets separated by chain-2 spaces.
For the second round, slip stitch to the next corner space, chain 3, make 2 double crochets, chain 2, 3 double crochets in the same space (this forms the first corner). Chain 1, then in the next corner space make 3 double crochets, chain 2, 3 double crochets. Repeat for all corners, ending with a slip stitch in the top of the starting chain-3.
Continue working in rounds, increasing the number of 3-double-crochet clusters along each side, and always forming corners with 3 dc, ch 2, 3 dc. Each new round increases the size of your square. You can stop at any size depending on your desired table cover dimensions. For a small side table, one large square might be enough. For a dining table, you can create several smaller squares and join them together.
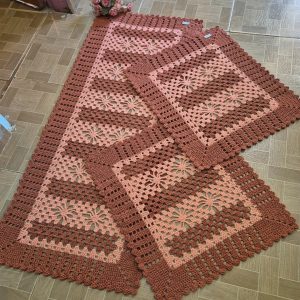
Once all your squares are completed, it’s time to join them into a larger piece. There are several techniques for connecting crochet squares, each creating a different effect.
The slip stitch join is a simple and clean method. Place two squares side by side with the right sides facing each other, insert your hook through both loops of the corner stitch on each square, and make a slip stitch. Continue slip stitching through both edges to join them neatly. This creates a flat seam ideal for table covers.
The join-as-you-go (JAYG) technique allows you to connect squares as you crochet. When finishing the last round of a new square, connect it directly to the previous one by replacing the last chain space with a slip stitch into the corner of the adjacent square. Continue this way until all squares are connected. This technique gives a seamless appearance.
The whip stitch join is another elegant option. Align the squares with the right sides facing up. Using a tapestry needle, stitch through the loops along the edges using a simple whip motion. This method gives a delicate, lace-like joining effect.
After joining all your squares, your table cover will start to take shape beautifully.
Once your table cover is assembled, it’s time to add finishing details that elevate the final look. Start by weaving in all yarn ends carefully with a tapestry needle. This prevents unraveling and ensures a professional finish.
Next, block your table cover. Dampen it slightly and pin it to a flat surface, making sure all edges are straight. Let it dry completely before unpinning. Blocking enhances stitch definition and helps your cover lay flat.
Adding a border gives your crochet cover a polished and complete appearance. Some popular border styles include the single crochet border for simplicity, a shell border for a soft scalloped edge, or a picot border for a decorative finish. Choose one that complements your square pattern and work evenly around the edges of your cover.
Once you master the basic pattern, you can personalize your square crochet table cover in countless ways. Mix and match colors to create a patchwork effect or alternate light and dark shades for depth. Combine different square designs such as floral motifs, lace squares, or solid blocks for texture and variety.
If you want an extra touch of creativity, you can add embroidery or beads after finishing your cover. This gives a luxurious look and makes your piece truly unique. You can also make seasonal versions of your table cover — use red and green for Christmas, pastels for spring, or warm tones for autumn.
To ensure your work looks professional, keep your tension consistent throughout. Uneven tension can distort your squares. Count your stitches regularly to avoid mistakes in corners and edges. Block each square individually before joining to keep everything even. Use quality yarn, as it makes a huge difference in how your table cover drapes and lasts over time. And finally, take your time when joining — neat seams are key to a flawless finish.
What’s the best yarn for table covers?
Cotton yarn is the best option because it’s durable, easy to wash, and holds its shape beautifully.
How many squares do I need for a table cover?
It depends on your table’s size. Measure the surface and decide the square size. Multiply to find the total number required.
Can I mix different square designs?
Yes, mixing designs adds personality and visual interest to your table cover.
Do I need to block my squares?
Definitely. Blocking helps even out stitches and ensures all squares are the same size before joining.
Can I use leftover yarns?
Yes, this project is perfect for using leftover yarn. It’s budget-friendly and creates a colorful, patchwork-style design.
Is this suitable for beginners?
Absolutely. The basic square pattern and joining techniques are simple enough for beginners.
Making a square crochet design for a table cover is a rewarding project that combines creativity and functionality. With a few simple stitches and some patience, you can craft a stunning handmade piece that enhances any table setting.
From choosing your materials to adding a final border, each step allows you to express your unique style and craftsmanship.
Whether you choose soft neutral tones or vibrant colors, your finished table cover will reflect your personality and skill. Crochet projects like this bring warmth and charm into your home, reminding everyone of the beauty of handmade work. If you found this guide helpful, share your thoughts and suggestions — your feedback inspires new creative ideas for future projects!


