Crochet Pig In A Granny Square Blanket Pattern


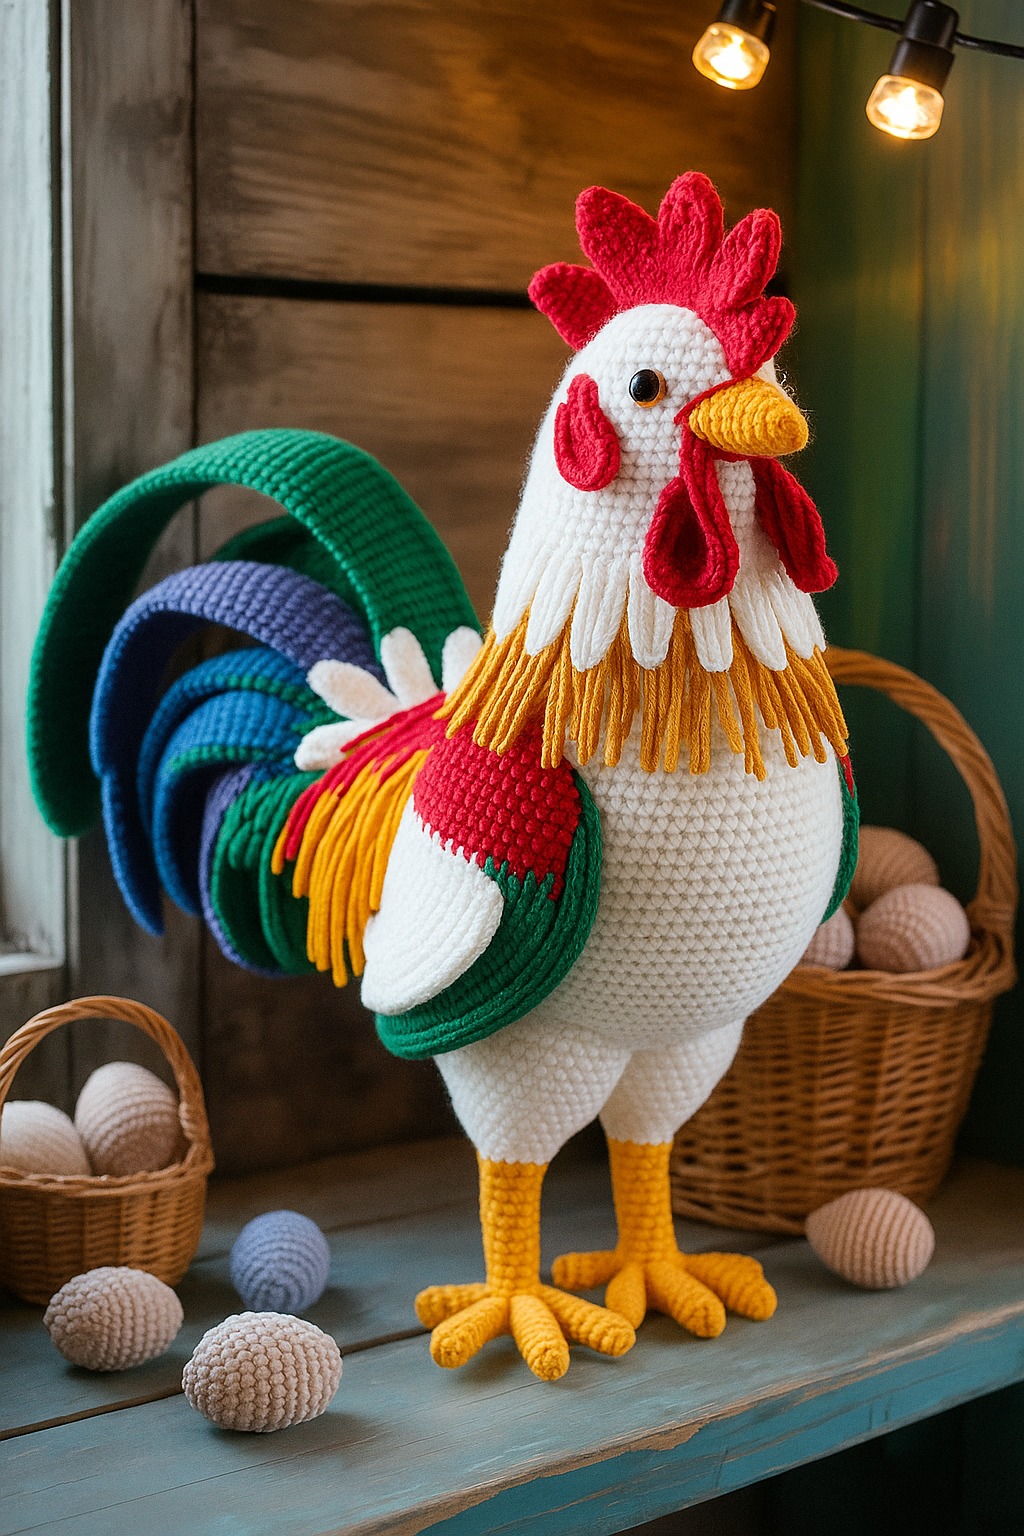
The Amigurumi Rooster – FREE Crochet Pattern is a delightful project for crochet enthusiasts of all levels. This pattern allows you to create a charming, handmade rooster that can be used as décor, a toy, or even a gift.
Unlike store-bought figurines, an amigurumi rooster is full of personality and showcases your crafting skills. With this free crochet pattern, you can bring a colorful and playful rooster to life, perfect for homes, nurseries, or seasonal decorations.
The appeal of the Amigurumi Rooster – FREE Crochet Pattern lies in its combination of creativity, fun, and functionality. By following the step-by-step instructions, you can make a soft, sturdy, and adorable rooster using basic crochet techniques.
This project is suitable for beginners who want to practice stitches like single crochet, slip stitch, and increases, as well as for advanced crafters looking to refine their shaping and detailing skills.
Creating an Amigurumi Rooster – FREE Crochet Pattern also provides a sense of accomplishment and relaxation. The repetitive nature of crochet promotes mindfulness, and seeing the rooster take shape stitch by stitch is immensely satisfying. Additionally, handmade amigurumi animals are often treasured keepsakes, making this project a meaningful and enjoyable craft for anyone.
Before starting your Amigurumi Rooster – FREE Crochet Pattern, gather the necessary materials. You will need crochet yarn in a variety of colors: typically red for the comb and wattle, yellow for the beak, and shades of brown, white, or other colors for the body and feathers.
A crochet hook suitable for the chosen yarn weight is essential. Most amigurumi patterns recommend a slightly smaller hook than what the yarn label suggests to create tight stitches that prevent stuffing from showing. A size 2.5–3.5 mm hook is commonly used for small to medium-sized roosters.
Additional supplies include fiberfill or polyester stuffing to give the rooster shape, a yarn needle for sewing parts together, and safety eyes or embroidery thread for the eyes. Stitch markers can also be helpful to keep track of rounds, especially when shaping the head and body.
Optional materials include small embellishments such as beads, felt for added features, or embroidery floss for decorative details. These extras allow you to customize your Amigurumi Rooster – FREE Crochet Pattern and give it a unique personality.
Finally, make sure to have scissors and a small ruler or tape measure on hand. Measuring the dimensions of your rooster during the process ensures consistency and helps in creating a proportionate finished piece.
To begin your Amigurumi Rooster – FREE Crochet Pattern, start with the body. Using the chosen yarn color, make a magic ring and work in continuous rounds to form a rounded body shape. Increasing and decreasing stitches according to the pattern creates the desired 3D form.
Next, create the head. Work in rounds to shape a slightly smaller sphere and attach it securely to the body using yarn and a needle. This ensures the head sits firmly and maintains the rooster’s structure.
The comb and wattle are added next. Crochet small shapes in red yarn and sew them to the head. These features give the rooster its signature appearance and add character to the finished amigurumi.
Create the beak with yellow yarn. A small triangular or rounded shape works best, attached just below the comb. Secure it firmly to prevent it from loosening, especially if the rooster will be handled often.
Next, crochet the wings and tail feathers. Wings can be flat or slightly shaped, while tail feathers often use longer stitches or layered colors to mimic real feathers. Attach these pieces carefully to the body for stability and aesthetic appeal.
Finally, add eyes using safety eyes or embroidery thread. Embroider small details like feather lines or claws for a more realistic appearance. Stuff the rooster firmly but gently, shaping it with your hands as you go, and ensure all parts are securely sewn together.
A custom Amigurumi Rooster – FREE Crochet Pattern allows endless creative possibilities. Experiment with color variations to create unique roosters, from traditional farm colors to vibrant, whimsical designs. Using variegated yarn can give a multicolored feather effect without changing colors frequently.
You can also alter the size. Using thicker yarn and a larger hook produces a bigger rooster, while finer yarn and a smaller hook create a tiny, collectible version. Adjusting size allows you to make roosters suitable for different purposes, such as keychains, toys, or table décor.
Adding embellishments is another way to customize your amigurumi. Tiny beads for eyes, embroidered designs for feather details, or small felt accents for added texture enhance the rooster’s charm and individuality.
Mixing stitch techniques can also elevate the pattern. Try puff stitches, bobble stitches, or textured crochet stitches for wings, tail feathers, or body details to add dimension and visual interest.
Creating sets of roosters in different colors or sizes can make a beautiful display or a gift set. These sets are perfect for collectors, holiday decorations, or themed nursery décor.
Finally, consider the finishing touches. Blocking the finished rooster lightly or shaping it with your hands improves posture and symmetry, giving your Amigurumi Rooster – FREE Crochet Pattern a polished, professional appearance.
After completing your Amigurumi Rooster – FREE Crochet Pattern, proper care ensures longevity. Keep it away from pets that might chew or pull yarn and store it in a clean, dry place.
Hand washing is generally recommended if needed. Use lukewarm water and mild detergent, gently pressing rather than wringing, and allow the rooster to air dry flat to maintain its shape.
For display, place it on a shelf, table, or in a shadow box. Avoid direct sunlight for prolonged periods to prevent yarn colors from fading.
Check regularly for loose threads or parts, especially if used as a toy. Reinforce any weak stitches to ensure safety and durability.
Finally, involving children or family in the care and display of your amigurumi encourages appreciation of handmade crafts and makes your rooster a cherished decorative piece.
What is an Amigurumi Rooster?
It is a crocheted toy rooster made using amigurumi techniques, which involve working in rounds to create 3D shapes.
Do I need experience to make it?
No, beginners can follow the step-by-step instructions, while experienced crafters can experiment with customizations.
Which yarn is best?
Cotton or acrylic yarn works well. Choose colors for the body, comb, wattle, beak, and feathers according to your preference.
How long does it take to make?
Depending on complexity and size, it can take 3–6 hours for a medium-sized rooster.
Can it be washed?
Yes, hand wash gently with mild soap and air dry flat.
Can I customize my rooster?
Absolutely. Change colors, add embellishments, or alter size to create a unique amigurumi.
Is it suitable for gifts?
Yes, handmade amigurumi roosters make thoughtful and adorable gifts for any occasion.
Can children play with it safely?
Yes, but if using safety eyes or beads, ensure they are securely attached to prevent choking hazards for small children.
The Amigurumi Rooster – FREE Crochet Pattern is a fun and rewarding project that combines creativity, skill development, and decorative appeal. From selecting yarn and materials to crocheting, assembling, and customizing, every step allows crafters to create a unique and charming rooster. Handmade roosters can be displayed, gifted, or collected, making this pattern perfect for all crochet enthusiasts.
We encourage you to try this free pattern and share your experiences. Leave your feedback, suggestions, or photos of your finished rooster, as your contributions can inspire others and foster a community of creative crafters.


