
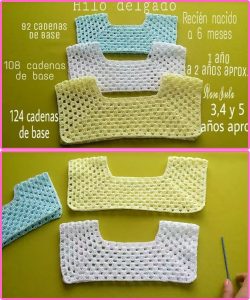
Ballerina pencil case with zipper Pattern


If you have been searching for a creative and practical project that combines style, functionality, and the joy of handmade crafts, this guide is perfect for you.
Making your own DIY cute backpack is not only fun but also an excellent way to express your personality through fabric choices, colors, and decorative touches.
In this article, you will discover everything you need to know to create a backpack from scratch, step by step, with a free pattern to guide you.

Whether you are an experienced sewer or a beginner looking for a meaningful project, this tutorial will help you achieve a result that is both beautiful and useful.
With detailed instructions, tips for customization, and answers to common questions, you will walk away with a complete understanding of how to design, sew, and finish your own DIY backpack.
In today’s world of fast fashion and mass-produced items, there is something incredibly special about making your own accessories. Here are a few reasons why creating a DIY cute backpack is worth your time:
Before jumping into the sewing process, it’s important to gather all the supplies. Having everything on hand makes the workflow smoother and more enjoyable. For your DIY cute backpack, you will need:
This section provides a step-by-step walkthrough of how to assemble your backpack. Even if you are a beginner, you will be able to follow along and complete the project successfully.
Download or sketch the free backpack pattern. Cut out:
And just like that, you now have a handmade DIY cute backpack ready to use!
The beauty of a DIY backpack is the endless opportunity to personalize it. Here are some fun customization ideas:
Using a free pattern makes the sewing process easier and more structured. Some of the main benefits include:
If this is your first sewing project, don’t worry! Here are some tips to help you succeed:
Q1: How long does it take to make a DIY backpack?
A beginner may take about 6–8 hours, while an experienced sewer can finish in 3–4 hours.
Q2: Can I make this backpack without a sewing machine?
It’s possible to sew by hand, but it will take longer and may not be as durable. A machine is recommended.
Q3: What fabric works best for durability?
Canvas, denim, or faux leather are excellent choices for long-lasting backpacks.
Q4: How can I make the backpack waterproof?
Use waterproof fabric like ripstop nylon or apply a water-resistant spray to your finished backpack.
Q5: Can kids use this backpack?
Yes! Simply scale the pattern down for a smaller, child-friendly size.
Making your own DIY cute backpack with a free pattern is not only a rewarding craft but also a chance to design something that reflects your personal style.
From choosing fabrics to adding finishing touches, each step allows for creativity and self-expression. This backpack is practical for everyday use—whether for school, work, travel, or casual outings—and doubles as a thoughtful handmade gift.
By following the step-by-step instructions, gathering the right materials, and adding your personal flair, you’ll end up with a backpack that is unique, durable, and stylish. More importantly, you will enjoy the process of creating something by hand, knowing it carries your own effort and imagination.
So, grab your fabric, thread your needle, and get started today. Your DIY cute backpack will not only hold your essentials but also carry a story of creativity, patience, and love.
You can choose colors, materials, and patterns to make the backpack completely unique. Crafting this backpack is a rewarding experience, as it combines practicality with aesthetics, giving you a final product that is both functional and visually appealing.


