
Ballerina pencil case with zipper Pattern


The Quilt in the Hat Pattern – Pattern is an innovative and creative way to combine two beloved crafting techniques: quilting and crochet or knitting.
This pattern allows crafters to produce a unique, wearable item that showcases intricate design, texture, and creativity. Whether you are an experienced quilter, a crochet enthusiast, or a beginner interested in combining techniques, this pattern offers a rewarding project with endless possibilities.
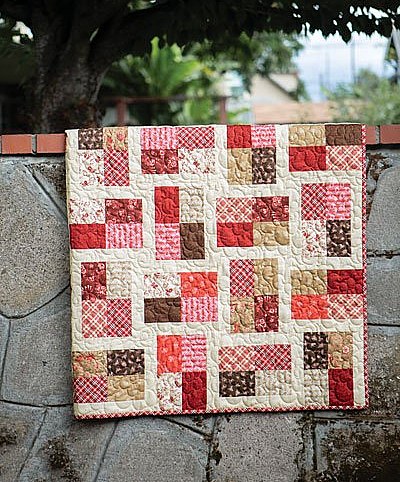
The concept of a quilted hat involves using small patchwork pieces, often inspired by traditional quilt blocks, to form a structured and visually appealing hat.
By following the Quilt in the Hat Pattern – Pattern, crafters learn how to assemble pieces cohesively, integrate textures, and create a one-of-a-kind accessory.
Using quilt-inspired designs in wearable items has become increasingly popular because it merges practicality with artistry. Unlike flat quilt projects, a quilted hat is functional while allowing the maker to display their color choices, patterns, and techniques in a small, wearable format. The Quilt in the Hat Pattern – Pattern also encourages creativity in design, giving each crafter the freedom to experiment with fabrics, textures, and embellishments.
One of the main reasons to follow the Quilt in the Hat Pattern – Pattern is the opportunity to showcase artistic expression. Quilting allows for intricate patterns, color mixing, and playful design, while the hat format makes it practical and wearable.
Another advantage is the learning experience. Completing this pattern teaches essential skills like sewing or crocheting precise pieces together, understanding geometry in design, and incorporating different textures. These skills are highly transferable to other projects, whether in quilting, crochet, or general crafting.
The project also offers a sense of accomplishment. Seeing individual quilt blocks transform into a complete, wearable hat provides immense satisfaction. Each completed hat reflects the crafter’s creativity, patience, and skill, resulting in a meaningful handmade piece.
Customization is a major benefit. Makers can choose colors, fabrics, and embellishments to reflect personal style or match specific outfits. The Quilt in the Hat Pattern – Pattern allows for endless variation, making each hat completely unique.
Additionally, quilted hats make excellent gifts. Handmade, personalized items like this are thoughtful and cherished. Friends and family appreciate the time, effort, and creativity put into such a project, making it more than just an accessory.
Lastly, this project is practical. Quilted hats provide warmth during cold weather while displaying artistry. They are suitable for daily wear or special occasions, combining functionality with aesthetic appeal.
Before beginning the Quilt in the Hat Pattern – Pattern, it’s important to gather the right materials. These ensure that the crafting process is smooth and the finished product is polished and durable.
Fabric or yarn selection is the first consideration. Quilted hats can be made using cotton fabrics, fleece, wool, or a combination. For crochet or knitted variations, yarns like acrylic or wool blends provide warmth and texture. Choosing complementary colors or themed designs helps achieve a cohesive look.
You’ll also need basic sewing or crocheting tools. This includes a sewing needle, crochet hook, scissors, pins, and stitch markers. A rotary cutter and cutting mat are helpful for precise fabric cutting.
Thread should match or complement the fabrics chosen. High-quality, durable thread ensures the pieces stay together during wear. For crochet, a matching yarn is used for joining and finishing.
Optional accessories include buttons, beads, or embroidery for decoration. Some crafters like to add a small quilted brim, a pom-pom, or applique designs to enhance visual appeal.
Finally, a measuring tape or ruler is essential to ensure the pieces fit together properly. Accurate measurement guarantees that the hat will have the desired fit and structure.
The first step in the Quilt in the Hat Pattern – Pattern is selecting the blocks. Decide on the shapes, sizes, and colors for your quilt squares or triangles. Classic quilt blocks like the nine-patch, star, or log cabin can all work beautifully.
Next, cut or crochet the individual pieces. If using fabric, ensure each piece is cut precisely. For crochet or knitting, follow the pattern for stitch count and size to maintain uniformity. Consistency is key to a polished final product.
After all pieces are ready, begin joining them. Fabric pieces can be sewn together using a sewing machine or hand-stitching, while crochet pieces can be joined with slip stitches or whip stitch. Check alignment frequently to ensure the quilt pattern remains consistent.
Once the main quilted portion is assembled, start shaping the hat. Depending on the pattern, this might involve folding and sewing the top into a dome shape, decreasing stitches for crochet, or shaping the fabric for fit. Accuracy ensures a comfortable fit and attractive shape.
Adding a brim or decorative elements is optional but can enhance the design. For crochet hats, you can add ribbed edges, scallops, or textured patterns at the base. Fabric hats may include folded or quilted brims.
Finally, finish the hat by weaving in all yarn ends or securing thread. Press the fabric if needed and inspect all seams to ensure durability. Your Quilt in the Hat Pattern – Pattern is now complete and ready to wear or gift.
Once you master the Quilt in the Hat Pattern – Pattern, there are countless creative variations to explore. You can experiment with different color schemes, from neutral tones to vibrant, bold combinations.
Textures are another area for creativity. Mixing fabrics or yarns creates tactile interest and visual depth. You might combine smooth cotton with textured fleece or use a combination of cotton and wool yarns.
Different quilt block designs can give each hat a unique personality. Traditional patterns like stars, pinwheels, or log cabin designs work well, but you can also design custom blocks to tell a story or reflect your style.
Size and shape can also be varied. Make fitted beanies, slouchy hats, or even hats with brims. Adjusting the number of blocks or rounds allows you to create a range of fits and styles.
Adding decorative elements like buttons, embroidery, appliqués, or small tassels can personalize each hat. These small touches elevate the project from functional to artistic.
Lastly, consider seasonal or themed designs. Holiday-themed hats, pastel colors for spring, or cozy winter designs can all be made using the Quilt in the Hat Pattern – Pattern, making them suitable for gifts or personal wear.
1. Is this pattern suitable for beginners?
Yes! While some quilting experience helps, the pattern can be adapted for beginners, especially with simple block designs.
2. What materials work best for quilted hats?
Cotton, fleece, wool, or a combination. For crochet variations, acrylic or wool yarns are ideal.
3. How long does it take to make a hat?
Depending on skill level and design complexity, most hats can be completed in a few days.
4. Can I customize the colors and patterns?
Absolutely! This pattern encourages creativity, allowing you to choose colors, fabrics, and quilt block designs.
5. Do I need special tools for this project?
Basic sewing or crochet tools are sufficient. Optional accessories like buttons or embroidery can be added for decoration.
6. Can these hats be gifted?
Yes! Handmade quilted hats are thoughtful and cherished gifts, perfect for any occasion.
The Quilt in the Hat Pattern – Pattern is a creative and functional project that combines the beauty of quilting with wearable design. From selecting materials to assembling blocks and adding finishing touches, this project offers both artistic expression and practical results.
Whether you are making a hat for yourself, as a gift, or to expand your crafting skills, this pattern delivers satisfaction and a sense of accomplishment. Share your creations, tips, and ideas with others—your unique quilted hat can inspire fellow crafters to explore this innovative and enjoyable project.


