Crochet Pig In A Granny Square Blanket Pattern


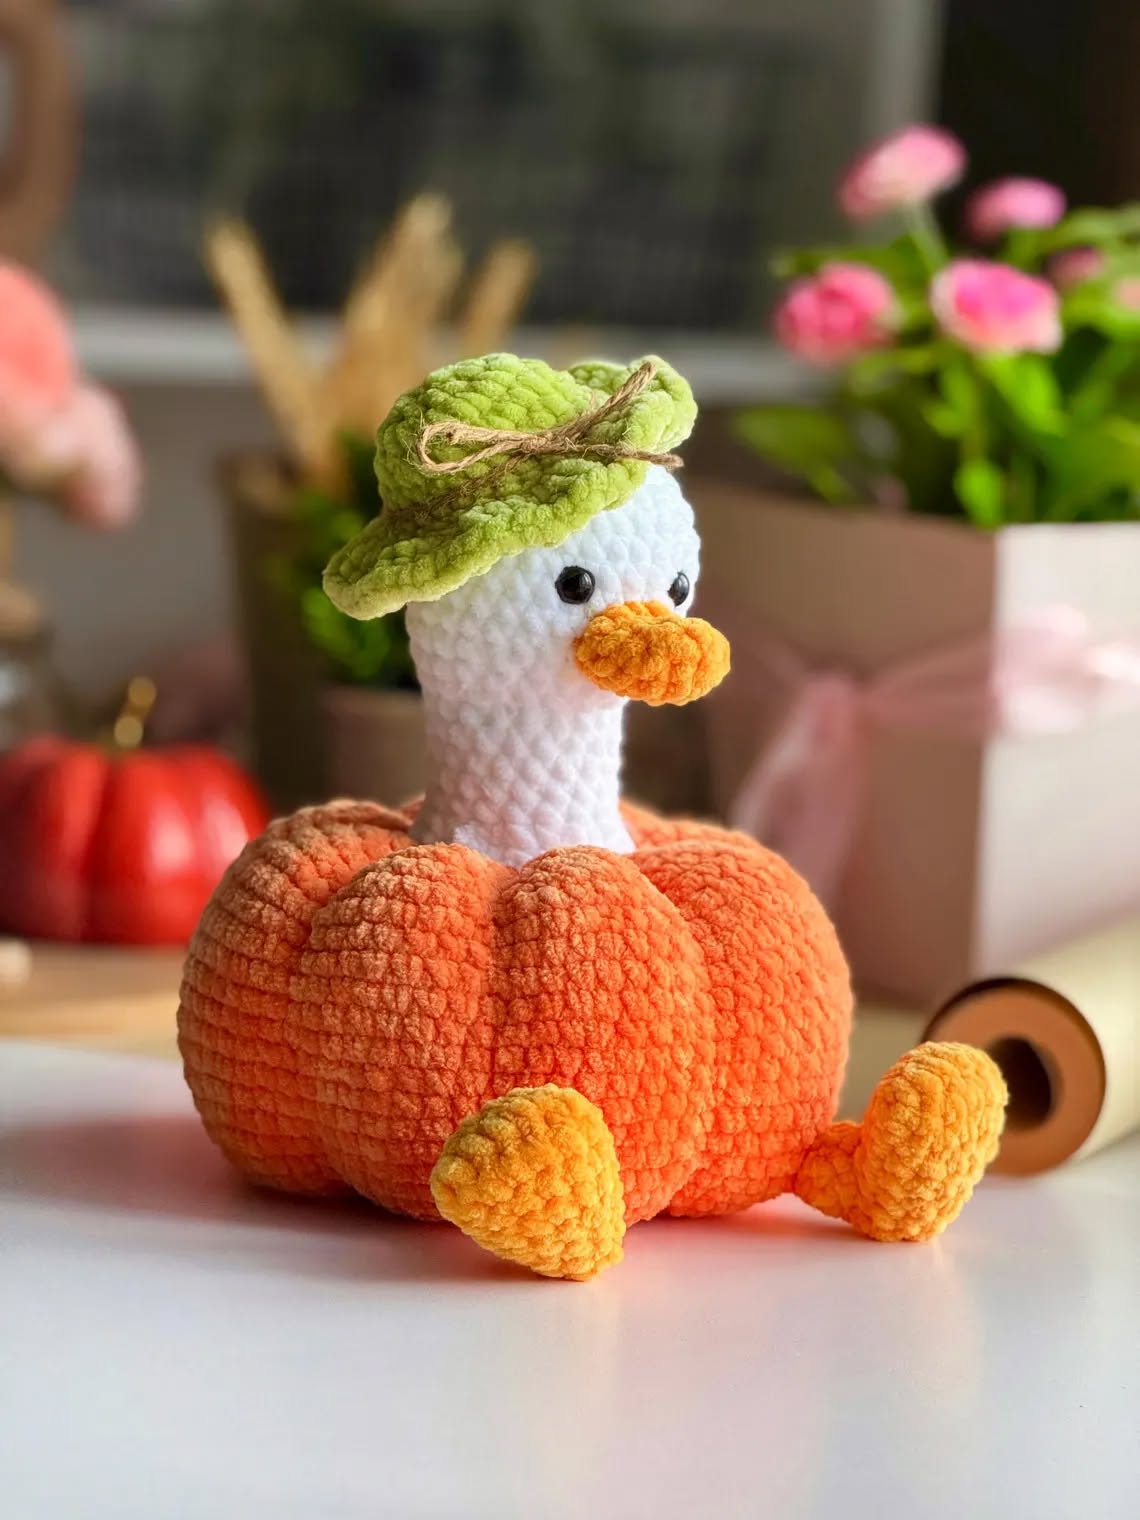
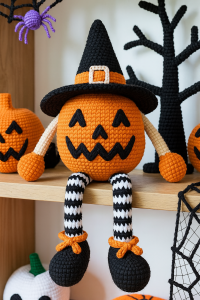
The Crochet goose in a pumpkin – Pattern is a delightful craft project that combines the charm of autumn with the cozy appeal of handmade crochet.
This pattern has become increasingly popular among crochet enthusiasts who want to create unique decorations for fall or Thanksgiving.
Crafting a crochet goose in a pumpkin allows crafters to explore different techniques, from basic stitches to more advanced shaping, while producing a charming piece that can adorn any home.
Whether you are a beginner or an experienced crocheter, this pattern provides both a fun challenge and a rewarding outcome.
Creating a crochet goose in a pumpkin involves a combination of creativity, precision, and attention to detail. The pumpkin serves as the perfect base for the project, while the goose adds a whimsical touch that makes it truly special. By following a structured pattern, crafters can ensure that their final product has the correct proportions and a polished look. The satisfaction of completing a handmade piece like this goes beyond decoration—it offers a sense of accomplishment and a personal connection to your craft.
The popularity of the Crochet goose in a pumpkin – Pattern has grown due to the rise of seasonal home decor trends and the desire for personalized, handmade items. Many crafters enjoy gifting these creations to friends and family, as they represent thoughtful, one-of-a-kind presents. Additionally, crafting this pattern provides an opportunity to practice and refine various crochet techniques, including increases, decreases, and color changes. With the right materials and attention to detail, anyone can create a beautiful crochet goose in a pumpkin that becomes a cherished seasonal decoration.
To successfully complete the Crochet goose in a pumpkin – Pattern, gathering the right materials is crucial. Choosing quality yarn ensures your project looks vibrant and holds its shape well. Acrylic or cotton yarns are commonly used for this pattern due to their durability and ease of handling. It is also important to select colors that match the seasonal theme, such as orange for the pumpkin, white or grey for the goose, and green for the stem.
The crochet hook size should correspond to the yarn weight. For most medium-weight yarns, a 4mm to 5mm hook works perfectly. Using the recommended hook size helps maintain consistent stitch tension, which is essential for shaping both the goose and the pumpkin accurately. Crafters may also need stitch markers to mark rounds and keep track of pattern progress.
Stuffing is another essential material for the Crochet goose in a pumpkin. Polyfill or fiberfill stuffing ensures the pumpkin maintains its round shape, and the goose stands upright within it. Proper stuffing is crucial to avoid uneven bulges and to give your finished piece a polished appearance.
Safety eyes or embroidery thread can be used to create facial features for the goose, depending on personal preference. Some crafters prefer embroidered eyes for a softer look, while others choose safety eyes for a more detailed and expressive appearance. Scissors, yarn needles, and a stitch counter complete the list of necessary tools.
Choosing the right materials not only impacts the visual appeal but also affects the longevity of the final piece. Using high-quality yarn and proper stuffing can make your crochet goose in a pumpkin – Pattern a lasting seasonal decoration that can be enjoyed year after year.
Attention to detail in materials selection ensures that the project will meet both functional and aesthetic goals, resulting in a charming centerpiece for any autumn display. By carefully considering yarn type, hook size, and stuffing materials, crafters can set themselves up for success from the start.
Following clear, structured instructions is key to mastering the Crochet goose in a pumpkin – Pattern. Starting with the pumpkin base, crafters usually begin with a magic ring and work in rounds to create the rounded shape. Increasing stitches gradually ensures a smooth curve, and consistent tension helps maintain symmetry throughout the project.
After completing the pumpkin, attention shifts to the goose. The body is generally worked in a similar round method, with shaping achieved through strategic increases and decreases. Adding the wings and beak requires a combination of basic stitches like single crochet, half double crochet, and slip stitches, providing texture and definition to the goose.
Assembling the goose into the pumpkin involves careful placement. The goose should be securely stitched or attached to ensure it stays upright while giving the appearance of naturally emerging from the pumpkin. This step requires patience and precise stitching to achieve a seamless look.
Embellishments can enhance the charm of the Crochet goose in a pumpkin. Adding small details, like embroidered eyes or a crocheted scarf for the goose, provides personality and makes the decoration more engaging. Subtle touches elevate the final piece from simple to striking.
It is important to consistently refer back to the pattern while crocheting to ensure accuracy. Skipping steps or miscounting stitches can affect the overall shape and symmetry of both the goose and the pumpkin.
Completing the Crochet goose in a pumpkin – Pattern provides a satisfying sense of accomplishment. Following the instructions carefully ensures a professional-looking result that can be proudly displayed or gifted to loved ones.
Beginners attempting the Crochet goose in a pumpkin – Pattern may find some techniques challenging, but patience and practice make the process enjoyable. Starting with smaller projects or simpler shapes helps build confidence before attempting more complex patterns like this one.
Using stitch markers can be extremely helpful, especially when working in continuous rounds. Marking the beginning of each round prevents confusion and makes it easier to track increases or decreases, which are crucial for shaping the pumpkin and goose.
Maintaining consistent tension is one of the most important skills in crochet. Uneven tension can result in a misshapen pumpkin or goose. Practicing even stitching on scrap yarn before beginning the main project can help achieve uniformity.
Reading the pattern carefully before starting is essential. Understanding each step and preparing all materials in advance minimizes mistakes and ensures smoother progress throughout the project.
Don’t rush through challenging sections. If a particular stitch or step feels complicated, take the time to practice or consult visual references for clarification. Many beginners benefit from watching video tutorials to complement written instructions.
Finally, enjoy the process! Crafting a crochet goose in a pumpkin is not only about the final product but also about the experience of creating something unique with your hands. Taking pride in each completed section enhances the overall satisfaction of the project.
The Crochet goose in a pumpkin – Pattern can be customized in countless ways to suit individual tastes and seasonal themes. Changing yarn colors allows crafters to create pumpkins in unique shades or geese with different feather patterns, adding a personalized touch to the decoration.
Altering the size of the pumpkin or goose provides flexibility for different display purposes. Smaller versions are perfect for table decorations or gifts, while larger versions can serve as eye-catching centerpieces for autumn gatherings.
Adding accessories to the goose, like a tiny crocheted hat or scarf, injects personality and makes the decoration even more engaging. These small touches can make your crochet goose in a pumpkin stand out and become a conversation starter.
Mixing yarn textures, such as combining smooth and fluffy yarns, creates interesting visual and tactile effects. This approach enhances the decorative appeal and adds depth to the final piece.
Incorporating seasonal embellishments, such as crocheted leaves or vines around the pumpkin, complements the autumn theme. These additions create a more immersive and cohesive decoration that celebrates the season.
Experimenting with different techniques and materials allows crafters to make the Crochet goose in a pumpkin – Pattern truly their own. Each variation reflects individual creativity and ensures that no two finished pieces are exactly alike.
Q: What skill level is required for the Crochet goose in a pumpkin – Pattern?
A: This pattern is suitable for intermediate crocheters. Beginners may need extra practice on basic stitches and shaping techniques.
Q: Can I use any yarn for this pattern?
A: While most yarns can work, medium-weight acrylic or cotton yarn is recommended for durability and ease of handling.
Q: How long does it take to complete the project?
A: Depending on experience and available time, the project can take anywhere from 6 to 12 hours, spread over multiple sessions.
Q: Are there tips for making the goose stand upright in the pumpkin?
A: Yes. Proper stuffing, strategic stitching, and occasionally a small internal support can help the goose remain upright.
Q: Can I scale the pattern to make different sizes?
A: Absolutely. Adjusting yarn thickness, hook size, and stitch counts allows for smaller or larger versions.
Q: Is this pattern suitable for gifting?
A: Yes. The Crochet goose in a pumpkin makes a thoughtful, handmade gift that is perfect for autumn or Thanksgiving.
The Crochet goose in a pumpkin – Pattern is a charming and versatile project that blends creativity with traditional crochet techniques.
From selecting the right materials to completing intricate stitching and assembling the pieces, this pattern provides an enjoyable and rewarding crafting experience.
Experimenting with variations, colors, and embellishments ensures each creation is unique. We hope this guide inspires you to try the pattern yourself. Feel free to leave your honest opinion, share your results, and provide suggestions for future projects.


