Crochet Pig In A Granny Square Blanket Pattern


The Amigurumi Bone-Chilling Skeleton – FREE Crochet Pattern is an exciting project for crochet enthusiasts who love spooky, fun, and decorative creations.
This amigurumi skeleton is perfect for Halloween decorations, themed gifts, or even collectible items for fans of quirky crochet projects. Using a free pattern makes this design accessible to beginners and experienced crafters alike, allowing you to create a detailed and charming skeleton without purchasing an expensive guide.
Crocheting a mini skeleton combines essential amigurumi techniques with fun creative touches. The Amigurumi Bone-Chilling Skeleton helps crafters practice increasing, decreasing, working in rounds, and securely attaching limbs.
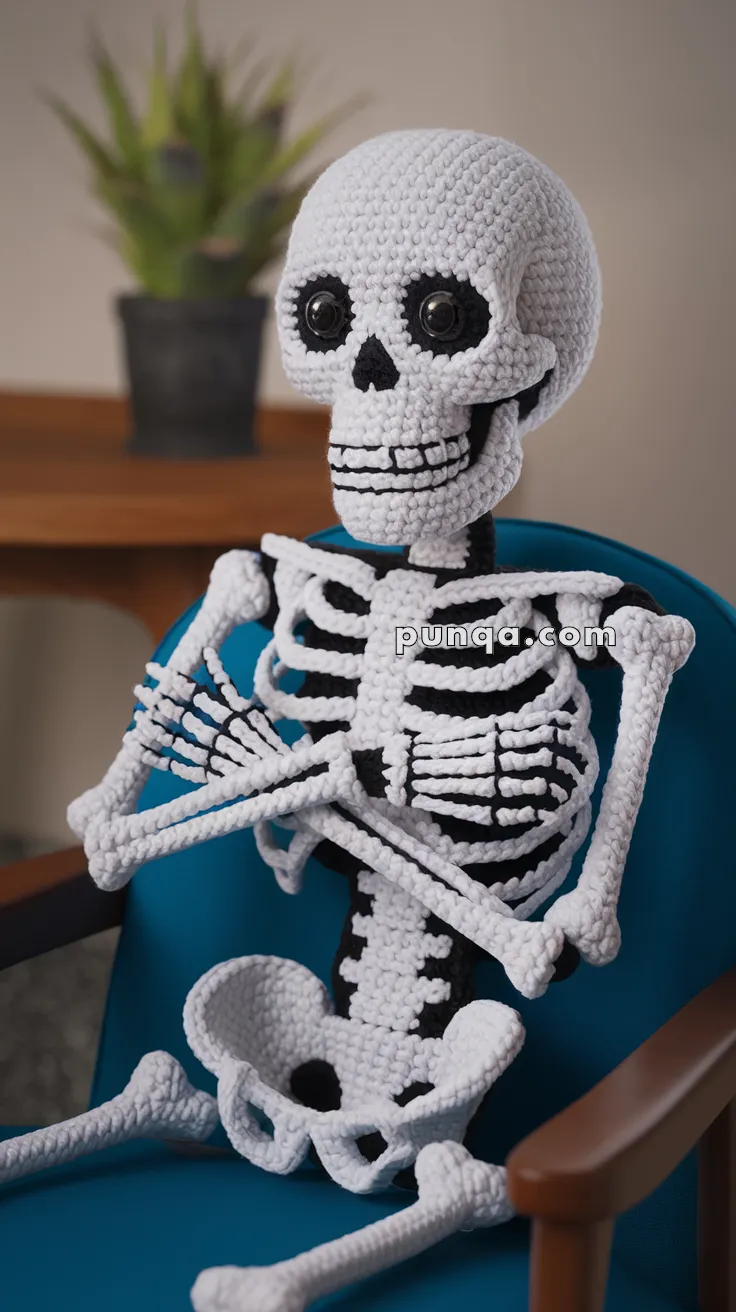
Its playful yet slightly eerie design makes it a favorite for seasonal projects, and completing it provides both a sense of accomplishment and a unique decorative piece.
Beyond technical skills, this skeleton encourages creativity. You can customize it with different yarn colors, eye designs, and accessories like hats, capes, or miniature props. Whether you plan to use it as a standalone decoration or part of a larger Halloween display, this free pattern ensures a professional-looking and customizable finished product.
Before starting the Amigurumi Bone-Chilling Skeleton – FREE Crochet Pattern, gather all necessary materials to streamline your project. You will need small amounts of yarn, primarily white or off-white for the bones, and optional black or gray for details like eyes, mouth, or clothing accessories.
A small crochet hook is recommended, usually smaller than what the yarn label suggests, to create tight stitches that prevent stuffing from showing. A 3.0 mm or 3.5 mm hook works well for worsted-weight yarn.
Additional essential tools include a yarn needle for sewing parts together, stitch markers for tracking rounds, and polyester fiberfill stuffing to shape the skeleton. Safety eyes or embroidery thread can be used for facial features. Scissors, a measuring tape, and a row counter are also helpful for accuracy.
Optional embellishments include miniature hats, scarves, or accessories to personalize your skeleton. Some crafters add buttons, beads, or fabric accents to enhance the spooky or whimsical character of the skeleton.
Having an organized workspace with good lighting is key for amigurumi projects. Keeping your tools, yarn, and instructions close at hand will make your crochet process smooth and enjoyable.
The first step in creating your Amigurumi Bone-Chilling Skeleton is to crochet the body. Start with a magic ring and work in continuous rounds using single crochet stitches to form the torso. Gradually increase and decrease stitches according to the pattern to shape the body accurately.
Next, create the head, typically worked separately or as an extension of the torso. Pay attention to stitch counts to achieve a round, skull-like shape. Embroider or attach the eyes and mouth before closing the head completely to ensure proper placement.
Arms and legs are usually crocheted as separate tubular pieces. Use increases and decreases to shape the limbs appropriately. Once completed, sew them securely to the torso using matching yarn and a yarn needle. Reinforcing attachment points ensures the skeleton’s durability.
The hands and feet can be formed using small chains or stitched details to represent fingers and toes. These features, though tiny, add character and authenticity to the skeleton design.
Optional extras, like a ribcage detail or tiny spinal embellishments, can be added using embroidery thread or additional crochet stitches. These accents elevate the visual appeal and make the skeleton look more bone-chilling.
Finally, lightly stuff the skeleton with fiberfill to maintain its shape without overfilling, which could distort limbs or joints. Assemble all parts, weave in any loose ends, and make final adjustments for symmetry and posture.
One of the joys of the Amigurumi Bone-Chilling Skeleton – FREE Crochet Pattern is its versatility. While traditional skeletons are white, you can experiment with gray, black, or pastel shades for a creative twist. Bright or multicolored skeletons are fun for quirky decorations or playful gifts.
Size variations are easy by adjusting yarn weight and hook size. Smaller skeletons work as keychains or charms, while larger versions make impressive table decorations or display pieces.
Accessories are another way to personalize your skeleton. Add miniature hats, scarves, tiny weapons, or props like pumpkins for a Halloween theme. These additions create personality and make each skeleton unique.
You can also experiment with texture. Bobble stitches, surface crochet, or layered crochet pieces can create visual interest, such as raised ribs or bone details. Embroidery thread adds fine details like facial expressions or skeletal markings.
Creating a set of skeletons in various poses or colors can make a striking display. For example, you can design a group of dancing skeletons, each with different expressions or accessories, for a lively and festive decoration.
Finally, functional adaptations are possible. Attach a loop for hanging, add magnets for fridge decorations, or turn the skeleton into a bag charm or zipper pull. This combines craft creativity with practicality.
Although the Amigurumi Bone-Chilling Skeleton may look intricate, beginners can succeed by following some helpful tips. Start with basic amigurumi techniques, including single crochet, increases, decreases, and working in rounds.
Use stitch markers to track the start of each round, helping maintain accurate stitch counts. Consistent tension is crucial; too tight stitches make sewing difficult, while loose stitches may reveal stuffing.
Take care when sewing limbs and small parts. Reinforce attachment points with extra stitching to ensure durability, especially if the skeleton is intended as a toy or decoration that will be handled frequently.
Refer to the free pattern regularly to avoid mistakes. Missing an increase or decrease can affect proportions, so double-check your work often.
Patience is key. Amigurumi projects, particularly detailed ones like skeletons, require time and attention to detail. Enjoy the process and celebrate each completed section.
Lastly, don’t hesitate to personalize. The beauty of amigurumi lies in creativity, allowing you to make a skeleton that reflects your style and preferences.
What skill level is needed?
The pattern is suitable for beginners familiar with basic amigurumi stitches, though intermediate skills are helpful for adding details.
What yarn is best?
Cotton or acrylic yarn is ideal. Cotton holds shape well, while acrylic is softer and more forgiving.
Can I use safety eyes?
Yes, safety eyes are recommended for durability, but embroidery works for baby-friendly versions.
How do I make the skeleton stable?
Stuff lightly and sew limbs securely. Reinforce joints with extra stitching if needed.
Can I customize the skeleton?
Absolutely. Change colors, add accessories, or experiment with textures to create unique designs.
Is it suitable as a gift?
Yes, the skeleton is perfect for Halloween, themed gifts, or as a collectible item.
How long does it take to crochet?
Depending on size and complexity, it can take 2–5 hours for a mini skeleton.
Can I make multiple skeletons for decoration?
Yes, creating a set allows for different colors, sizes, or poses, making a festive display.
The Amigurumi Bone-Chilling Skeleton – FREE Crochet Pattern is a fun, creative, and rewarding project suitable for crafters of all levels. From gathering materials and learning essential stitches to assembling and customizing your skeleton, this pattern combines skill-building with playful creativity.
The finished skeleton is a charming decoration, gift, or collectible item, perfect for Halloween or year-round whimsical displays.
Now that you have the tools, instructions, and creative ideas, gather your yarn and hook, and start crocheting your bone-chilling skeleton.
Share your results, offer feedback, and suggest variations to inspire other crochet enthusiasts to explore this spooky yet delightful amigurumi project.


