Crochet Pig In A Granny Square Blanket Pattern


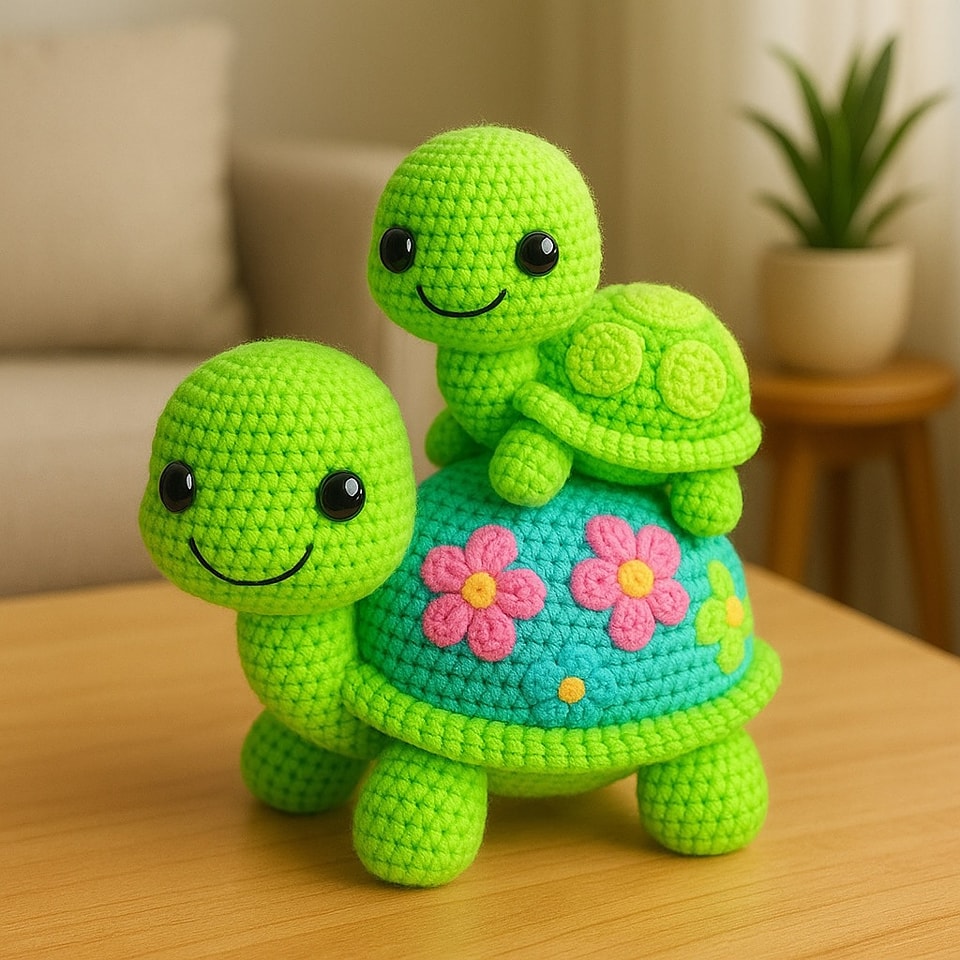
If you are looking for a delightful and fun crochet project, the Amigurumi Turtle Free Pattern is perfect for you. This charming little turtle can be made by beginners and experienced crafters alike.
The Amigurumi Turtle Free Pattern is designed to be versatile and enjoyable. You can customize the colors of your turtle, add accessories, or even make a family of turtles.
One of the greatest advantages of using the Amigurumi Turtle Free Pattern is the affordability and accessibility. All you need are basic crochet materials such as yarn, a crochet hook.
Before starting your Amigurumi Turtle Free Pattern, it is essential to gather all the necessary materials and tools. First, you will need soft yarn in the colors of your choice. Many crafters recommend cotton or acrylic yarn for its durability and softness. Choosing the right colors can make your turtle more appealing and realistic. Additionally, you will need a suitable crochet hook that matches the yarn weight to ensure your stitches are even and tight, which is crucial for shaping the turtle correctly.
Next, you will need stuffing material to give your amigurumi turtle its shape. Polyester fiberfill is a common choice because it is lightweight, soft, and easy to work with. Proper stuffing ensures that your turtle retains its structure and feels cuddly. You should also have safety eyes if you want a more realistic look, or you can embroider eyes using yarn or thread. Choosing between safety eyes and embroidered eyes depends on personal preference and whether the toy is intended for small children.
Other tools include a yarn needle for sewing pieces together and weaving in ends, as well as stitch markers to keep track of your rounds. Some crafters find it helpful to have scissors and a small ruler or tape measure to ensure the pieces are consistent in size. Gathering all these materials before starting will make your Amigurumi Turtle Free Pattern experience smooth and enjoyable, allowing you to focus on creativity rather than searching for tools mid-project.
The process of creating your Amigurumi Turtle Free Pattern starts with mastering basic crochet stitches. Typically, this pattern will use single crochet, increase, and decrease stitches. Begin with the turtle’s shell, which is often made as a separate piece and attached later. Crochet in continuous rounds to create a smooth, rounded shape, and remember to use stitch markers to keep track of your rounds. Proper tension is key to maintaining the shell’s structure.
After completing the shell, the body and head are next. Use the same technique of continuous rounds to shape the turtle’s body. Attach safety eyes or embroider them before closing the head to make it easier to handle. Adding small details like the mouth or patterns on the shell enhances the overall look and brings your amigurumi turtle to life. Carefully follow each step in the free pattern to avoid mistakes and ensure a neat finish.
The legs and tail are typically small and can be made quickly using simple rounds. Stuff them lightly and attach them securely to the body. Using a yarn needle ensures that all pieces are sewn tightly so that the turtle remains durable. Once all parts are attached, review the Amigurumi Turtle Free Pattern instructions to make sure every detail is accurate. This careful assembly guarantees a professional-looking finished product that is both adorable and sturdy.
Customizing your Amigurumi Turtle Free Pattern allows you to express your personal style and creativity. Consider using different colors for the shell and body to create a unique design. You can even add tiny accessories like a bow, scarf, or tiny hat to give your turtle personality. Customization makes your amigurumi turtle a more thoughtful gift or a standout decoration in your home.
Another way to customize your turtle is by experimenting with different yarn textures. For instance, using fluffy yarn for the body can create a soft, cuddly toy, while smooth cotton yarn gives a polished, neat appearance. Changing yarn thickness or hook size slightly can also adjust the size of your turtle, allowing you to create a variety of turtles from the same free pattern. This versatility makes it easy to make multiple turtles in different styles and sizes.
For advanced crafters, you can even add embroidered patterns or shapes on the turtle’s shell. These additional details make your amigurumi turtle more realistic and artistic. Adding tiny beads or sequins can enhance the turtle’s appearance for decorative purposes, but ensure that any small additions are securely attached if the toy is intended for children. Using these tips, your Amigurumi Turtle Free Pattern can become a signature piece that reflects your crafting style.
While working on your Amigurumi Turtle Free Pattern, some mistakes are common but easy to avoid. One frequent issue is uneven stitching, which can distort the turtle’s shape. To prevent this, maintain consistent tension and count your stitches carefully. Using stitch markers can help track rounds and prevent accidental increases or decreases. Properly following the instructions in the free pattern is crucial for achieving the desired shape.
Another mistake is overstuffing or understuffing the turtle. Overstuffing can make seams stretch and distort the body, while understuffing can result in a floppy, misshapen turtle. Light, even stuffing ensures that your amigurumi retains its soft, rounded appearance. Checking the stuffing as you go and adjusting as necessary will help maintain a balanced and proportional toy.
Finally, attaching the pieces incorrectly is another common error. Ensure the legs, head, and tail are symmetrically positioned and sewn tightly. Double-check placement before sewing, and use pins if necessary to visualize the final arrangement. Proper assembly is key to creating a durable and aesthetically pleasing Amigurumi Turtle Free Pattern that will last for years.
Q: Can beginners make this amigurumi turtle?
A: Yes! The Amigurumi Turtle Free Pattern is designed to be beginner-friendly. It uses basic crochet stitches, and step-by-step instructions make it easy to follow.
Q: What yarn is best for this project?
A: Cotton or acrylic yarn works best. Cotton offers a smooth finish, while acrylic is soft and easy to handle. Both types are suitable for the Amigurumi Turtle Free Pattern.
Q: How long does it take to make a turtle?
A: Depending on your experience, it can take 2–6 hours. Beginners may need more time, while experienced crafters can complete it faster.
Q: Can I customize the colors?
A: Absolutely! The Amigurumi Turtle Free Pattern allows full customization. You can mix and match colors for the shell, body, and accessories.
Q: Is this toy safe for children?
A: Yes, if you avoid small detachable parts like beads or securely attach safety eyes. For young children, embroidered eyes are safest.
Q: Can I sell the turtles I make?
A: Yes, many crafters sell their handmade amigurumi turtles. Ensure you follow the pattern’s terms, especially if it is a free pattern for personal use.
In conclusion, the Amigurumi Turtle Free Pattern is a delightful and accessible project for crafters of all levels. It allows you to create a charming toy while learning or refining basic crochet skills.
Remember to take your time with stitching, stuffing, and assembly to ensure a professional finish. We hope this guide has inspired you to try the Amigurumi Turtle Free Pattern.
Share your thoughts, leave an honest opinion, and let us know any suggestions to improve future patterns. Your feedback helps the crafting community grow and thrive.


