Crochet Pig In A Granny Square Blanket Pattern


Creating a Crochet Pig Amigurumi – Tutorial can be a delightful experience for crafters of all skill levels. Whether you are an experienced crocheter or a beginner.
This project not only strengthens your crochet skills but also enhances your creativity by allowing you to customize your pig with different colors, accessories, and expressions.
This guide will also cover important tips for finishing and stuffing your Crochet Pig Amigurumi, ensuring your creation has a professional look and maintains its shape over time.
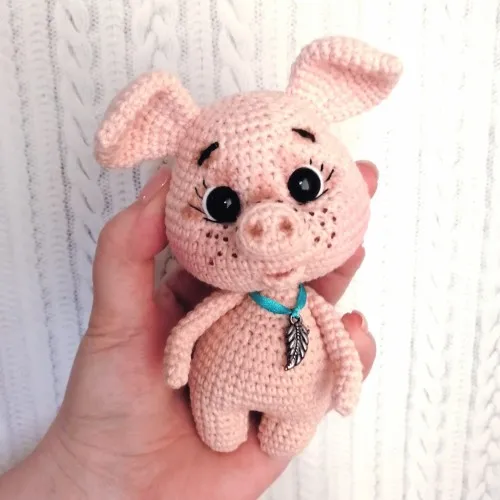
To begin your Crochet Pig Amigurumi – Tutorial, you will need a few essential materials. First, select the yarn that suits your project. Light pink or pastel shades are common choices for a pig, but feel free to get creative with colors. Using soft, durable yarn ensures your amigurumi will be pleasant to touch and long-lasting.
Next, gather the appropriate crochet hooks. The hook size depends on your chosen yarn, but typically a 2.5mm to 3.5mm hook works well for small amigurumi projects. Using the correct hook size will help maintain consistent stitches, giving your pig a neat and professional appearance.
You will also need polyester stuffing to fill your pig and give it its characteristic plump shape. Adequate stuffing is crucial to avoid gaps or loose sections, which could affect the overall look of your amigurumi.
Don’t forget to prepare stitch markers to keep track of rounds and ensure you do not lose count during the process. A yarn needle is essential for sewing parts together, while scissors are needed for cutting threads neatly. Safety eyes or embroidery thread can be used for the pig’s facial features.
Using the right materials and tools is key to achieving the best results in this Crochet Pig Amigurumi – Tutorial. Having everything ready before starting will make the process smoother and more enjoyable.
In addition to the basic tools, consider adding small accessories like ribbons, tiny hats, or bows. These decorations can personalize your amigurumi and make it unique. Accessories also provide an opportunity to practice additional crochet techniques and enhance your creativity.
Finally, ensure you have a comfortable workspace with good lighting. Crocheting can strain your eyes if done in poor light, and a well-organized workspace keeps all materials within reach, making the creation process of your Crochet Pig Amigurumi more efficient and pleasant.
Starting with the body is the foundation of your Crochet Pig Amigurumi – Tutorial. Begin by creating a magic ring, which allows you to start crocheting in the round without leaving a hole at the center. This technique is essential for most amigurumi patterns and ensures a clean, professional look.
Work in single crochet stitches, increasing gradually to form a spherical shape for the pig’s body. Increases are usually spaced evenly within each round to maintain symmetry. This part requires patience and attention to detail to keep the rounds even.
Once you reach the desired width, continue crocheting without increasing to build the body’s height. Consistent tension is important here; uneven tension can distort the shape and make assembling the parts more challenging later on.
Next, begin decreasing stitches gradually to close the body. Using stitch markers can help track decreases accurately. It’s essential to stuff the body firmly but not excessively, as overstuffing may stretch the stitches and affect the pig’s shape.
After completing the body, ensure all yarn ends are secured neatly. This prevents unraveling and gives a polished look. Proper finishing is one of the key steps in creating a high-quality Crochet Pig Amigurumi.
Finally, review the body to ensure it is smooth and rounded. Minor adjustments can be made by redistributing the stuffing or lightly shaping with your hands. A well-shaped body provides a sturdy base for attaching other parts like the head, limbs, and tail.
The head is another critical part of your Crochet Pig Amigurumi – Tutorial, and attention to detail will bring your pig to life. Start by crocheting a smaller sphere for the head using the same magic ring and single crochet technique as the body. Increases and decreases help shape the head proportionally.
The ears can be created by crocheting small triangles or semi-circular shapes, which are then sewn onto the head. Position them symmetrically for a balanced appearance. Experimenting with different ear sizes can give your pig a distinct personality.
The snout is an essential facial feature. It is usually made separately as a small oval or cylinder and sewn onto the front of the head. Use embroidery or yarn to create nostrils, adding more realism and charm.
Eyes can be made using safety eyes, beads, or embroidery thread. Placement is crucial to achieving an expressive and cute look. Ensure the eyes are even and secure them properly for safety, especially if the amigurumi is intended for children.
Adding a small smile or mouth using embroidery thread enhances the pig’s friendly appearance. Simple stitches can make a significant difference in the character’s overall expression, making your Crochet Pig Amigurumi more engaging.
Once the head and facial features are complete, sew the head securely onto the body. Check alignment and proportions to ensure the pig looks natural. Proper attachment ensures durability and a polished final appearance.
The limbs and tail bring movement and personality to your Crochet Pig Amigurumi – Tutorial. Start with the legs, crocheting small cylinders or rounded shapes for each limb. Using the same yarn color as the body ensures consistency and cohesion.
Attach the legs evenly to the body, using a yarn needle and strong thread. Proper placement ensures that your pig can sit or stand as desired. You can also adjust the leg shape slightly to create different poses.
The arms are typically smaller and can be slightly curved. Crochet them separately and sew them securely to the upper part of the body. Attention to symmetry ensures a balanced and aesthetically pleasing look.
The tail is one of the most recognizable features of a pig. It can be made using a simple chain stitch, coiled to create a curly tail. Attach it to the back of the body, positioning it slightly above the bottom to match natural proportions.
Once all parts are attached, make any final adjustments. Redistribute stuffing if necessary and check for any loose stitches. A well-assembled Crochet Pig Amigurumi should feel balanced, cute, and ready for display or gifting.
Finishing touches, like adding blush to the cheeks using fabric paint or soft yarn, can make your pig even more adorable. Personalizing these small details enhances the overall charm and uniqueness of your amigurumi.
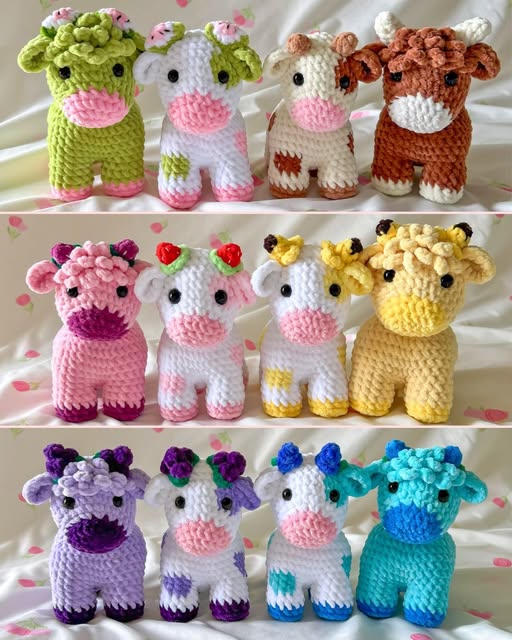
Customizing your Crochet Pig Amigurumi – Tutorial allows you to create a unique and personal toy. You can experiment with different yarn colors, adding stripes, spots, or even tiny accessories like scarves, hats, or bows to give your pig character.
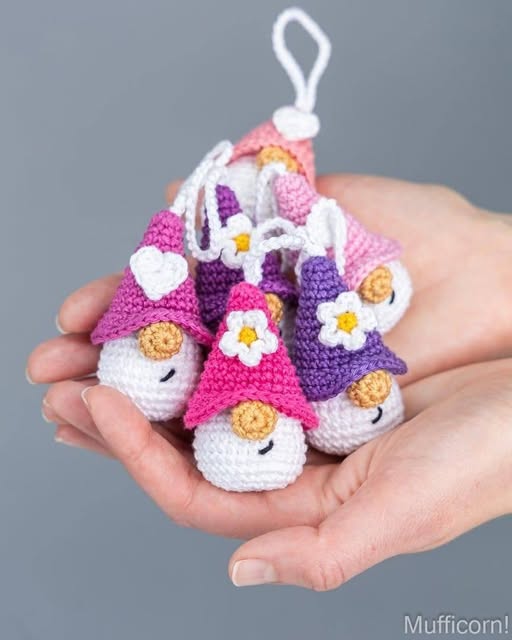
Consider making a set of pigs in different sizes. Small pigs can be used as keychains, while larger ones are perfect for cuddling or display. This flexibility makes amigurumi a versatile craft suitable for various purposes.
Using different types of yarn textures can also add uniqueness. For instance, fuzzy or fluffy yarn gives a soft and plush appearance, while smooth yarn provides clean lines and a polished look. Each choice impacts the final aesthetic of your Crochet Pig Amigurumi.
Proper care is important to maintain your amigurumi. Hand wash gently with mild soap and air dry to preserve shape and softness. Avoid harsh detergents or wringing, as this can damage stitches and distort the figure.
Storage is another key factor. Keep your amigurumi away from direct sunlight and moisture to prevent fading or mildew. A well-maintained crochet pig will last for years, becoming a cherished keepsake.
Lastly, don’t be afraid to innovate. Mix patterns, add textures, or combine techniques to create a pig amigurumi that is entirely your own. Personalization makes your craft more enjoyable and the end product more memorable.
Q: What skill level is needed for a Crochet Pig Amigurumi?
A: This project is suitable for beginners with basic crochet knowledge, but intermediate skills can help in shaping and finishing details more professionally.
Q: Can I use any type of yarn?
A: Yes, but soft, medium-weight yarns like acrylic or cotton are recommended for durability and a pleasant texture.
Q: How do I keep the amigurumi from losing shape?
A: Proper stuffing and careful attachment of parts help maintain shape. Avoid overstuffing, which can stretch stitches.
Q: Are safety eyes necessary?
A: No, but they are recommended for a professional look. Embroidered eyes are safe for children and give a handmade touch.
Q: Can I make the pig in different sizes?
A: Absolutely! Adjusting yarn thickness and hook size can create pigs from tiny keychains to large plush toys.
Q: How do I wash my Crochet Pig Amigurumi?
A: Hand wash gently with mild soap and air dry. Avoid wringing or using hot water to prevent damage.
In this Crochet Pig Amigurumi – Tutorial, we explored every step of creating a charming pig, from gathering materials to assembling limbs and adding finishing touches.
By following this guide, you now know how to crochet a complete pig amigurumi, customize its features, and care for your creation.
This tutorial combines skill-building with creativity, allowing anyone to craft an adorable toy that can be cherished for years. We invite you to share your experiences, leave a sincere opinion, and suggest ways to make this tutorial even better. Happy crocheting!

