Crochet Pig In A Granny Square Blanket Pattern


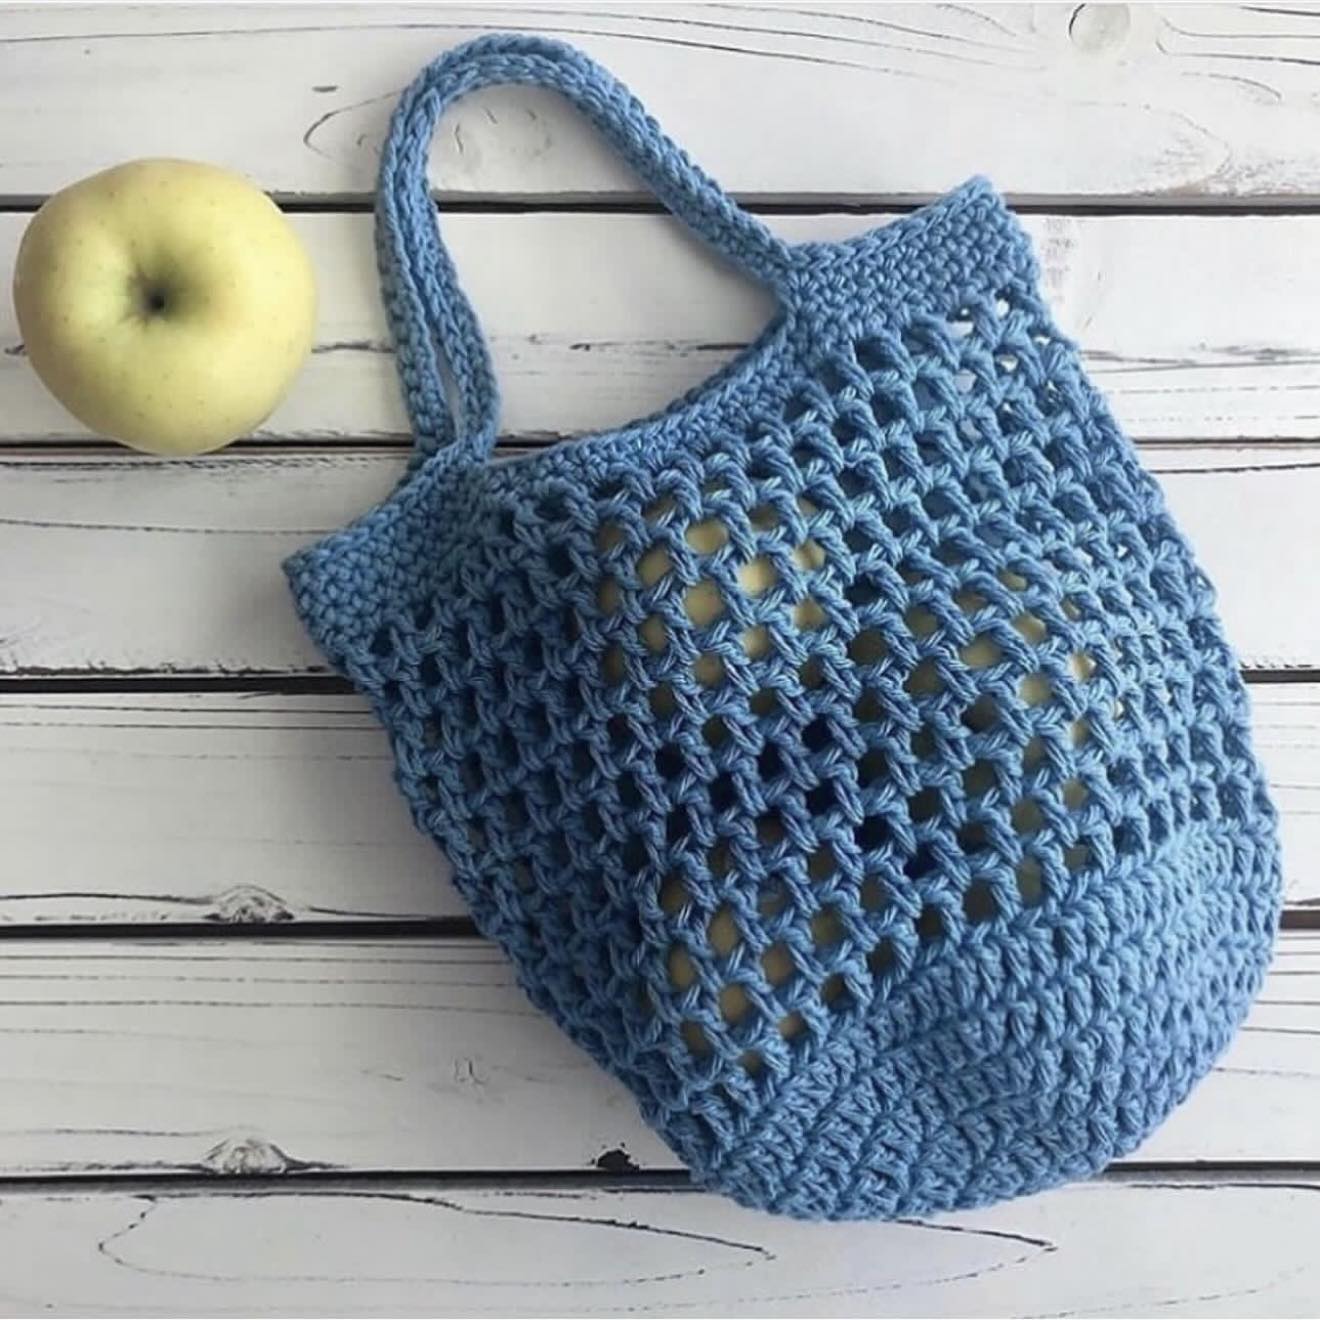
Creating your own Apple Sack – Crochet Pattern is a fun and practical project that combines creativity with functionality. This crochet pattern allows you to make a charming and eco-friendly bag that is perfect for carrying apples or other small produce.
Whether you are an experienced crocheter or a beginner, this guide will take you step by step through the process of making a durable, stylish, and functional apple sack that can be reused for years.
The beauty of the Apple Sack – Crochet Pattern lies in its simplicity and versatility. By choosing different yarn colors and textures, you can personalize your sack to match your kitchen, gift style, or outdoor trips.
Crocheting your own bag is not only rewarding but also promotes sustainability by reducing the need for disposable plastic bags. With a few basic stitches and easy shaping techniques, you can create a project that is both practical and visually appealing.
In this Apple Sack – Crochet Pattern, you will learn how to crochet the main body, form a secure base, add handles, and finish with neat edges. Each section is explained clearly to ensure success even for beginners. Additionally, the tutorial provides tips for adjusting the size, choosing the right yarn, and adding decorative touches that make your apple sack uniquely yours.
To get started with the Apple Sack – Crochet Pattern, gather all necessary materials before beginning. This ensures a smooth workflow and helps you stay organized.
You will need medium-weight cotton yarn for durability and easy washing. Cotton is ideal because it holds its shape and can safely carry fruit without stretching excessively. Choose colors that complement your personal style or kitchen décor.
A crochet hook that matches your yarn label is essential for consistent stitches and tension. For most medium-weight yarns, a 4.0 to 5.0 mm hook works well.
A yarn needle is useful for weaving in ends and attaching handles securely. This tool ensures that your apple sack is sturdy and long-lasting.
Scissors are needed for trimming yarn ends and cutting any additional pieces, while stitch markers can help you keep track of rounds and stitches, especially when forming the sack’s base.
Measuring tape or ruler is handy to ensure your apple sack reaches the desired size and dimensions. You can easily adjust the number of stitches or rounds to make a larger or smaller bag.
The first step in the Apple Sack – Crochet Pattern is to create the main body of the sack. Start with a magic ring or a small chain circle as the foundation.
Crochet in rounds, working single or double crochet stitches depending on your chosen design. Increase stitches evenly to form a circular base that will give the sack stability.
Continue crocheting in the round until the base reaches your desired diameter. Make sure your increases are symmetrical to keep the base flat and even.
Once the base is complete, stop increasing and crochet straight in rounds to build the height of the sack. Maintaining consistent stitch tension is important to ensure the sides are straight and uniform.
You can incorporate simple decorative patterns or stripes as you crochet the sides to add a personal touch. Alternating colors every few rounds creates a visually appealing design.
Finish the main body at the height you prefer for your apple sack. It should be tall enough to hold apples comfortably without tipping over easily.
To make the most of your Apple Sack – Crochet Pattern, keep these helpful tips and customization ideas in mind. A few small adjustments can personalize your project and improve your overall results.
Maintain even tension throughout the project. Loose stitches may result in a saggy sack, while overly tight stitches can be hard to work with. Practice a few rows if needed before starting the actual sack.
If you’re a beginner, break the pattern into sections and take your time. Completing one part at a time helps avoid feeling overwhelmed and ensures each section is done neatly.
Next, focus on handles and practical features in the Apple Sack – Crochet Pattern. Handles make your bag easy to carry and add aesthetic charm.
Measure and mark where the handles will attach. Crocheting directly onto the sack body or sewing separate strips ensures sturdy attachment.
Crochet handles using rows of single or double crochet, depending on your desired thickness and strength. Reinforce them with extra stitches if needed.
Attach the handles to the bag securely using a yarn needle, ensuring that the stitches are tight and even to prevent stretching under weight.
You can also add decorative elements like tassels or loops near the handles to enhance the bag’s visual appeal while maintaining functionality.
Finally, test the handles by gently lifting the sack to ensure they are secure. Adjust if necessary before weaving in all yarn ends for a polished finish.
Completing your Apple Sack – Crochet Pattern involves adding finishing touches and any desired personalization. This step ensures that your sack is both beautiful and practical.
Weave in all loose yarn ends neatly using a yarn needle to give the bag a professional appearance. Trim any excess yarn carefully.
Blocking the bag lightly helps to even out stitches and shape the sack correctly. This step can make a noticeable difference in the final look of your apple sack.
You may add embellishments such as small crocheted flowers, initials, or color accents to personalize your bag. This makes it a perfect gift or keepsake.
Ensure that the bag is clean and dry before first use. Cotton yarn can be washed gently, and pre-washing prevents shrinkage after the first use.
Your handmade apple sack is now ready for use. Enjoy carrying fresh fruit or other small items in a stylish and eco-friendly way, showcasing your creativity and crochet skills.
1. What type of yarn should I use for an apple sack?
Medium-weight cotton yarn is ideal because it is durable, washable, and holds the shape needed to carry fruit.
2. Can beginners follow this crochet pattern?
Yes, this Apple Sack – Crochet Pattern is designed for beginners with step-by-step instructions that make it easy to complete.
3. How do I adjust the size of the apple sack?
Increase or decrease the number of stitches and rounds in the base and body of the bag to achieve your desired size.
4. Can I make multiple colors or patterns?
Absolutely. Alternate colors every few rounds or add stripes to customize your apple sack’s design.
5. Are handles necessary?
Handles are recommended for convenience and aesthetics, but you can also create a small bag without them if desired.
6. How should I care for my crochet apple sack?
Hand wash in cold water with mild soap and lay flat to dry. Cotton yarn is durable and maintains its shape when washed gently.
7. Can this bag carry other items besides apples?
Yes, the apple sack is versatile and can carry any small produce, gifts, or lightweight items around the house or for shopping.
Creating your own Apple Sack – Crochet Pattern allows you to craft a functional, stylish, and eco-friendly bag from scratch. You’ve learned how to crochet the body, form a strong base, attach handles, and finish with neat edges and personal touches.
This project is both enjoyable and practical, providing a sense of accomplishment and creativity. Share your results, ideas, and experiences with others to inspire them, and enjoy the satisfaction of a handmade bag that’s perfect for everyday use.


