Crochet Pig In A Granny Square Blanket Pattern


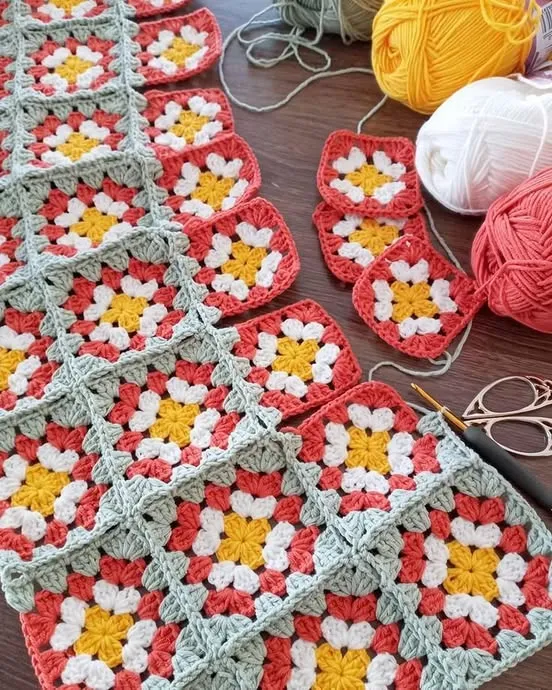
The Classic Granny Square is one of the most iconic crochet motifs, loved by beginners and experts alike. Known for its versatility and timeless charm, this square pattern has been used for generations to create blankets, bags, clothes, and home décor.
The beauty of the Classic Granny Square lies in its simplicity and endless color possibilities. Whether you prefer bright combinations or soft pastel tones, this traditional pattern allows you to explore creativity while practicing essential crochet skills.
Learning how to make a Classic Granny Square is an excellent way to start your crochet journey. It teaches you basic stitches such as chains, double crochets, and slip stitches, which are the foundation of most crochet projects.
The pattern is simple to memorize and can be worked on anywhere, making it perfect for portable crafting. Many crocheters find the rhythmic repetition relaxing and rewarding, especially when they see a collection of small squares transform into a larger, beautiful piece.
In addition to its aesthetic appeal, the Classic Granny Square represents sustainability and craftsmanship. By using leftover yarn, crafters can create unique, colorful designs while minimizing waste. Each square can tell a story—different colors may represent memories, moods, or seasons. This combination of practicality and creativity has made the Classic Granny Square an enduring favorite in the crochet community for decades.
To master the Classic Granny Square, it’s essential to understand its structure. It is usually made in rounds, starting from the center and expanding outward. Each round alternates between clusters of stitches and chain spaces, creating the recognizable openwork pattern. Typically, a square begins with a small loop formed by chain stitches, which serves as the foundation for subsequent rounds.
The first round usually consists of four sets of double crochet clusters separated by chain spaces, forming the corners. As you continue to work in rounds, these corners are expanded, and new clusters are added along each side, allowing the square to grow symmetrically. The balance between stitch clusters and chain spaces gives the Classic Granny Square its characteristic look and flexibility.
A critical aspect of achieving a perfect square is maintaining even tension throughout the work. Uneven tension can cause the square to twist or curl, affecting its final appearance. Therefore, consistent hand movement and attention to stitch height are vital. Using the correct hook size for your yarn weight also ensures that your Classic Granny Square maintains its intended size and shape.
Color changes play a big role in defining the final appearance of your square. Many crocheters choose to switch yarn colors after each round to create vibrant designs. When changing colors, it’s best to do so at the start of a new round and to weave in ends carefully for a neat finish. The Classic Granny Square offers unlimited color possibilities, allowing you to experiment freely without following strict patterns.
Lastly, blocking your finished square can make a significant difference. This process involves lightly wetting or steaming the square and then shaping it to its correct dimensions before letting it dry. Blocking helps even out the stitches and gives your Classic Granny Square a professional finish, especially if you plan to join multiple squares together.
The Classic Granny Square is one of the most adaptable crochet patterns ever created. It can be used to make almost anything you can imagine, from cozy blankets to trendy fashion items. One of the most traditional applications is in making afghans or throws. Joining multiple squares in a coordinated or random color scheme creates a visually stunning result that adds warmth and character to any home.
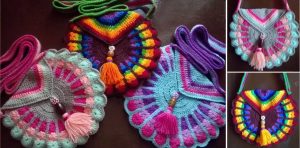
Beyond blankets, Classic Granny Squares are perfect for accessories. You can craft stylish tote bags, cushion covers, or even clothing like vests, shawls, and cardigans. Combining different color palettes and square sizes can help you design unique pieces that reflect your personal taste. Many crocheters enjoy mixing modern colors with traditional layouts to give a contemporary twist to this classic pattern.
Home décor is another area where Classic Granny Squares shine. Use them to create table runners, coasters, pillowcases, or even wall hangings. The geometric symmetry of each square adds a handmade aesthetic that complements both rustic and modern interiors. When arranged thoughtfully, the squares can form intricate patterns that look both artistic and inviting.
You can also use the Classic Granny Square as a learning base for more advanced projects. Once you understand the technique, you can modify the pattern to form triangles, hexagons, or circles. These variations expand your creative options, allowing you to experiment with shapes and designs while keeping the same cluster-based principle.
If you want to make your Classic Granny Squares extra special, consider adding embellishments such as embroidered motifs, beads, or fringe. These small details personalize your work and make it stand out. Combining different textures and materials adds depth and sophistication to your finished pieces.
Finally, granny squares are great for community or charity projects. Many crochet groups and crafters join forces to create blankets made from hundreds of squares contributed by different people. Each piece carries the maker’s touch, and together, they form something meaningful and warm, both literally and emotionally.
To crochet a Classic Granny Square, start with your chosen yarn and hook. A medium-weight yarn with a 4mm or 5mm hook is ideal for beginners. Begin with a slip knot and chain four. Join the chain with a slip stitch to form a ring—this is your foundation.
Round one begins with chaining three (which counts as your first double crochet), followed by two more double crochets. Chain two to form a corner, then make three double crochets into the ring. Repeat this sequence twice more, finishing with a chain two and a slip stitch into the top of your starting chain. You should now have four clusters separated by chain spaces.
For round two, slip stitch into the next chain space, chain three, and make two more double crochets. Chain two for the corner, then create three double crochets again in the same space. Move to the next chain space and repeat this process around. This round establishes the foundation for your Classic Granny Square structure.
Each new round follows the same logic: corners always contain two clusters of three double crochets separated by two chains, while sides consist of single clusters separated by one chain. As your square grows, you’ll notice the pattern taking shape beautifully. Keep adding rounds until your square reaches the desired size.
Fasten off the yarn by cutting the end and pulling it through the final loop. Weave in all loose ends using a yarn needle to ensure a neat finish. Once complete, block the square to even out the stitches and prepare it for joining with others.
Repeat these steps as many times as needed to make additional squares. The process is simple, rhythmic, and incredibly rewarding. Soon, you’ll have a collection of beautifully made Classic Granny Squares ready to be joined into your next project.
Consistency is key when creating the Classic Granny Square. Always try to keep your stitches uniform in size and tension. Practice regularly until your hand movement feels natural and steady. Even experienced crocheters refine their technique over time to achieve more precise results.
Another important tip is choosing the right yarn. Cotton and acrylic yarns work best for granny squares, as they hold shape well and are easy to care for. When selecting colors, think about the overall effect you want to achieve—complementary colors create harmony, while contrasting colors add excitement.
If you plan to join multiple Classic Granny Squares, try using the same hook size and yarn brand for all of them. Slight variations can affect the uniformity of the final project. Joining methods also vary—some prefer sewing squares together, while others use crochet join-as-you-go techniques. Both methods can produce beautiful results.
When making large projects, consider planning your color layout in advance. Laying your finished squares on a flat surface helps visualize the final arrangement before joining them. This step ensures color balance and symmetry, giving your finished work a polished appearance.
Regularly check your corners and sides while working. Counting stitches and ensuring each side has the same number of clusters helps maintain a perfect square shape. Small mistakes can accumulate, so paying attention early prevents problems later.
Lastly, enjoy the process. The Classic Granny Square isn’t just about the finished item—it’s about the meditative rhythm of creating, the joy of combining colors, and the satisfaction of seeing something beautiful emerge from your own hands.
1. What is the best yarn for a Classic Granny Square?
Medium-weight cotton or acrylic yarns are ideal because they provide durability and easy handling for both beginners and experts.
2. How big should a Classic Granny Square be?
There’s no fixed size; it depends on your project. Typically, squares range from 4 to 8 inches, but you can make them larger or smaller.
3. Can I use multiple colors in one Classic Granny Square?
Yes! Changing colors between rounds is very common and adds visual interest. Just remember to weave in the ends securely.
4. How do I join multiple Classic Granny Squares?
You can sew them together with a yarn needle or use crochet join-as-you-go methods for a seamless look.
5. Why does my Classic Granny Square curl or twist?
Uneven tension or incorrect stitch counts are common causes. Try blocking your square to flatten it properly.
6. Can I make clothes with Classic Granny Squares?
Absolutely. Many beautiful garments like cardigans, tops, and skirts are made using joined granny squares.
7. How can I make my Classic Granny Square look more professional?
Keep consistent tension, use quality yarn, block your squares, and pay attention to color placement for a clean finish.
The Classic Granny Square remains a beloved staple in the world of crochet for its simplicity, versatility, and timeless charm. From cozy blankets to stylish accessories, this pattern offers limitless creative potential.
With practice, patience, and attention to detail, anyone can master it and enjoy the process of turning yarn into art. We hope this article has inspired you to create your own Classic Granny Squares and explore their many uses.
Share your honest opinions and suggestions below—we’d love to hear your thoughts and see what beautiful creations you come up with!


