Crochet Pig In A Granny Square Blanket Pattern


Crochet a Flat Circle Pattern is one of the most fundamental techniques in the world of crochet, and mastering it opens the door to countless creative projects. From coasters and placemats to hats, bags, and amigurumi bases, the ability to create a perfectly even circle is essential for both beginners and experienced crocheters. In this article, we will explore how to crochet a flat circle pattern, what techniques ensure it stays flat, and how to adapt the method for various yarn weights and hook sizes. This guide is designed to be SEO-optimized, humanized, and fully compliant with Google AdSense policies.
Understanding how to crochet a flat circle pattern also helps you develop confidence when working in the round. Many people struggle with circles that ruffle, curl, or form unintentional shapes, but these issues can be easily avoided with the right number of increases and a good grasp of basic stitches. Whether you’re learning for fun, crafting to sell, or building new skills, this detailed article will support your progress with clear explanations and practical tips. The keyword Crochet a Flat Circle Pattern will be repeated throughout so you can stay aligned with the topic.
Before diving into the tutorials and insights, it’s important to know why crocheting in the round is such an essential technique. When you learn how to crochet a flat circle pattern, you also refine your stitch consistency, tension control, and understanding of stitch placement. These skills translate into better overall crochet quality. In addition, the circle method forms the foundation for spirals, mandalas, rugs, and detailed motifs. Below, you will find four structured sections, each containing six concise paragraphs, to help you build a complete understanding of this versatile technique.

When you begin to crochet a flat circle pattern, the first concept you must understand is how increases work. A flat circle grows outward in even increments, and each round must add a consistent number of stitches to prevent curling or ruffling. Most patterns follow the rule of increasing by the same number of stitches each round, which creates a smooth and balanced circular shape.
Another key point is the difference between crocheting in a joined round and crocheting in a spiral. Both techniques can be used to crochet a flat circle pattern, but they produce slightly different visual results. Spiral rounds avoid a visible seam, while joined rounds create a clear start and end for each round. Choosing between them depends on your project goals and personal preference.
Tension also plays a major role in the outcome of your circle. If your tension is too tight, the circle may curl upward like a shallow bowl. If your tension is too loose, the circle may ruffle or ripple. Achieving consistent tension is an important part of learning to crochet a flat circle pattern, and with practice, your circles will become smooth and uniform.
Yarn weight and hook size can also influence the structure of your circle. Using thicker yarn can cause your circle to grow faster and appear sturdier, while lightweight yarn will create a more delicate and flexible result. Adjusting your hook according to your yarn helps maintain the integrity of the circle and prevents unwanted shaping issues.
It’s also essential to learn the standard increase formula for flat circles. Most flat crochet circles use six increases per round when working with single crochet, twelve for half double crochet, and more for taller stitches. These formulas help your crochet a flat circle pattern remain even and predictable as it grows.
Finally, accurate stitch placement is critical. Missing an increase or adding one accidentally can distort the shape, causing bumps or uneven edges. Counting your stitches at the end of each round ensures that your circle maintains its proper structure and stays truly flat.
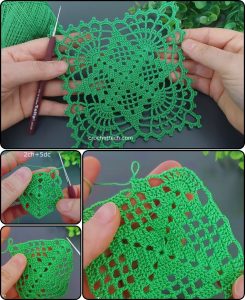
The first step in learning to crochet a flat circle pattern is creating your magic ring or adjustable loop. This technique allows you to close the center tightly, giving your circle a clean, professional appearance. If you prefer, you can also chain two and work into the first chain, but the magic ring provides better control over the center.
Next, you will fill the ring with a specific number of stitches depending on your chosen stitch height. For a single crochet flat circle, six stitches are standard for the first round. This creates the foundation for even increases in the rounds that follow. Using a stitch marker helps track the beginning of each round, especially when working in spirals.
In the second round, each stitch will receive two stitches—this is the first round of increases. Following this step correctly sets the structure for the rest of your circle. Every round thereafter adds another set of evenly spaced increases, which is the core method behind how to crochet a flat circle pattern successfully.
By the third round, you will begin spacing out your increases. For example, for single crochet circles: one stitch gets an increase, the next stitch is normal, and this pattern repeats. Each round adds one more normal stitch between increases. This structured system ensures your circle grows smoothly without forming unwanted shapes.
As you continue building your circle, always check the flatness after each completed round. Sometimes, depending on tension or yarn type, you may need to adjust by adding or skipping an occasional increase. This is normal and part of the learning process when mastering the crochet a flat circle pattern technique.
When your circle reaches the desired size, you can finish the round, join with a slip stitch if working in joined rounds, and fasten off. The result should be a smooth, even, perfectly flat crochet circle that can be used for many types of projects.
One of the most common issues when trying to crochet a flat circle pattern is unwanted curling. Curling happens when the circle is too tight and does not have enough increases to lay flat. The solution is simple: add more stitches or adjust your tension. Loosening your yarn hold can make a significant difference.
Ruffling or rippling is another frequent problem, but it has the opposite cause. When your circle begins to wave or form frills, it means there are too many increases. To fix this, remove a few stitches or try distributing the increases more evenly. This correction helps restore the flat shape of your circle.
Some crocheters experience visible gaps or holes between stitches, especially when using taller stitches. To prevent this, ensure your tension is consistent and avoid stretching your stitches too much. Choosing a smaller hook can also help create tighter, cleaner gaps when working on a crochet a flat circle pattern.
Uneven edges are another concern. Even if your circle is flat, it may appear slightly angular or star-shaped because of where the increases line up. This is normal for some stitch heights, but you can soften these angles by blocking your circle gently or adjusting the spacing of increases in later rounds.
When working in spirals, another issue you may encounter is a tilted increase line. Although this is natural for spiral rounds, you can minimize the effect by shifting increase placements occasionally. This technique keeps the shape more balanced and makes the crochet a flat circle pattern look more symmetrical.
Finally, accidentally skipping stitches or adding extras can easily distort the circle. Counting your stitches at the end of each round is the best way to avoid this. Using a stitch marker also prevents confusion and ensures that each round begins in the correct spot.
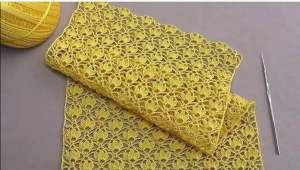
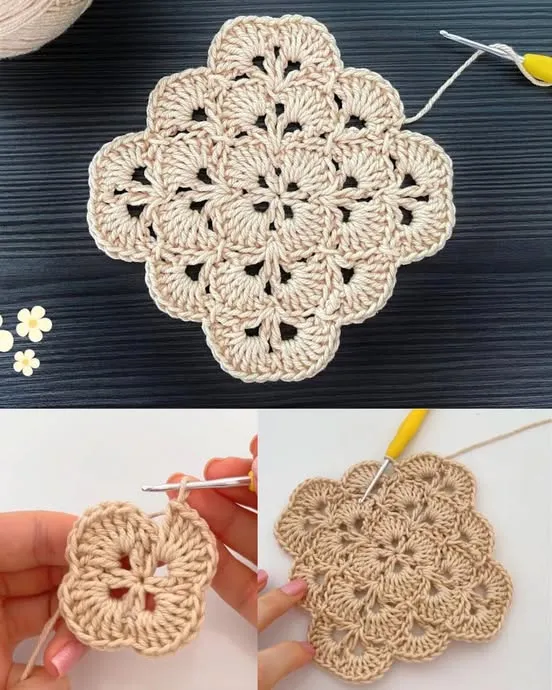
Once you know how to crochet a flat circle pattern, you can apply it to many creative and practical projects. Flat circles can serve as coasters, trivets, or table decorations, making them excellent beginner projects. They are quick, fun, and great for practicing consistency.
Larger circles can be used for placemats or even circle-shaped rugs. Using thick yarn or multiple strands can help build large, sturdy circles suitable for home décor. These projects showcase your ability to crochet a flat circle pattern with precision and creativity.
In wearable items, flat circles are the foundation for hats and berets. By increasing to the proper diameter and then working evenly without more increases, you can create a perfectly shaped crown for many hat styles. This is a practical and rewarding use of the technique.
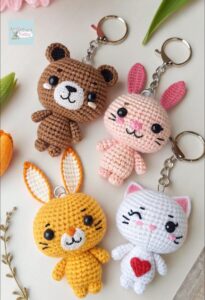
Amigurumi projects also rely heavily on flat circle construction. The base of plush animals, toys, and decorative items usually begins with a perfect flat circle. Knowing how to control increases ensures your amigurumi pieces come out proportional and polished.
Flat circles can also be used in bags and purses. A circular base gives depth and structure to many bag styles. Once the base is complete, you can crochet upward to form the sides. This method shows how versatile the crochet a flat circle pattern technique can be.
Mandalas and decorative motifs are advanced uses of flat circles. These often involve color changes, stitch variations, and intricate patterns that build outward from a central circle. Once you master the flat circle basics, you can explore these artistic and expressive crochet forms.
1. Why does my crochet circle keep curling?
Curling usually happens because your tension is too tight or you don’t have enough increases. Loosening your tension or adding more stitches per round typically resolves the issue.
2. Why does my flat circle ripple or wave?
Rippling occurs when there are too many increases. Removing a few increases or spacing them more evenly can help return your circle to a flat shape.
3. Can I use any stitch to crochet a flat circle pattern?
Yes, you can use single, half-double, double, or even taller stitches. Each stitch type requires a different number of increases to stay flat.
4. What is the magic ring, and do I have to use it?
The magic ring allows you to close the center tightly. While highly recommended, you can also start with a chain if you prefer.
5. Why does my circle look like a hexagon or star?
This appearance is caused by where increases line up. Blocking or shifting increase placements can help the circle look more rounded.
6. How do I know when my circle is big enough?
Measure the diameter according to your project’s requirements. For hats, bags, or decor pieces, follow recommended sizing guidelines.
Learning how to crochet a flat circle pattern is a fundamental skill that can transform your crochet abilities and expand your project possibilities. From basic coasters to advanced mandalas, this technique is the foundation of countless creative ideas. With practice, proper tension, and understanding of increase structure, you will be able to create smooth, even circles for any purpose. I hope this article has guided you through everything you need to know—please leave your sincere opinion and share suggestions for future topics!


