Crochet Pig In A Granny Square Blanket Pattern


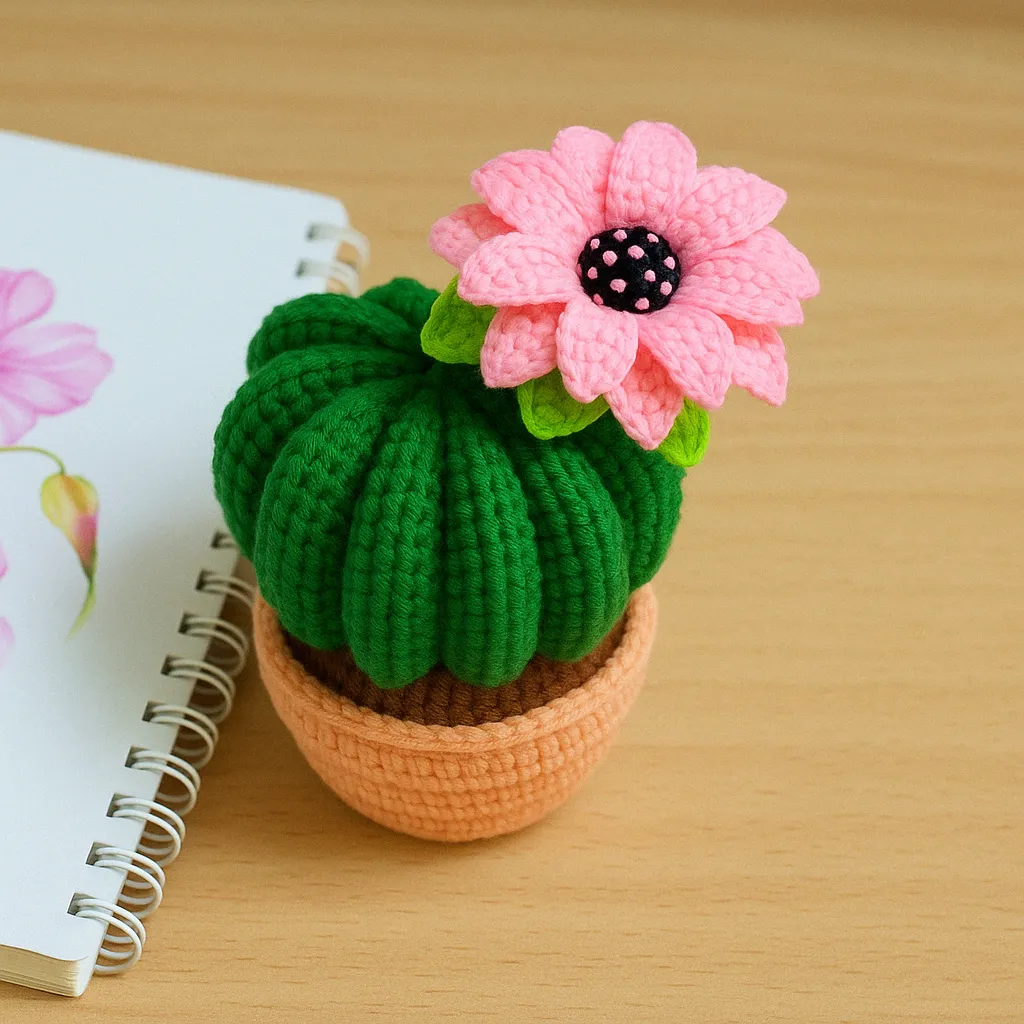
Crochet Cactus in Pot Tutorial Step by Step is a fun and creative project perfect for both beginners and experienced crocheters. Making a crochet cactus in a pot allows you to bring a touch of greenery into your home without worrying about watering or sunlight.
This guide will take you through a step-by-step tutorial, showing exactly how to create a charming crochet cactus that looks realistic and adds a unique decorative element to any room.
By following this tutorial step by step, you will learn how to work in the round, use different stitches, and assemble the pieces to achieve a professional-looking result. Unlike real plants, your crochet cactus will stay perfect indefinitely, making it an ideal gift or personal decoration.
The beauty of this project is that it is highly customizable. You can choose different sizes, colors, and pot styles to match your home decor.
Using this crochet cactus in pot tutorial step by step, you will gain the confidence to experiment with your own designs, creating cacti that are as unique as your creativity.
To start your crochet cactus in pot project, you need a few basic materials. First, choose a soft yarn in green shades for the cactus body and a contrasting color for the pot. You will also need a crochet hook appropriate for your yarn, a yarn needle, scissors, and some stuffing material to give your cactus shape and firmness. Optional accessories like small beads or flowers can add extra charm to your finished piece.
It’s important to select yarn that is easy to work with, especially if you are a beginner. Acrylic yarn is a popular choice because it is widely available and comes in various colors. The right crochet hook size will ensure your stitches are consistent and tight enough to hold the stuffing inside the cactus.
Having all your materials ready before starting makes the process smooth and enjoyable. You will also need basic crochet knowledge, including single crochet, increasing, and decreasing stitches. These fundamental techniques will allow you to follow the crochet cactus in pot tutorial step by step with confidence.
Crocheting the cactus requires patience and attention to detail. Take your time to count stitches and follow each step carefully. By doing so, your finished cactus will have a neat and professional look. This project is a rewarding way to enhance your crocheting skills while creating something visually appealing.
With your materials prepared, you are ready to begin. Following the step-by-step tutorial, you will start by creating the cactus body, then work on the pot, and finally assemble all parts for a beautiful final result.
Start by making a magic ring with your green yarn. Crochet six single crochet stitches into the ring to form the base of your cactus. Pull the ring tight and join with a slip stitch to close the circle. Continue crocheting in the round, increasing evenly in each row to create a stable base for the cactus.
Once the base is complete, work several rounds without increasing to build the height of the cactus. Make sure your stitches are tight enough to hold the stuffing. When the body reaches your desired height, begin decreasing stitches gradually to create a rounded top.
Stuff your cactus with fiberfill as you go to ensure it maintains a firm shape. Make sure the stuffing reaches all corners and edges for a balanced look. Avoid overstuffing, which can stretch the stitches and affect the final appearance.
To add texture, you can crochet small ridges or stripes around the cactus body. These details give your crochet cactus a more realistic and visually appealing design. Following the crochet cactus in pot tutorial step by step, you can create different cactus types, such as tall columns or rounded balls.
Optional decorative elements like tiny flowers or beads can be sewn onto the cactus. These finishing touches personalize your project and make it suitable for gifts or display. You can experiment with various placements and colors to achieve your desired effect.
Finally, secure the top of the cactus by closing the remaining stitches with a yarn needle. This ensures the stuffing stays in place and the body keeps its shape over time. Your cactus body is now ready to be attached to the pot.
Using a contrasting color for the pot, start with a magic ring and crochet six single crochet stitches into it. Join with a slip stitch and continue increasing in rounds until the circle reaches the desired diameter for your pot. The size depends on the cactus body you created earlier.
Once the base of the pot is complete, crochet several rounds without increasing to form the walls of the pot. This creates a cylindrical shape that can hold your cactus securely. Make sure your stitches are tight to prevent the stuffing from showing through.
After reaching the desired height, finish off the pot by weaving in the ends with a yarn needle. You can also add decorative borders or stitches around the top edge for a polished look. These details enhance the overall appearance of your crochet cactus project.
Stuff the bottom lightly with fiberfill or a small piece of foam to create stability. This helps your cactus stand upright and prevents tipping over. Make sure the stuffing is evenly distributed across the pot.
Optionally, you can create a saucer or small base for the pot using the same crochet techniques. This adds realism and a professional touch to your project. Following the crochet cactus in pot tutorial step by step, these details elevate your creation.
Finally, check the fit by placing your cactus body inside the pot. Adjust as needed to ensure it sits snugly and securely. Once satisfied, your crochet cactus is ready for final assembly.
Place the stuffed cactus body into the crochet pot. Make sure it fits snugly and stands upright. You can use a few stitches to secure the cactus to the pot from the inside, ensuring it does not move or tip over.
If you want, add small decorative elements like flowers, beads, or yarn accents to personalize your cactus. These embellishments bring life and character to your finished project. Experiment with placement to find the most visually pleasing design.
Check all ends and seams to make sure they are neatly tucked in. This gives your crochet cactus in pot a professional finish. Use a yarn needle to hide loose ends and secure any loose stitches.
Your crochet cactus is now complete and ready to display. It makes a charming decoration for desks, shelves, or windowsills and requires no maintenance, unlike real plants. The step-by-step tutorial ensures that even beginners can achieve beautiful results.
Consider making multiple cacti in different shapes and sizes for a small indoor collection. This is a fun way to enhance your home decor and practice your crochet skills further. You can experiment with colors and textures to create a visually dynamic display.
Finally, share your creation with friends and family. Handmade crochet cactus in pot projects are thoughtful gifts that show care and creativity. By following this tutorial step by step, you have created something unique, beautiful, and long-lasting.
Q: What yarn is best for making a crochet cactus?
A: Acrylic yarn is ideal because it is easy to work with and comes in many colors. You can also use cotton yarn for a softer feel.
Q: Can beginners make this crochet cactus project?
A: Yes, this crochet cactus in pot tutorial step by step is designed for beginners, with clear instructions and simple stitches.
Q: How do I stuff the cactus without distorting the shape?
A: Stuff gradually as you crochet, making sure all areas are evenly filled but not overstuffed, to maintain the shape.
Q: Can I make different sizes of cactus using this tutorial?
A: Absolutely! Adjust the number of rounds and stitches to create various sizes and types of cacti.
Q: How can I make my cactus more realistic?
A: Add details like small flowers, stripes, or textured ridges to mimic natural cactus patterns.
Q: Is it possible to wash the crochet cactus?
A: Light hand washing with mild detergent is safe. Avoid machine washing to prevent deformation.
In this crochet cactus in pot tutorial step by step, you learned how to create a charming and low-maintenance decorative plant. From preparing materials, crocheting the cactus body, making the pot, to assembling the final piece, each step ensures a beautiful, professional result.
This project enhances your crochet skills while allowing creativity and personalization. Share your handmade cacti with friends or use them to brighten your own space. Leave your honest opinion and suggestions about this tutorial to help improve future projects and inspire fellow crocheters.


