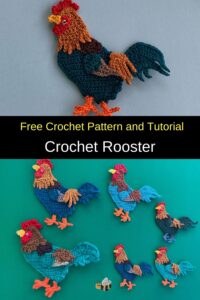
Crochet Pig In A Granny Square Blanket Pattern


The Crochet Camellia Flower Pattern is a charming and versatile project that brings elegance to any crochet collection. This beautiful floral design is perfect for embellishments on garments, accessories, home decor, or as standalone decorative pieces.
With a combination of basic crochet stitches and a few shaping techniques, you can create flowers that are both delicate and visually striking.
Making a Crochet Camellia Flower allows crocheters of all skill levels to explore creativity. Beginners can learn the foundational techniques, while experienced crafters can experiment with color, yarn types, and layering to produce intricate, lifelike blooms.
Each flower can be made in multiple sizes, making it perfect for everything from small brooches to large decorative wall pieces.
The Crochet Camellia Flower Pattern is also ideal for gifts. Handmade flowers carry a personal touch and can be used to embellish hats, bags, scarves, or even wedding decorations. This project is not only rewarding but also helps improve precision, tension control, and stitch consistency in crochet practice.
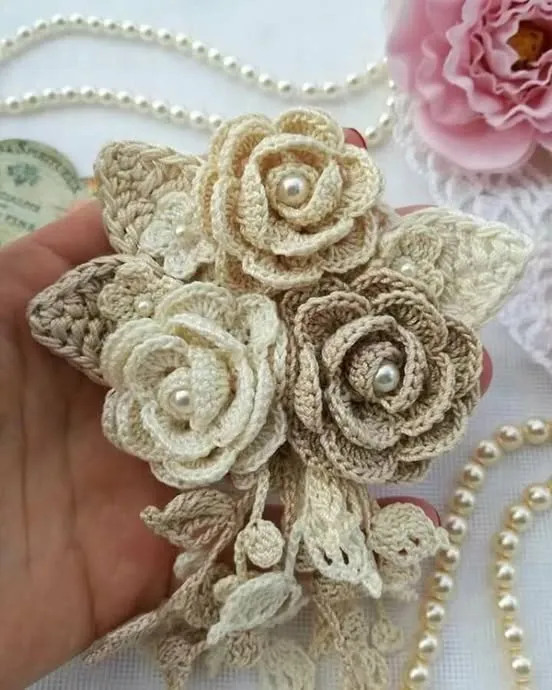
The Crochet Camellia Flower Pattern uses a combination of chain stitches, single crochet, half-double crochet, and slip stitches to create layered petals that radiate outward from a central point. This layering gives the flower a three-dimensional appearance and a realistic, blooming effect.
A key feature of camellia flowers is their rounded, overlapping petals. To achieve this, each petal is crocheted individually or in small groups, then attached together in a circular arrangement. This method ensures that each petal maintains its shape and contributes to the flower’s natural look.
Choosing the right yarn is essential for achieving the desired appearance. Lightweight or medium-weight cotton yarn works best because it holds shape while maintaining softness. You can also experiment with acrylic or silk-blend yarns for different textures and sheen.
Another important aspect is hook selection. Using a slightly smaller hook than recommended on the yarn label produces tighter stitches that help the petals stand firm. Conversely, a larger hook creates looser, softer petals. Both approaches are suitable depending on the final look you want.
Color is a creative tool in the Crochet Camellia Flower Pattern. Traditional camellias are white, pink, or red, but you can explore unconventional colors for decorative or themed projects. Gradient yarns or multiple shades within a single flower can create depth and dimension, enhancing the natural effect.
Finally, understanding basic finishing techniques is crucial. Weaving in ends neatly, blocking the finished petals, and securing the layers carefully ensures that your Crochet Camellia Flower looks polished and professional.
To begin your Crochet Camellia Flower Pattern, gather your materials: cotton yarn, an appropriately sized hook, a yarn needle, and scissors. Choose a smooth yarn that will allow the petals to hold their shape.
Step 1: Start with a magic ring or chain four and slip stitch to form a ring. This will be the center of your flower.
Step 2: Work the first layer of petals by chaining a few stitches, then forming a combination of single and half-double crochets in the ring. Each petal is created individually by working around the central ring.
Step 3: Slip stitch between petals to secure them, then continue around the ring until you have completed the first layer. This layer forms the innermost, small petals of your camellia.
Step 4: For the second layer, attach yarn behind the first layer of petals. Chain a few stitches and work slightly larger petals, ensuring they overlap the previous layer to mimic the natural camellia bloom.
Step 5: Continue adding layers, increasing the size of each petal as you move outward. Use the same stitch pattern for consistency, but adjust the number of stitches per petal to create a gentle curve.
Step 6: Once the flower reaches your desired size, fasten off and weave in all ends. Optionally, you can slightly block the petals to help them open fully and hold their shape.
After completing these steps, you will have a full, layered Crochet Camellia Flower ready for embellishment or display.
To ensure your Crochet Camellia Flower Pattern turns out beautifully, focus on tension control. Consistent tension ensures uniform petal size and a balanced flower.
Use stitch markers if needed to maintain symmetry. This helps keep the petals evenly spaced around the center, especially as the flower grows larger.
Experiment with different hook sizes to see how it affects petal thickness and bloom size. Smaller hooks create more compact flowers, while larger hooks yield fuller, softer blooms.
Consider combining multiple flowers to create bouquets or layered decorative pieces. Attaching them to headbands, brooches, or wall hangings adds versatility to your project.
Adding a small decorative element in the center, like a bead or button, can enhance realism and provide a polished finishing touch.
Finally, choose colors strategically. Light-colored yarns highlight stitch texture, while darker shades create dramatic, bold flowers. Combining shades can simulate natural petal variations for a more realistic effect.
The Crochet Camellia Flower Pattern is versatile and can be used in numerous creative ways. One of the most popular uses is embellishing clothing items. Attach a flower to a hat, sweater, or scarf for a chic, personalized look.
Home decor is another excellent application. Use these flowers to adorn pillows, curtains, or blankets, adding a touch of elegance and charm to your living space.
Crochet camellias are also perfect for accessories. Create hair clips, brooches, or bags decorated with these flowers to make unique, stylish items.
Seasonal decorations are another fun idea. White and pink camellias can be used for spring displays, while red and darker shades are perfect for festive winter décor.
You can also combine multiple flowers to create garlands, wreaths, or table centerpieces. Layering different sizes and colors adds depth and visual interest.
Finally, gifting handmade camellia flowers is a thoughtful option. Their durability and beauty make them memorable keepsakes for friends, family, or special occasions.
Q: Is the Crochet Camellia Flower Pattern suitable for beginners?
A: Yes, it’s beginner-friendly with basic crochet skills. The step-by-step process helps you learn layering and shaping techniques.
Q: What type of yarn is best?
A: Lightweight or medium-weight cotton yarn is ideal for structure and softness. Acrylic blends also work well.
Q: Can I make flowers in different sizes?
A: Absolutely. Adjust the number of stitches per petal and the number of layers to change the flower size.
Q: How do I attach multiple flowers together?
A: Use yarn or a yarn needle to stitch flowers together, overlapping layers slightly for a natural look.
Q: Can I add a center decoration?
A: Yes, beads, buttons, or small crocheted circles make beautiful centers and add detail.
Q: How do I keep petals from curling?
A: Maintain consistent tension and block the finished flower lightly to help petals open evenly.
Q: Are these flowers washable?
A: Yes, gently hand wash and lay flat to dry to maintain shape and texture.
The Crochet Camellia Flower Pattern is a versatile, elegant, and rewarding crochet project. From home decor to accessories and gifts, these flowers add charm and sophistication to any creation.
By following the step-by-step tutorial and tips provided, you can make realistic, layered blooms that showcase your crochet skills.
Now that you’ve learned how to make your own Crochet Camellia Flower, start creating and experimenting with colors, layers, and sizes. Share your experiences, suggestions, and feedback — your honest opinion helps inspire others to try this beautiful crochet project.


