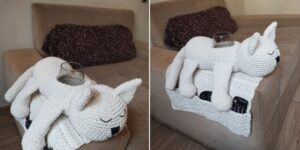
Crochet Pig In A Granny Square Blanket Pattern


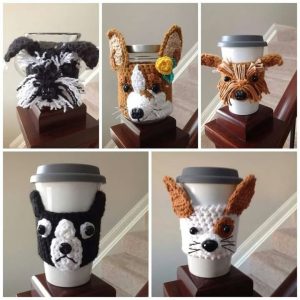
Crochet Cat Coasters – Tutorial is the perfect project for crochet lovers who enjoy combining creativity, functionality, and a touch of cuteness in their crafts.
These adorable coasters shaped like cats are not only practical for protecting your furniture but also add a charming handmade touch to your home décor.
Whether you’re a beginner or an experienced crocheter, making cat coasters is a simple, fun, and rewarding activity that results in beautiful and useful pieces.
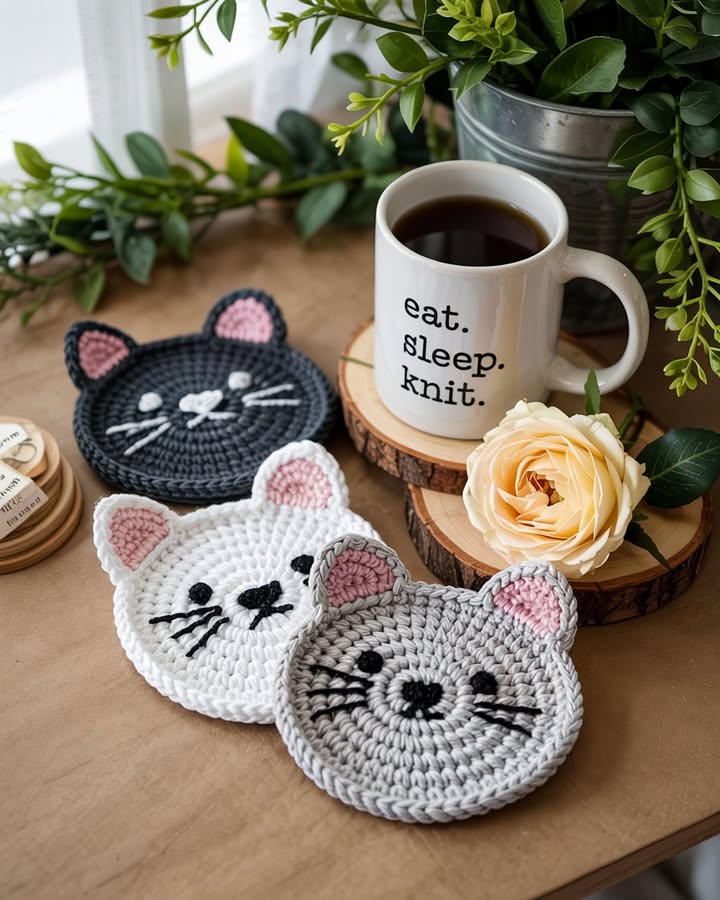
The best part about Crochet Cat Coasters is how customizable they are. You can use different yarn colors to represent various cat breeds, add tiny whiskers, or even crochet little bows and collars for extra personality.
They make perfect handmade gifts for cat lovers, thoughtful housewarming presents, or even items to sell at craft fairs. With just a small amount of yarn and a bit of time, you can create something adorable and functional that everyone will love.
In this Crochet Cat Coasters – Tutorial, we’ll go step-by-step through everything you need to make your own set of cat-shaped coasters. From choosing the best yarn and hook size to crocheting the base, adding details, and finishing your design, this guide covers it all. The pattern is beginner-friendly, but the end result looks impressively polished. Let’s get started and bring some crochet cats to life for your table!
Before you begin, make sure you have all the materials ready. For this Crochet Cat Coasters – Tutorial, you’ll only need a few simple supplies that are easy to find and affordable. Choosing the right materials ensures your coasters are durable, washable, and comfortable to use under cups or mugs.
Start with cotton yarn, as it absorbs moisture and holds its shape well. Cotton yarn is ideal for coasters because it doesn’t melt under heat, unlike some synthetic fibers. Choose colors that resemble your favorite cat breeds—gray, white, black, orange, or even multi-colored for a fun twist. You can also use leftover yarn from other crochet projects.
For your crochet hook, a size between 3.0mm and 4.0mm works perfectly with medium-weight cotton yarn. You’ll also need scissors, a tapestry needle for weaving in the ends, and a stitch marker if you want to keep track of your rounds. Optional items include small safety eyes or black embroidery thread for the cat’s face, and pink yarn for the nose and ears. Having everything ready makes the process smooth and enjoyable.
The great thing about Crochet Cat Coasters – Tutorial projects is that they require minimal tools but offer maximum creativity. With just these materials, you can crochet an entire set of cat coasters in different colors and expressions, adding personality to your home or workspace.
Now that your materials are ready, let’s go through the steps to create your own Crochet Cat Coasters. The process is easy and relaxing, perfect for beginners or anyone who wants a quick, cute crochet project.
Step 1: Start with a Magic Ring.
Begin with a magic ring and crochet six single crochets (sc) into the ring. Pull the ring tight to close the circle. This will be the starting point of your cat coaster base.
Step 2: Create the Circular Base.
Continue crocheting in the round, increasing evenly on each row until the circle measures about 4 inches in diameter. Use single crochet or half-double crochet stitches for a sturdy and flat coaster base. This round shape will form the cat’s face.
Step 3: Make the Ears.
Once the base is finished, crochet two small triangles at the top for ears. To do this, chain two and work one double crochet, one half-double crochet, and one single crochet into the same stitch. Slip stitch to the next stitch to secure. Repeat on the other side to make the second ear.
Step 4: Add Facial Details.
Use black yarn or embroidery thread to stitch on the cat’s eyes, nose, and whiskers. You can create simple straight whiskers or add little embroidered paws if you wish. If you prefer, attach small safety eyes before finishing the coaster.
Step 5: Add a Finishing Touch.
To make your Crochet Cat Coasters more durable, crochet one final border round around the entire piece. You can use a contrasting color to make the edges stand out. Fasten off and weave in all the yarn ends neatly.
Step 6: Block and Finish.
Gently block your coasters by dampening them slightly and shaping them flat. Let them dry completely before use. This ensures your coasters look professional and lay evenly on any surface.
One of the best parts about Crochet Cat Coasters – Tutorial projects is the opportunity to personalize them. You can create entire collections inspired by different cat breeds—like tabbies, calicos, or Siamese cats—just by changing yarn colors and facial expressions.
For a playful touch, try adding a small crocheted tail or even tiny paws on the edge of your coaster. Another idea is to make themed sets, such as “Rainbow Cats,” where each coaster has a different bright color. If you want something seasonal, make Halloween black cat coasters with little orange bows or Christmas cats wearing tiny red scarves.
These Crochet Cat Coasters also make fantastic handmade gifts. Bundle a few together with a ribbon and gift tag, and you have a thoughtful, budget-friendly present for birthdays, holidays, or cat-loving friends. You can even sell them at local craft fairs or online stores as part of your handmade product line.
Finally, remember to experiment with different yarn textures—soft cotton gives a smooth, absorbent finish, while chunky yarn creates plush, decorative coasters. Every variation adds a new level of creativity and charm to your crochet collection.
Creating the perfect Crochet Cat Coasters takes just a few tips and tricks. First, keep your stitches even and consistent throughout the project. Uneven tension can cause your coaster to curl or lose its circular shape.
Second, always check your yarn label for care instructions. Most cotton yarns are machine washable, which is great for coasters that might get spills. If you use mixed-fiber yarns, handwashing might be best to preserve the shape.
Third, consider using a small amount of non-slip fabric glue on the back of the coaster to prevent sliding on smooth tabletops. It’s a simple trick that adds practicality to your project.
Lastly, don’t be afraid to play with color and details. Use contrasting yarns for outlines, or add embroidered patterns like stripes or tiny hearts to make each cat unique. The goal is to have fun and let your creativity shine while following this Crochet Cat Coasters – Tutorial.
1. Are crochet cat coasters beginner-friendly?
Yes! Crochet Cat Coasters – Tutorial patterns are perfect for beginners because they use basic stitches like single crochet and half-double crochet.
2. What is the best yarn for cat coasters?
Cotton yarn is ideal because it’s absorbent, durable, and easy to clean.
3. How can I make the coasters bigger?
Simply add more rounds to your circular base before attaching the ears.
4. Can I wash crochet coasters in the machine?
If made with 100% cotton yarn, yes! Use a gentle cycle and let them air dry flat.
5. Can I sell crochet cat coasters I make?
Absolutely. These are popular handmade items, especially when personalized with different colors and details.
6. How long does one coaster take to make?
On average, each coaster takes about 30–45 minutes, depending on your crochet speed.
The Crochet Cat Coasters – Tutorial offers a fun, relaxing, and creative way to bring your love for cats and crochet together. With just a few simple materials and stitches, you can craft adorable, practical coasters that make any table setting more cheerful.
Each coaster can reflect a different personality or color theme, making them as unique as the cats that inspired them. Try making a full set for your home or as gifts, and enjoy the satisfaction of handmade art.
If you enjoyed this tutorial, feel free to share your honest opinion and suggestions—I’d love to know what you think and see your creations!


