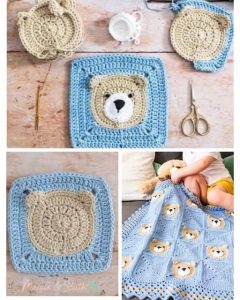
Crochet Pig In A Granny Square Blanket Pattern


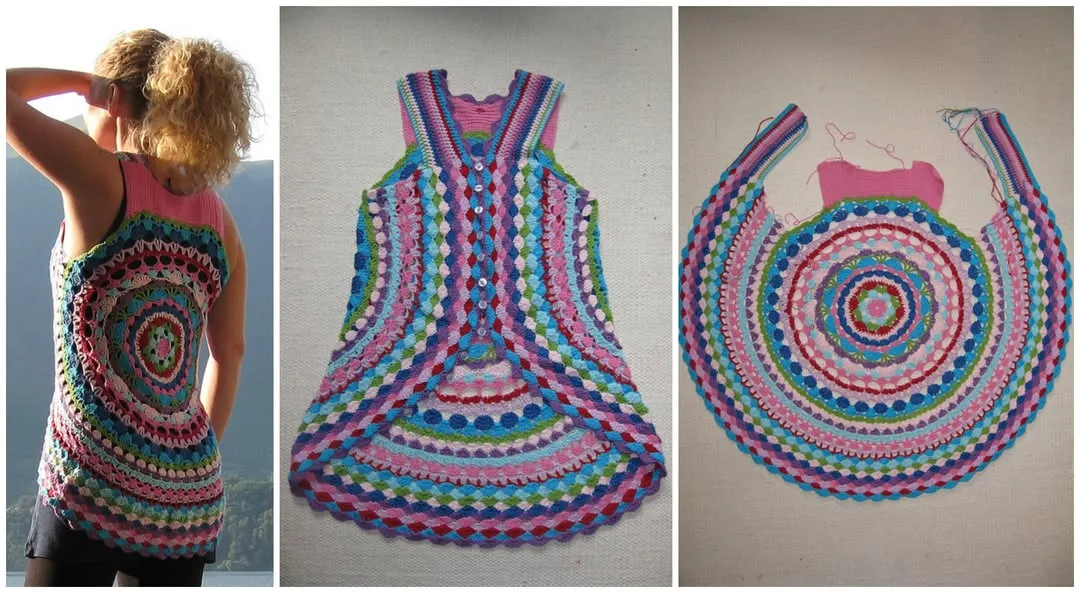
Crochet Flower Power Vest is a delightful and stylish project for anyone looking to add a handmade touch to their wardrobe. This crochet vest combines the charm of floral patterns with the practicality of a lightweight garment, making it perfect for layering over casual outfits or dressing up for special occasions.
Whether you are a beginner or an experienced crocheter, this guide will walk you through the process with clear, step-by-step instructions.
Creating a Flower Power Vest allows you to explore vibrant colors and playful textures. Using crochet flowers as decorative motifs not only enhances the overall look but also adds a personal and creative flair.
The Crochet Flower Power Vest tutorial will teach you how to join individual flowers seamlessly, ensuring your vest is both durable and visually appealing.
Beyond aesthetics, making your own vest offers a sense of accomplishment and personalization. Unlike store-bought vests, a handmade crochet piece reflects your unique style and creativity. By following this tutorial, you’ll gain confidence in your crochet skills while producing a garment that’s both functional and beautiful.
Selecting the correct yarn and hook is crucial for the success of your Crochet Flower Power Vest. Using a yarn that complements your skin tone and desired texture ensures comfort and longevity. Soft cotton yarns are ideal for spring and summer, while wool or acrylic blends provide warmth for cooler seasons.
The size of your crochet hook affects the tightness and drape of the vest. A larger hook will create a looser, airier fabric, whereas a smaller hook produces a denser and more structured piece. It’s important to test a small swatch to see how your yarn and hook combination works together.
Pay attention to the weight of the yarn. Light and medium-weight yarns are generally preferred for vests, as they provide flexibility without adding unnecessary bulk. Choosing the right materials ensures your Flower Power Vest is comfortable and wearable for long periods.
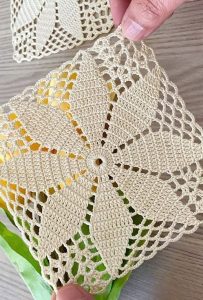
The heart of the Crochet Flower Power Vest – Free Pattern lies in the granny squares, each designed to resemble a cheerful flower in bloom. These motifs are fun to make and easy to memorize, making it an excellent project to work on in pieces.
Each flower square begins with a magic ring or chain loop as the center. Use your first yarn color to crochet a small circle using basic stitches like double crochet or treble crochet, depending on your pattern.
The second round introduces the petal shapes. This is where you can get creative with color. Petals are usually created using clusters of stitches and give the square its signature floral appearance.
Next, you’ll square off the circle by crocheting corners and sides around the petals. Use a neutral or matching background color to create a balanced frame for each motif. The squares should be uniform in size for easier joining later.
The heart of the Crochet Flower Power Vest is the flowers themselves. Each flower is crafted individually and later joined to form the overall vest. Start by creating a small magic ring or chain loop, then work your stitches in rounds to form petals.
Experiment with different stitch patterns to create variety and texture in your flowers. You can use double crochet, half-double crochet, or even puff stitches to add depth and interest. The choice of stitches affects the final look, allowing you to customize the vest according to your taste.
Consistency is key. Ensure each flower is of similar size so that the joining process is smooth and the vest looks cohesive. By practicing the flower pattern before starting the full vest, you can avoid mistakes and save time in the long run.
Once your flowers are ready, it’s time to assemble the Crochet Flower Power Vest. Lay out your flowers in a pattern that pleases you. You can choose symmetrical arrangements or a more random, organic layout.
Joining methods vary depending on preference. You can use slip stitches, whip stitches, or crochet them together directly. Make sure your joins are secure but not too tight, allowing the vest to maintain flexibility and comfort.
Assembling the vest requires patience and attention to detail. Check the alignment frequently to avoid uneven spacing. Once completed, you’ll have a beautiful floral garment that is both charming and wearable.
Finishing touches bring your Flower Power Vest to life. Add edging around the neckline, armholes, and bottom hem to give a polished and professional look. Simple single crochet or scalloped edges work beautifully.
Consider embellishments such as buttons, beads, or small crocheted leaves to enhance the floral design. These details elevate the vest from a simple garment to a unique statement piece.
Finally, gently block your vest to even out the stitches and improve the overall drape. Blocking ensures the flowers lay flat and the vest maintains its intended shape, giving it a clean, finished appearance.
A Crochet Flower Power Vest is versatile and can be styled in multiple ways. Pair it with a plain t-shirt and jeans for a casual look, or wear it over a dress to add a touch of bohemian charm.
Layering is key. The vest works well over long-sleeve tops during cooler months or light blouses in warmer seasons. Mixing textures and colors adds depth to your outfit and showcases the intricate floral crochet design.
Accessorize thoughtfully. Simple jewelry and neutral shoes allow the vest to remain the focal point of your ensemble. By experimenting with different combinations, you can make the vest suitable for everyday wear or special occasions.
Q: Can beginners make the Crochet Flower Power Vest?
A: Yes, this tutorial is designed to guide beginners through each step, from creating flowers to assembling the vest. Basic knowledge of crochet stitches is helpful but not mandatory.
Q: What yarn is best for this vest?
A: Soft cotton yarn is ideal for summer wear, while wool or acrylic blends are better for cooler weather. Choose yarn that feels comfortable against the skin.
Q: How long does it take to complete the vest?
A: Depending on skill level and available time, it may take several days to a few weeks. Creating the flowers is the most time-consuming part.
Q: Can I customize the flower colors?
A: Absolutely! One of the best features of this vest is the ability to mix and match colors to reflect your personal style.
Q: How do I wash the vest?
A: Hand wash in cold water and lay flat to dry. Avoid wringing or twisting to maintain the shape of the flowers.
Q: Can I adjust the size of the vest?
A: Yes, by adding or reducing the number of flowers, you can customize the vest to fit any size.
Making a Crochet Flower Power Vest is a rewarding project that combines creativity, patience, and skill. By following this step-by-step tutorial, you’ve learned how to select the right yarn, create beautiful crochet flowers, assemble them into a wearable vest, and add finishing touches to perfect your garment.
This project not only results in a stunning handmade piece but also allows you to showcase your personal style and creativity. Share your results, leave honest feedback, and offer suggestions to help others enjoy this fun and fulfilling crochet project.


