Crochet Pig In A Granny Square Blanket Pattern


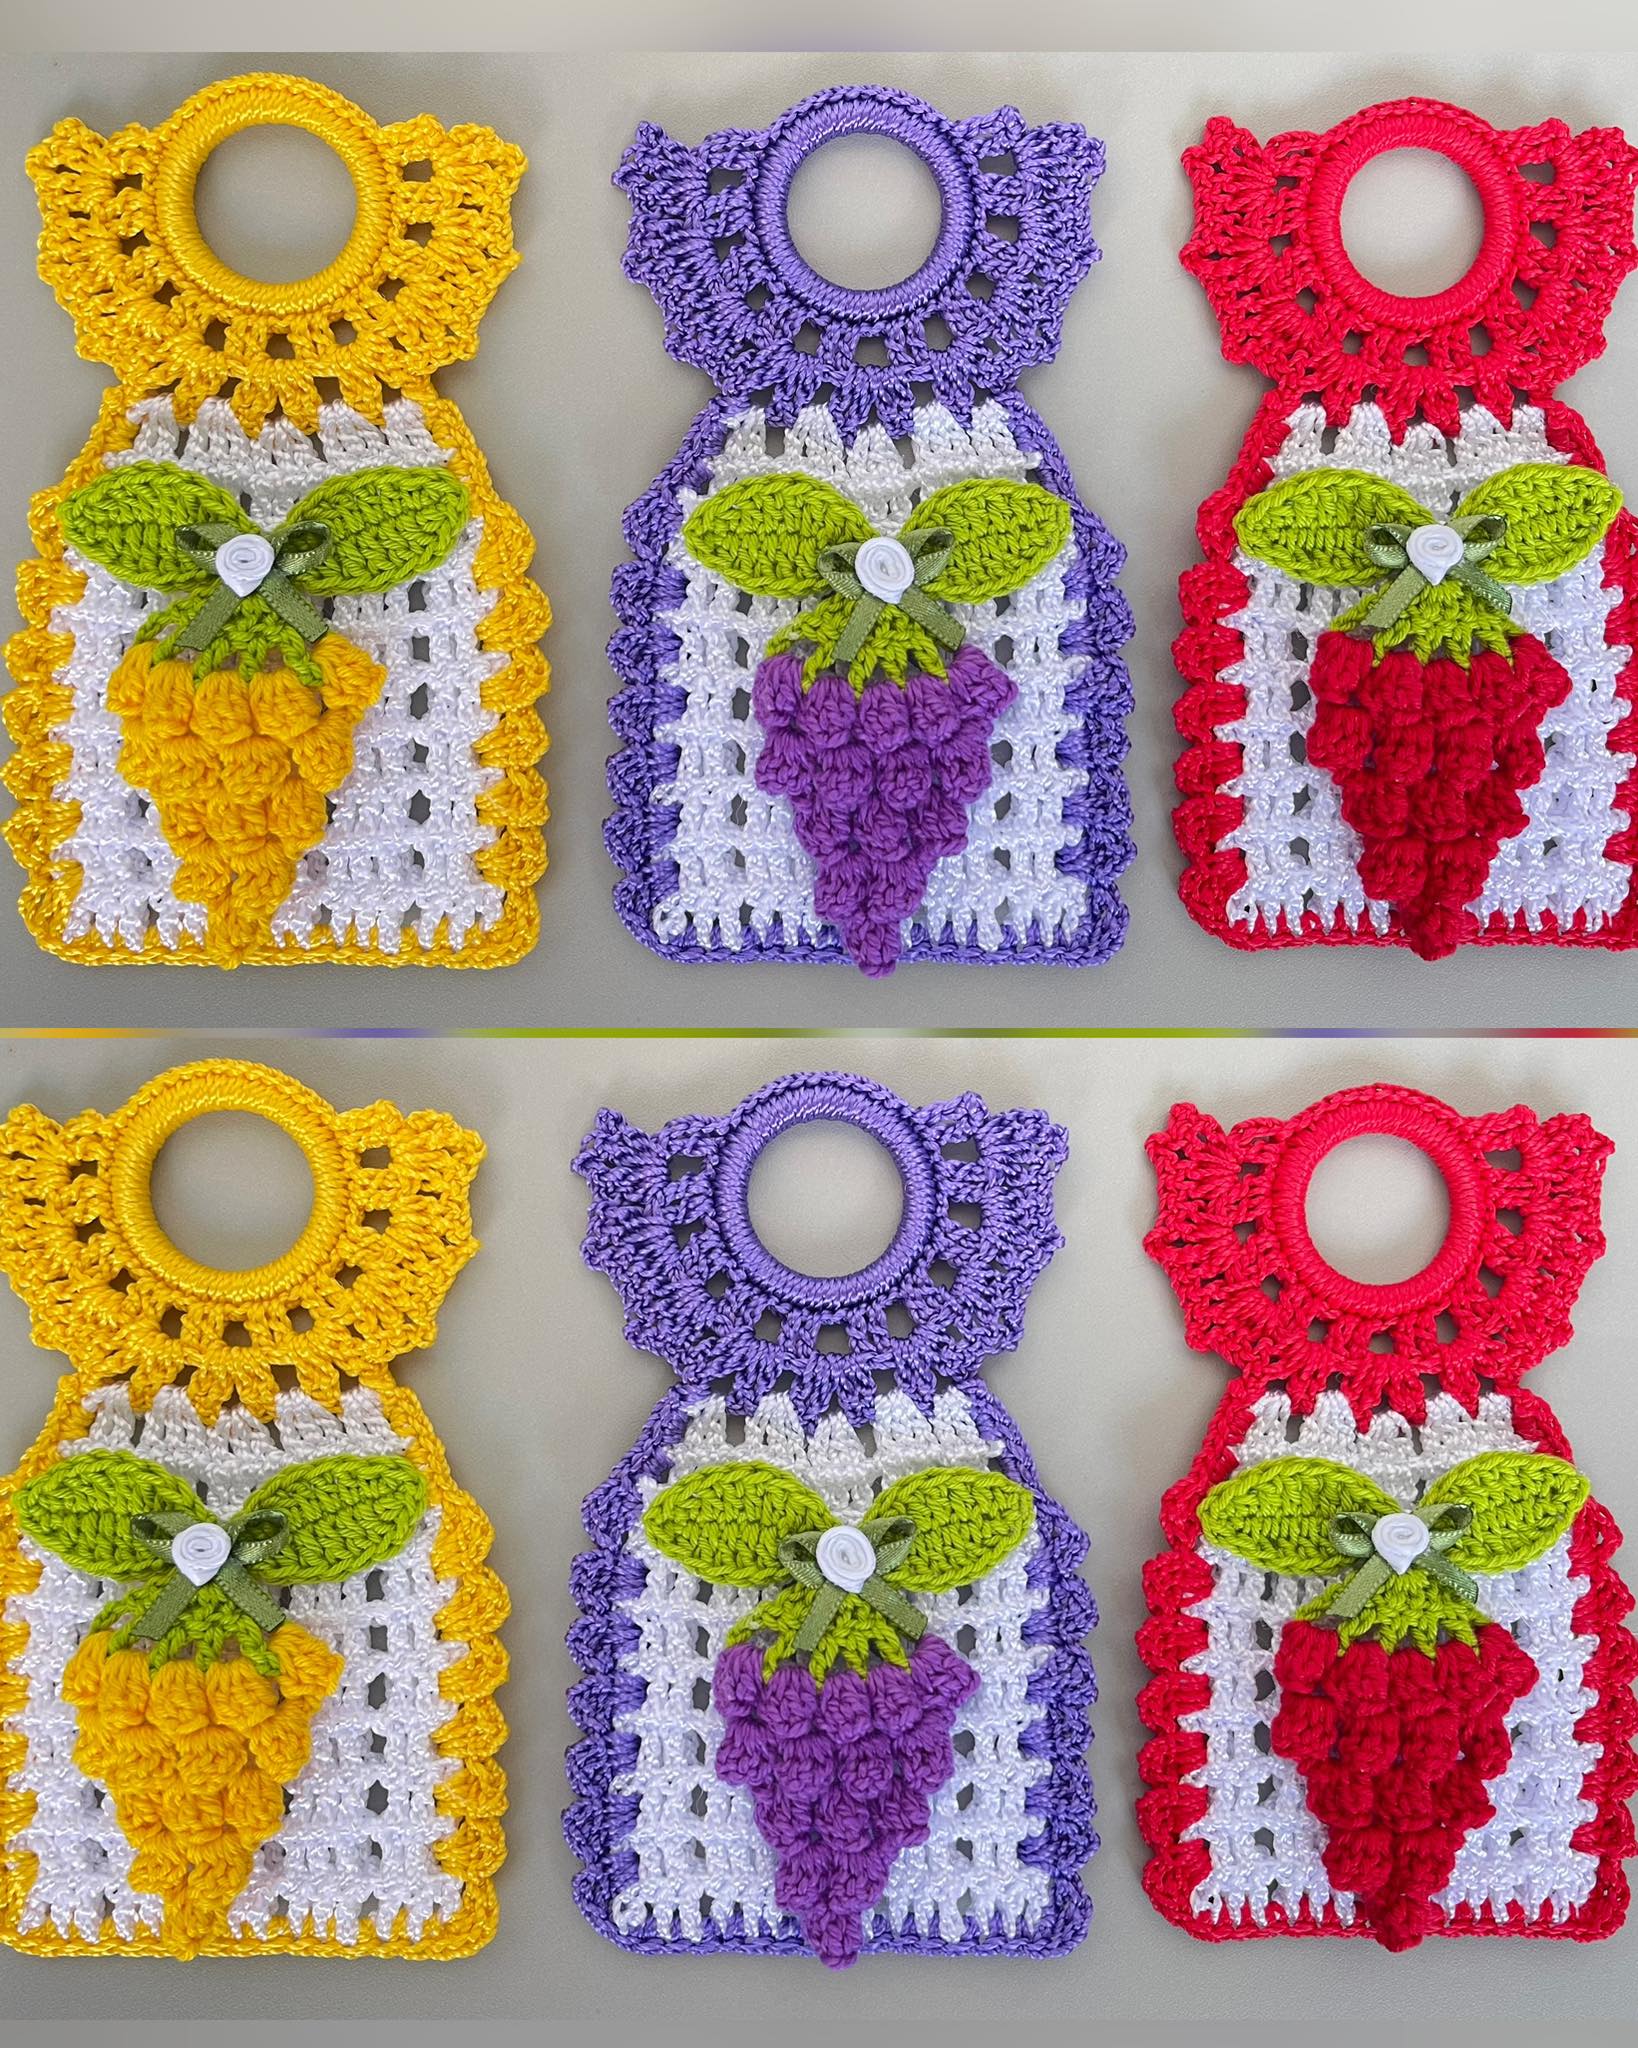
Crochet Lighter Holder – Free Pattern is the perfect project for crochet lovers who enjoy making small, practical, and stylish accessories.
Whether you’re making it for personal use or as a handmade gift, this crochet lighter holder is a great way to use leftover yarn and practice your stitches while creating something functional. Plus, it’s quick to make and can be customized with colors, textures, and embellishments that match your personal style.
The beauty of a crochet lighter holder lies in its simplicity and versatility. You can make one in under an hour, and it requires only basic crochet skills.
You can hang your holder on a keychain, belt loop, or bag, ensuring your lighter is always within reach. It’s not just convenient—it’s also an eco-friendly alternative to disposable plastic covers.
In this Crochet Lighter Holder – Free Pattern, we’ll walk through the materials you’ll need, the crochet stitches used, and step-by-step instructions to complete your project. You’ll also find creative design ideas to personalize your lighter holder and make it truly your own. Whether you prefer minimalist styles or colorful boho designs, this pattern offers endless possibilities for customization. Let’s get started and make your very own crochet lighter holder today!
Before beginning your Crochet Lighter Holder – Free Pattern, gather your materials. You don’t need much for this project, which makes it perfect for using up leftover yarn from previous crafts. The most important thing is to choose a yarn that is durable and easy to handle.
You’ll need a small amount of cotton or acrylic yarn. Cotton is a great choice because it’s strong, heat-resistant, and keeps its shape well. Acrylic yarn is softer and offers a wider range of colors. Either works well, depending on your preference. Choose a yarn weight between 3 (light) and 4 (medium) for the best results.
For your crochet hook, a size 3.5 mm or 4 mm hook is ideal. This will create tight, neat stitches that securely hold the lighter. You’ll also need scissors to cut the yarn, a yarn needle for weaving in the ends, and optionally, a keyring or small carabiner if you want to attach your holder to your bag or belt.
Finally, keep your lighter handy so you can measure as you go. Each lighter varies slightly in size, and adjusting your stitch count will help you achieve a snug, custom fit. With your materials ready, you’re set to begin crocheting your unique lighter holder.
Now it’s time to make your crochet lighter holder. This pattern is simple and quick, perfect for beginners or anyone looking for a short creative project. Follow these easy steps to complete your holder.
Step 1: Create the Base.
Start by making a slip knot and chaining enough stitches to wrap around your lighter—usually between 18 and 22 chains, depending on its size. Join the last chain to the first with a slip stitch to form a ring. This will be the foundation of your holder.
Step 2: Work the Body.
Crochet one single crochet stitch (sc) in each chain around. When you reach the end of the round, slip stitch to join. Continue working in rounds, adding one single crochet stitch per stitch from the previous round. Repeat this process for 10 to 12 rounds, or until the piece covers the body of your lighter.
Step 3: Shape the Top.
Once your holder reaches the desired height, it’s time to shape the top edge. You can continue with single crochet stitches or switch to half-double crochet for a slightly looser finish. To create a keyring loop, chain 10 and attach it to the top edge with a slip stitch. This makes it easy to hang or carry your holder.
Step 4: Finish and Secure.
Cut your yarn, leaving a short tail. Use your yarn needle to weave in any loose ends securely. Try inserting your lighter to make sure it fits snugly but can still be removed easily. If it feels too tight, you can gently stretch the stitches with your fingers.
Step 5: Optional Decorations.
If you want to personalize your crochet lighter holder, add decorative touches like small appliqués, buttons, or embroidery. You can also experiment with stripes by changing yarn colors every few rounds. These small details make your creation more unique and eye-catching.
Step 6: Attach the Keyring.
If you added a loop, slide a keyring or clip through it. This feature makes it easy to attach the holder to your bag, jeans, or backpack—keeping your lighter secure and accessible wherever you go.
The Crochet Lighter Holder – Free Pattern can be easily customized to suit your personality and style. One of the best parts about crocheting your own holder is the creative freedom it gives you. You can make them in bulk using different colors and designs to gift friends or sell at craft fairs.
Try using multi-colored yarn for a fun, variegated effect. Gradient yarns create beautiful transitions between shades, while solid colors offer a sleek, modern look. You can also experiment with textured stitches like puff stitch or shell stitch to add dimension and flair.
Adding small charms or tassels to the loop gives your crochet lighter holder a trendy touch. For a bohemian vibe, attach a few beads or use earth-toned yarns. For a minimalist aesthetic, stick with neutral shades like beige, gray, or white.
You can also make themed holders—like holiday-inspired designs, matching sets for camping gear, or color-coded ones for different family members. The possibilities are endless when it comes to personalizing your pattern.
For eco-conscious crafters, using organic cotton or recycled yarn adds a sustainable touch to your crochet lighter holder. Not only is it stylish and practical, but it’s also environmentally friendly—a small step toward greener crafting habits.
Experimentation is the key to mastering this project. Once you’ve made one, you’ll likely want to create several more, each one slightly different and more creative than the last.
To ensure your crochet lighter holder stays in great shape, here are a few practical tips. Always choose sturdy yarn, as lightweight or fluffy yarns might stretch too much with regular use. Cotton is especially durable and easy to clean, making it ideal for everyday items like this.
Avoid overly loose stitches—tight, consistent stitching helps your holder maintain its shape and grip the lighter properly. If you find the holder loosens over time, you can run a quick round of single crochet around the top edge to reinforce it.
If your lighter gets dirty or exposed to dust, simply remove it and hand-wash the crochet cover in mild soap and water. Let it air dry completely before using it again.
Finally, if you plan to gift or sell your crochet lighter holders, consider packaging them neatly with a small tag or ribbon. Handmade items always make a stronger impression when presented beautifully.
1. Can beginners make a crochet lighter holder?
Yes! This is a beginner-friendly project that uses basic stitches like single crochet and slip stitch. It’s perfect for those learning to crochet small accessories.
2. What type of yarn is best for this pattern?
Cotton yarn is the best choice because it’s strong, durable, and heat-resistant. However, acrylic yarn can also be used for its softness and wide color range.
3. How long does it take to make one?
A single crochet lighter holder typically takes less than one hour to complete, making it a great quick project.
4. Can I wash my crochet lighter holder?
Yes, but remove the lighter first. Hand-wash the holder gently in cool water and let it air dry.
5. Can I sell crochet lighter holders I make from this pattern?
Absolutely. Handmade crochet lighter holders are popular at craft fairs and online shops. Just ensure each one is made with care and good craftsmanship.
The Crochet Lighter Holder – Free Pattern is an enjoyable, practical, and creative project that combines functionality with artistry. It’s easy to make, requires minimal materials, and can be customized endlessly with colors, textures, and decorations.
Whether you’re crocheting for yourself or as gifts for friends, these holders add a personal, handmade touch to everyday life.
Now that you’ve learned how to make your own, it’s time to grab your yarn and hook, and start creating! Don’t forget to share your experience—leave your honest opinion and suggestions about this pattern. Your feedback helps inspire more creative and beginner-friendly crochet tutorials in the future.


