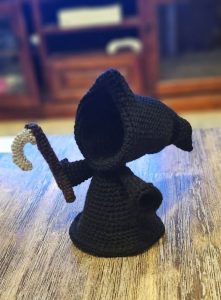
Crochet Pig In A Granny Square Blanket Pattern


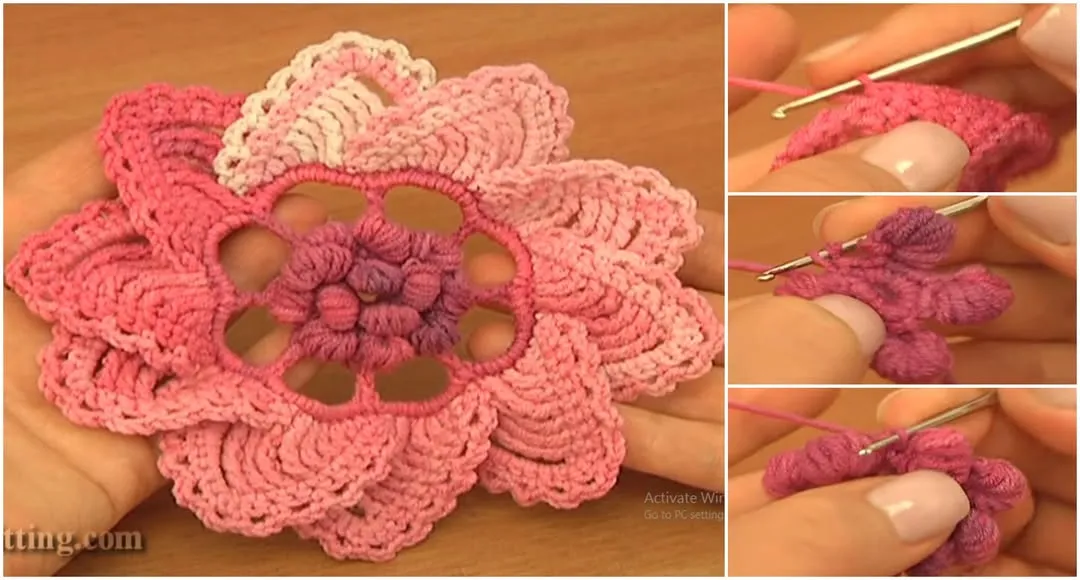
The Crochet Puff Stitch Flower – Free Pattern is an ideal project for both beginner and experienced crocheters looking to create charming, textured floral designs.
Puff stitches add dimension and elegance to any crochet project, making them perfect for embellishments, appliques, and decorative accessories.
This free pattern provides step-by-step guidance to help you craft puff stitch flowers that can be used in blankets, scarves, hats, or even as standalone decorative pieces.
Creating a puff stitch flower is not only enjoyable but also a great way to practice crochet techniques while producing beautiful results.
Each puff stitch creates a raised, three-dimensional effect that makes the flower stand out. By following this free pattern, you can learn how to combine stitches, maintain tension, and assemble petals in a way that produces a cohesive and visually appealing flower.
The Crochet Puff Stitch Flower is versatile and can be adapted to various sizes, shapes, and colors. Using different yarns and hook sizes allows you to customize each flower to suit your project. From small, delicate flowers for bookmarks or keychains to larger blooms for blankets and shawls, this pattern opens endless creative possibilities.
The puff stitch is created by pulling up multiple loops on the hook and then closing them together to form a “puff” in the fabric. This creates texture and volume, making your crochet flower more dynamic. The Crochet Puff Stitch Flower – Free Pattern typically combines puff stitches with chain stitches and slip stitches to form petals and the central core.
When starting the flower, a small magic ring or chain loop forms the center. This foundation is crucial for maintaining the shape and symmetry of the petals. Each petal is constructed by working puff stitches in sequence around the ring, then closing them to create the distinctive raised appearance.
Choosing the right yarn is essential. Soft acrylics, cotton blends, or lightweight yarns highlight the puff stitch texture while providing durability. Using a hook size appropriate for your yarn ensures that stitches are not too tight or too loose, maintaining the flower’s structure.
The free pattern also allows for creativity in arranging petals. You can make single-layer flowers for a simple, elegant look or add multiple layers for a fuller, three-dimensional effect. Experimenting with colors adds vibrancy and can transform a basic flower into a statement piece.
Practicing the puff stitch individually before starting the full flower can help improve consistency. This ensures that all petals have uniform height and volume, resulting in a polished final product.
Finally, finishing techniques such as blocking and weaving in ends enhance the appearance of the flower. Blocking helps shape petals evenly, while careful finishing ensures durability and a professional look.
To create your Crochet Puff Stitch Flower, begin with a magic ring or chain four and join to form a loop. This will be the foundation of your flower center.
Step 1: Yarn over, insert the hook into the ring, yarn over again, and pull up a loop. Repeat this process multiple times (usually 3–5 loops depending on the pattern) before pulling through all loops to form your first puff stitch. Chain one to secure the puff.
Step 2: Continue adding puff stitches around the ring until you have completed the number of petals indicated in the pattern. Each puff should have the same number of loops for uniformity.
Step 3: Close each petal with a slip stitch or chain stitch as directed. This ensures that each puff stitch remains distinct and the petals maintain their shape.
Step 4: For a layered flower, repeat the process for additional rounds, staggering the puff stitches between the previous petals. This creates a more textured and three-dimensional bloom.
Step 5: Adjust the size of the petals by changing yarn thickness or hook size. Larger petals can be achieved with bulkier yarn or a bigger hook, while smaller, delicate petals work best with finer yarn and smaller hooks.
Step 6: Finish by weaving in ends and blocking the flower if necessary. Blocking ensures that petals are evenly spread and the flower maintains its shape, particularly if multiple layers are used.
Your Crochet Puff Stitch Flower is now ready to embellish any project, adding a touch of texture, color, and handmade charm.
Maintaining consistent tension is key for uniform puff stitches. Uneven tension can result in petals that vary in size or appear lopsided.
Always count loops carefully when forming each puff stitch. This ensures that each petal has the same height and fullness, making your flower look symmetrical.
Use stitch markers to identify the beginning and end of each petal, especially when making layered flowers. This prevents mistakes and helps keep your rounds even.
Experiment with yarn colors for creative effects. Ombre yarns or alternating colors for different layers can make the flower visually striking.
Practice the puff stitch individually before creating the full flower. Familiarity with the stitch increases speed and consistency, leading to more professional results.
Finally, consider finishing touches like beads or embroidery for the center of the flower. These small details can enhance the overall appearance and make your Crochet Puff Stitch Flower truly unique.
The Crochet Puff Stitch Flower can be used in numerous projects. They make adorable appliques on blankets, shawls, and scarves, adding dimension and charm.
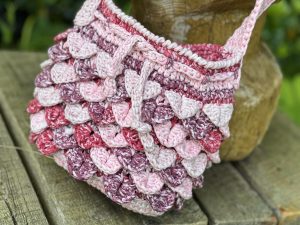
Attach them to hats, headbands, or hair clips for personalized accessories. They are also great for decorating bags or purses, giving a handmade touch to everyday items.
Use multiple puff stitch flowers to create garlands or wall hangings for home decor. These three-dimensional blooms bring color and texture to any space.
Layer several flowers together to create a bouquet effect. Secure them with a yarn needle and use them as decorative accents on gifts or crochet projects.
Incorporate puff stitch flowers into larger motifs, such as floral blankets or afghans. Combining flowers with other stitch patterns adds visual interest and complexity.
Finally, small puff stitch flowers can be used as coasters or decorative pins, demonstrating the versatility of this simple yet beautiful crochet element.
Q: Is the Crochet Puff Stitch Flower suitable for beginners?
A: Yes. While puff stitches require some practice, the free pattern provides clear step-by-step instructions suitable for beginners.
Q: What yarn works best?
A: Soft acrylics, cotton blends, or lightweight yarns work best to showcase the texture and dimension of the puff stitches.
Q: Can I make multi-layered flowers?
A: Absolutely. Adding multiple rounds of puff stitches in staggered positions creates a fuller, three-dimensional flower.
Q: What hook size should I use?
A: Use a hook size appropriate for your chosen yarn. Smaller hooks create tighter, delicate petals, while larger hooks produce bigger, fluffier petals.
Q: How do I attach the flower to projects?
A: Sew the flower onto the project using a yarn needle or attach it with a stitch of your choice. Layered flowers may require extra stitching for stability.
Q: Can I combine colors in one flower?
A: Yes. Alternating colors between petals or layers creates a vibrant and visually striking flower.
Q: How do I maintain uniform puff stitches?
A: Count loops carefully, maintain consistent tension, and practice the stitch individually before assembling the full flower.
The Crochet Puff Stitch Flower – Free Pattern is a versatile and creative addition to any crocheter’s toolkit. Its texture, dimension, and visual appeal make it ideal for embellishing a wide variety of projects, from accessories to home decor.
By following the step-by-step instructions, you can create beautiful, uniform puff stitch flowers that showcase your craftsmanship and creativity.
Now that you’ve learned how to make your own puff stitch flowers, try experimenting with colors, layers, and applications. Share your creations, tips, and experiences — we’d love to hear your honest opinions and suggestions to inspire fellow crocheters.


