Crochet Pig In A Granny Square Blanket Pattern


If you’re looking to add a touch of elegance and handmade charm to your home décor, creating a crochet table runner in natural color is an excellent choice.
Not only does this project bring a timeless, rustic vibe, but it also adds a personal, warm touch to any room. The beauty of crochet lies in the fact that it allows for creativity while still being accessible for beginners and seasoned crafters alike.
In this step-by-step guide, we will walk you through the entire process of making a crochet table runner in natural color, from selecting the materials to finishing the final piece.

Whether you’re new to crochet or have been crafting for years, this project will be enjoyable and satisfying. Throughout the article, we’ll also focus on essential techniques and tips to help you create a polished and professional-looking table runner.
Creating your own crochet table runner in natural color not only enhances your home but also gives you the satisfaction of crafting something beautiful and functional. With its neutral tones, a natural-colored crochet runner can blend seamlessly into a variety of settings, whether it’s for a cozy kitchen table, a rustic dining room, or a modern coffee table. The natural color can also be paired easily with other decorative elements, making it a versatile and timeless accessory.
Before you begin the crochet process, it’s important to gather all the necessary materials. Having everything ready ensures a smoother crafting experience and saves time in the long run.
The first step in creating a beautiful crochet table runner in natural color is selecting the right yarn. When choosing yarn, consider both the texture and the durability. For a natural look, cotton or linen yarn works wonderfully. These fibers are not only durable but also have a subtle sheen that adds to the overall aesthetic of the piece. You’ll want to choose a neutral color, like beige, cream, or light tan, to create that natural, rustic vibe. If you prefer a more earthy tone, you can explore options like off-white, ivory, or even soft browns.
Your crochet hook size is just as important as your yarn choice. Generally, a size H-8 (5mm) hook works well for most medium-weight yarns. However, depending on the thickness of the yarn you select, you may want to adjust the hook size to ensure your stitches are even and your fabric is the right density.
Along with yarn and a crochet hook, you’ll also need a scissors to cut your yarn, a yarn needle for weaving in loose ends, and a tape measure to ensure your table runner is the correct length and width. It’s also a good idea to have stitch markers on hand to keep track of your rows and stitches. These supplies are simple but essential for creating a professional-looking piece.
Once you have your materials ready, it’s time to choose a pattern. The beauty of crocheting a table runner is that you can go as simple or intricate as you want. There are a few classic options that work well for crochet table runners in natural color, and we will walk you through a few popular choices.
For a beginner-friendly approach, you can choose a simple single crochet or half double crochet stitch pattern. These basic stitches are easy to learn and can be worked up quickly. A single crochet stitch creates a tight and firm fabric, making it ideal for a table runner that needs to withstand daily use. A half double crochet stitch, on the other hand, creates a slightly looser, softer fabric, giving it a more delicate and drapey feel.
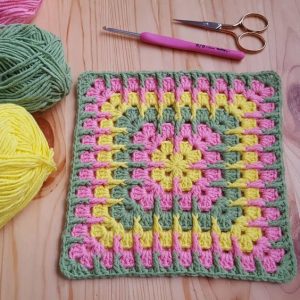
For a more sophisticated touch, you may want to experiment with lacy crochet patterns. Lacy designs can add an airy, elegant look to your table runner, especially when paired with natural yarn. Some popular lacy patterns for table runners include the shell stitch or the granny square. Both patterns offer a light and open design that still provides a sturdy and durable fabric.
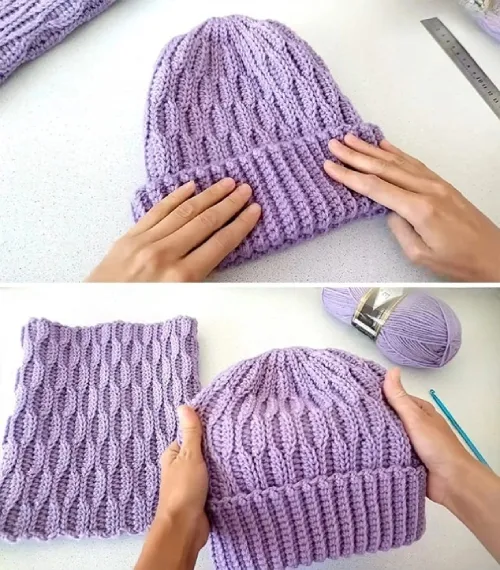
If you prefer a textured look, consider adding raised stitches or a bobbles stitch to your crochet table runner. These techniques add depth and interest to the fabric, making the runner more visually appealing. The basket weave or cable stitch are perfect examples of textured patterns that give your table runner a unique, handmade look.
Now that you’ve selected your yarn, hook, and pattern, it’s time to start the actual crocheting process. Follow these steps to create your beautiful crochet table runner in natural color.
Begin by creating a foundation chain that matches the desired width of your table runner. This number will vary depending on the pattern you are using and the thickness of the yarn. Typically, a standard table runner width is between 12 and 20 inches, so make sure your chain matches the size you want.
Once you have your foundation chain, turn your work and start crocheting into the chain. Use your selected stitch pattern, whether it’s single crochet, half double crochet, or a more intricate lacy design. Be sure to count your stitches and keep track of your rows, especially if you’re using a complex stitch pattern.
For most table runner designs, you will continue crocheting the rows back and forth until you reach your desired length. Keep measuring your work as you go to ensure the runner is the right size. If you want to add more texture, such as bobbles or shell stitches, be sure to follow the pattern instructions for when and where to add them.
Once your table runner has reached the right length, it’s time to finish the edges. For a clean and neat finish, crochet a border around the entire piece using a simple stitch, such as a slip stitch or single crochet. This will prevent the edges from curling and add a polished look to the table runner.
After finishing the crochet portion of your table runner, it’s important to weave in all the loose ends. Use a yarn needle to thread the loose yarn through the stitches and secure it in place. This will prevent the ends from unraveling and will give your piece a more finished, professional appearance.
To ensure your crochet table runner holds its shape and looks even, you may want to block it. Blocking involves wetting the fabric, gently shaping it to your desired dimensions, and allowing it to dry flat. This process helps smooth out any unevenness and gives your piece a crisp, neat finish.
Now that you’ve completed your crochet table runner in natural color, it’s important to know how to care for it properly so it lasts for years to come.
To keep your table runner clean, wash it regularly but gently. Hand wash in cool water with a mild detergent to avoid damaging the yarn. Avoid using bleach or harsh chemicals that could affect the color or texture of your crochet runner.
After washing, avoid wringing out your table runner. Instead, gently press out excess water with a towel and lay it flat to dry. This will help preserve its shape and prevent any stretching or shrinking.
When storing your crochet table runner, be sure to fold it carefully and keep it in a dry, cool place. Avoid hanging it, as this can cause the fabric to stretch out of shape.
1. How long does it take to crochet a table runner?
The time it takes to complete a crochet table runner depends on your experience, the complexity of the pattern, and the size of the runner. On average, it may take anywhere from a few days to a couple of weeks to finish, especially if you’re working on it in your free time.
2. Can I use a different color for my crochet table runner?
Absolutely! While natural colors like beige and cream are popular, feel free to use any color you like. The beauty of crochet is that it’s highly customizable to suit your personal style.
3. How do I make my crochet table runner wider?
To make your runner wider, simply increase the number of foundation chain stitches you start with. You can adjust this number based on the size of your table or the design you’re following.
4. Can I crochet a table runner with other types of yarn?
Yes! While cotton and linen are great choices for a crochet table runner, you can experiment with other yarns like bamboo, jute, or even a blend of materials. Just make sure to check the recommended yarn weight for your pattern.
5. Should I block my crochet table runner?
Blocking is optional but highly recommended for achieving a polished look. It helps even out the stitches and ensures your table runner holds its shape.
Creating a crochet table runner in natural color is a rewarding project that adds a touch of handmade beauty to your home. With the right materials and techniques, you can easily craft a stunning table runner that enhances your décor and stands the test of time. Whether you stick with a simple pattern or opt for a more intricate design, the key is to enjoy the process and take pride in the end result.
We hope this guide has inspired you to try making your own crochet table runner. We’d love to hear your thoughts, tips, and suggestions in the comments below. Happy crocheting!


