Amigurumi Golden Snitch - FREE Crochet Pattern


If you are looking to create something truly unique and eye-catching in your crochet projects, the 3D Petal Granny Square Tutorial is the perfect guide for you.
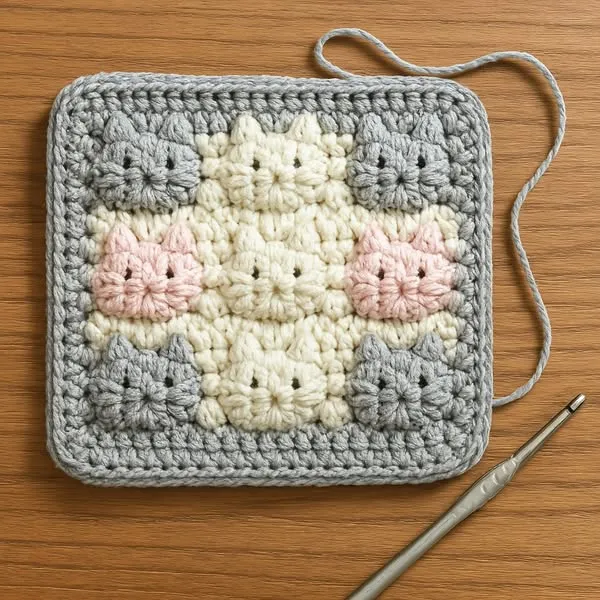
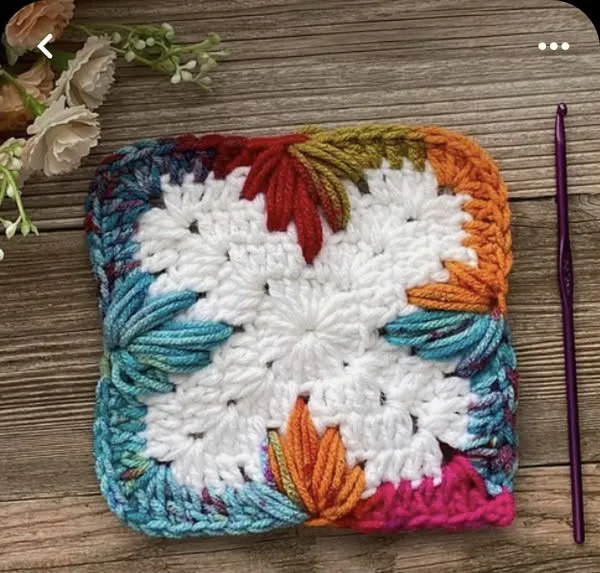
The charm of the 3D Petal Granny Square Tutorial lies in its versatility and creativity. Unlike traditional flat granny squares, the 3D petals provide depth and a unique design that immediately attracts attention.
Before diving into the 3D Petal Granny Square Tutorial, it’s important to understand the basic crochet stitches, tools, and materials required.

To start your 3D Petal Granny Square Tutorial, gathering the right materials and tools is essential. The quality of your yarn and the appropriate crochet hook can significantly affect the final look and feel of your project. Choosing soft, durable yarn ensures that your petals will hold their shape and maintain the three-dimensional effect over time.
Using the correct crochet hook size is also critical. A hook that is too small may make your petals tight and difficult to shape, while a hook that is too large may create loose stitches that do not support the 3D effect. For most standard yarns, a 4mm to 5mm hook works perfectly, but always check your yarn label for recommended sizes.
You will also need scissors to cut your yarn, stitch markers to keep track of your rounds, and a yarn needle for weaving in ends. Preparing all these tools before starting the 3D Petal Granny Square Tutorial will save time and prevent frustration during the crocheting process.
Selecting yarn colors thoughtfully can enhance the three-dimensional effect. Using contrasting colors for the petals and the base of the granny square makes the petals stand out, creating a striking visual appeal. This choice can be particularly effective if you plan to use the squares in blankets or decorative items where visual impact is important.
It’s helpful to have a printed or digital copy of the 3D Petal Granny Square Tutorial instructions nearby. Following a structured guide ensures that you do not miss any steps, and you can progress at your own pace, ensuring each square looks neat and professional.
Lastly, patience and practice are key. The 3D Petal Granny Square Tutorial may require a bit of trial and error, especially for beginners. Each square you complete will help improve your tension control, stitch consistency, and overall technique, leading to beautifully finished projects.
Starting your 3D Petal Granny Square Tutorial begins with a foundation chain, which will act as the base for your granny square. Typically, a chain of four to six stitches is created and then joined with a slip stitch to form a loop. This small loop becomes the center of your square and is where your petals will originate.
Once your foundation loop is ready, the first round involves creating the petals. Each petal is made using a combination of double and treble crochet stitches that give them a raised, three-dimensional shape. By carefully following the stitch pattern, each petal will maintain consistent size and form.
As you complete the first round of petals, the base of the granny square begins to take shape. The petals should slightly overlap the edges of the loop, ensuring that the three-dimensional effect is visible from all angles. This careful placement is what distinguishes the 3D Petal Granny Square Tutorial from flat granny square designs.
The second round usually involves creating corner stitches and connecting the petals to form a square shape. These stitches help stabilize the petals and provide structure to the overall square. Maintaining even tension in this round ensures that your granny square remains flat and does not warp.
Adding subsequent rounds expands the square and allows you to include more petals if desired. Some crocheters like to alternate colors in each round to add visual interest and make the three-dimensional petals pop even more. This technique enhances the decorative appeal of your finished squares.
Finally, finishing touches include weaving in loose ends and blocking the square if necessary. Blocking helps to define the shape and ensures that the petals hold their 3D form. After completing this step, your 3D Petal Granny Square Tutorial is ready to be used in larger projects or displayed as a standalone piece.
One of the most important tips for mastering the 3D Petal Granny Square Tutorial is consistent stitch tension. Uneven tension can cause petals to curl or flatten, which diminishes the three-dimensional effect. Practicing your stitches on a small sample piece can help achieve consistency before starting your main project.
Using stitch markers is highly recommended. These markers can indicate the beginning of each round or the placement of each petal, ensuring symmetry and accuracy in your squares. Proper placement of petals is crucial for achieving the 3D effect.
Experimenting with yarn types can lead to interesting results. Cotton yarn tends to hold structure well, making petals stand upright, while acrylic yarn offers flexibility and softness. Blending different yarns can create textured petals that add dimension and character to your granny squares.
Another useful trick is to slightly stretch the petals as you crochet them. This method allows the petals to open up fully, making the three-dimensional effect more prominent. Gently shaping the petals with your fingers after each round can also help maintain their form.
Pay attention to color contrast. Choosing colors that differ between the petal and the base makes the 3D effect more noticeable. Subtle gradients can also be used to create a soft, layered look, enhancing the visual depth of your squares.
Finally, practice patience. The 3D Petal Granny Square Tutorial may require several attempts to perfect, especially for beginners. Each square teaches valuable lessons about stitch control, tension, and three-dimensional shaping, improving your overall crochet skills.
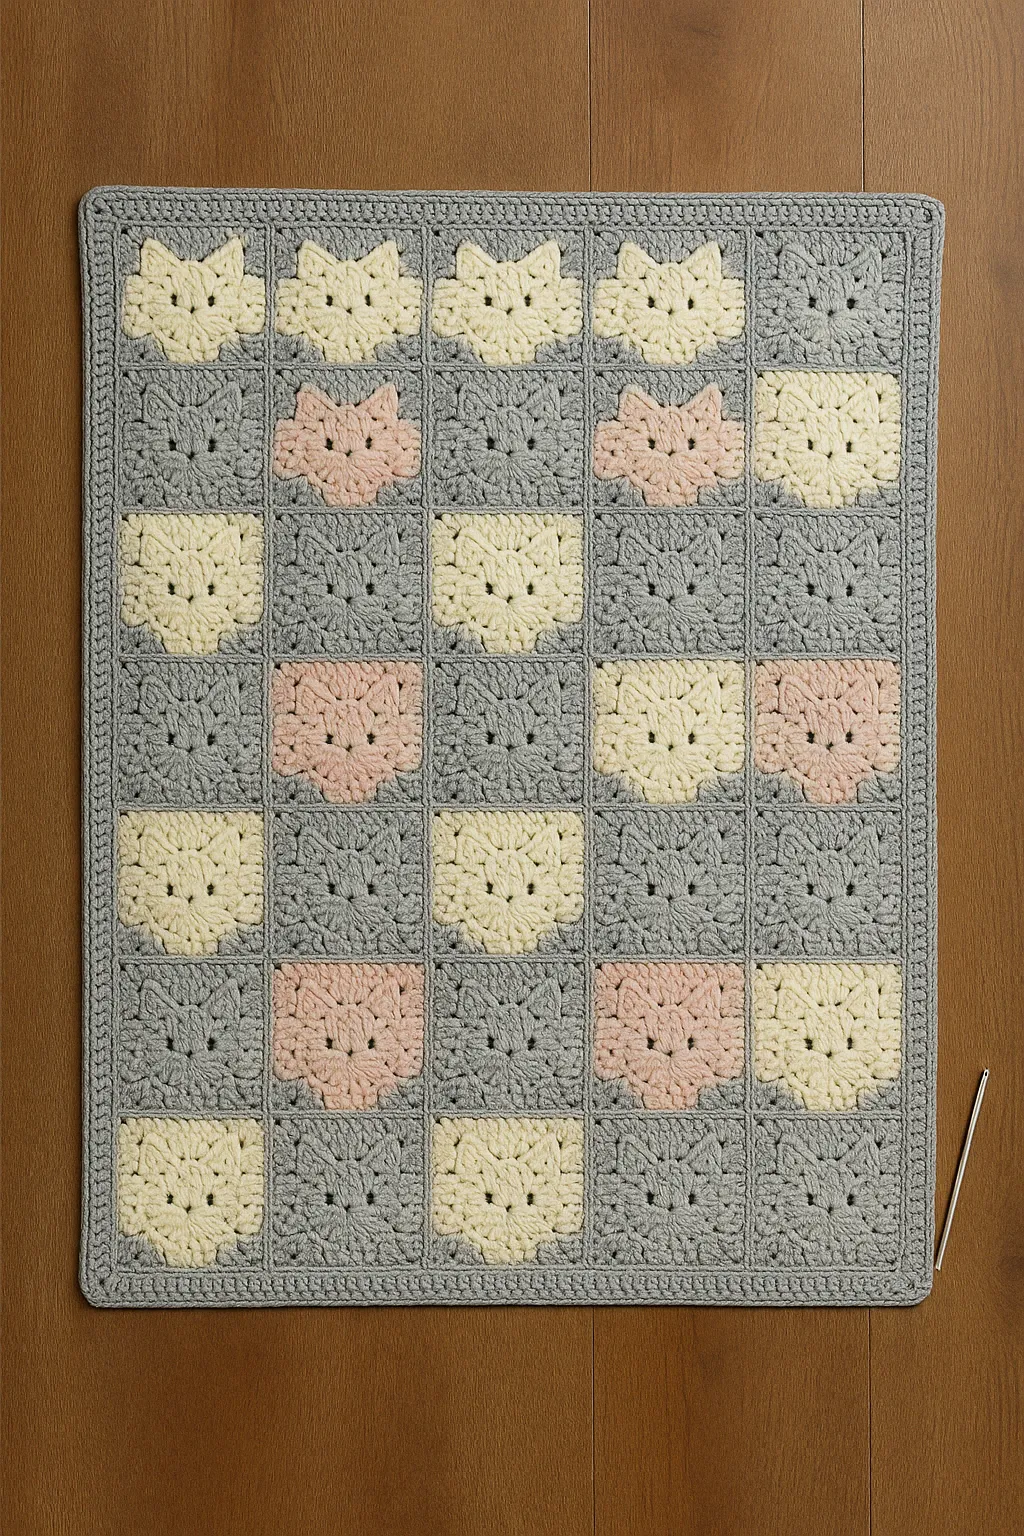
Once you have mastered the 3D Petal Granny Square Tutorial, the possibilities for creative projects are endless. One popular use is in making decorative blankets. By joining multiple 3D petal squares, you can create a textured, visually striking blanket that becomes a centerpiece in any room.
These squares are also ideal for making cushions and pillow covers. The three-dimensional petals add texture and depth, transforming ordinary pillows into elegant, handmade decor. Using contrasting colors can further enhance their visual impact.
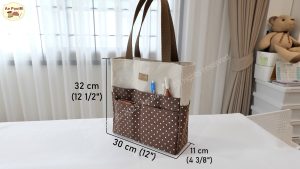
You can even use the 3D petal squares for fashion accessories, such as tote bags, shawls, or scarves. Each square becomes a miniature work of art, and combining them creates unique, stylish items that reflect your personal crochet style.
Home decor items such as wall hangings, table runners, or placemats are other excellent ways to use 3D petal granny squares. Their dimensional texture adds a sophisticated, handmade touch that can elevate the look of any space.
Small projects like coasters or mug rugs are perfect for experimenting with color combinations and petal arrangements. These mini projects allow you to practice your 3D Petal Granny Square Tutorial skills without committing to a large-scale project.
Finally, gifting handmade items created with 3D petal squares can make thoughtful, personalized presents. The time and effort put into these squares reflect care and creativity, making them treasured gifts for family and friends.
Q1: Is the 3D Petal Granny Square Tutorial suitable for beginners?
Yes, the tutorial is designed to be beginner-friendly, with step-by-step instructions. While it may take practice to master the three-dimensional petals, following the guide carefully ensures successful results.
Q2: Can I use any type of yarn for the 3D Petal Granny Square Tutorial?
You can use different types of yarn, but cotton and acrylic yarns are preferred. Cotton helps maintain the shape of the petals, while acrylic offers softness and flexibility. Experimenting with yarn blends can also produce interesting textures.
Q3: How do I maintain the three-dimensional shape of the petals?
Consistent stitch tension and gentle shaping of each petal during and after crocheting are essential. Blocking the finished squares can also help maintain their 3D form.
Q4: Can I change the color of the petals and the base?
Absolutely. Using contrasting colors enhances the three-dimensional effect. You can experiment with different color combinations to create unique designs.
Q5: How do I join multiple 3D Petal Granny Squares?
Squares can be joined using slip stitches, whip stitches, or other joining methods. Choose a method that suits your project and ensures the petals are not flattened during joining.
Q6: What projects can I make with 3D petal granny squares?
You can make blankets, cushions, bags, wall hangings, coasters, and more. The versatile design of the 3D petal squares allows for creative applications in both home decor and fashion.
The 3D Petal Granny Square Tutorial is a comprehensive guide that empowers crocheters to create stunning, three-dimensional squares with raised petals.
This tutorial not only enhances your crochet skills but also opens up endless possibilities for creative projects, from blankets and pillows to fashion accessories and home decor.
By mastering the techniques explained here, including stitch control, tension consistency, color selection, and shaping, you can produce professional-looking squares that impress and delight.
Share your creations, leave your honest feedback, and suggest ways we can further improve this tutorial to help the crochet community continue to grow creatively.


