Crochet Pig In A Granny Square Blanket Pattern


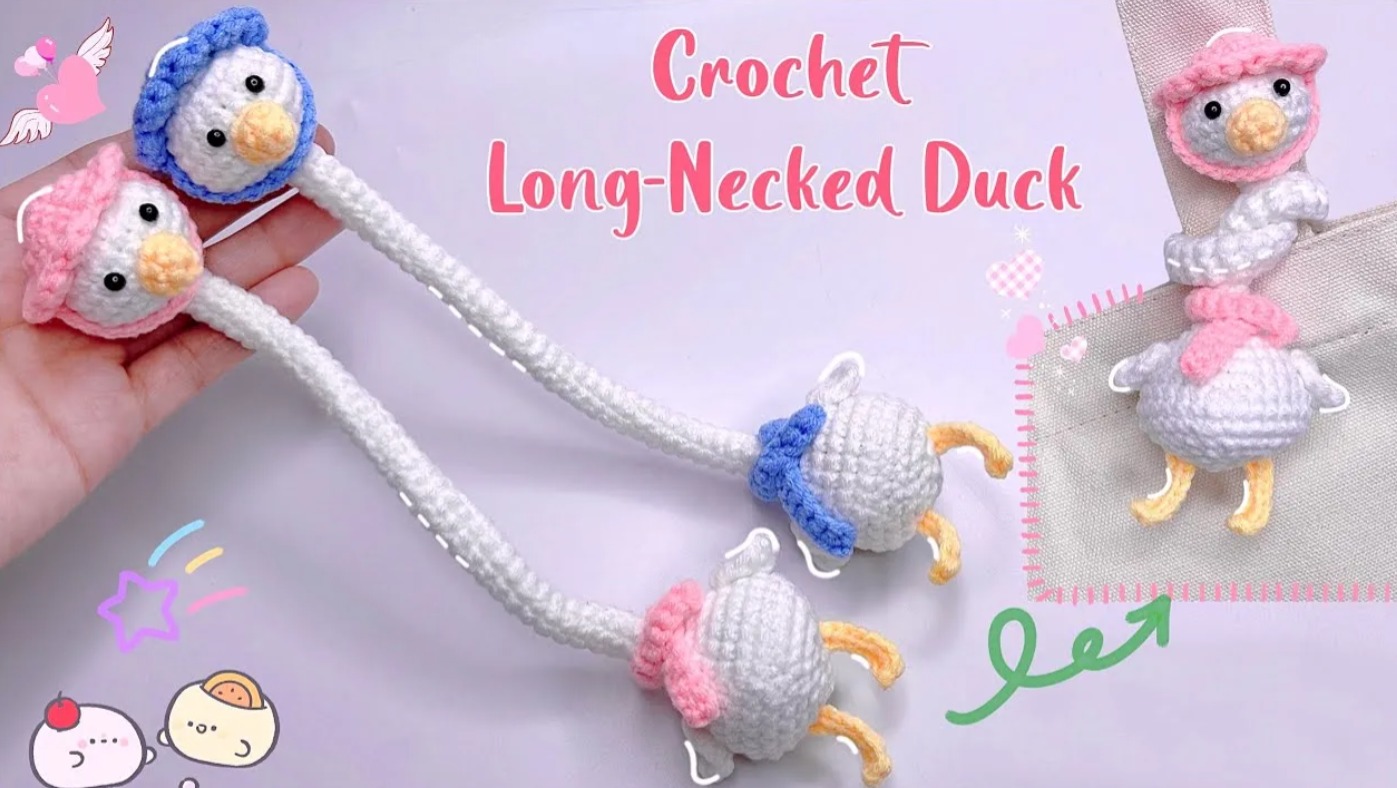
Necked Duck Wear Hat Crochet Pattern is a delightful and imaginative crochet project that combines fun, creativity, and charm in one adorable design.
Perfect for beginners and experienced crocheters alike, this pattern allows you to create a cute duck with a stylish hat, giving it a unique and playful personality.
Whether you want to make it as a gift for a child, a decoration for your home, or simply a joyful addition to your crochet collection, this project will bring smiles to everyone who sees it.
What makes the Necked Duck Wear Hat Crochet Pattern so special is its combination of classic amigurumi techniques with whimsical details.
The duck’s long neck and removable hat make it stand out from traditional crochet toys. You can customize the colors, yarn textures, and hat style to suit your taste. It’s also a great project for using up yarn scraps while practicing your shaping and stitching skills.
In this Necked Duck Wear Hat Crochet Pattern, we’ll guide you step by step through the process — from gathering materials to stitching and assembling your charming duck. You’ll also find tips for adjusting the pattern’s size, adding accessories, and finishing details to make your duck look as adorable as possible. Get your yarn and hook ready, and let’s start creating this cute, fashionable duck that’s sure to become a favorite handmade piece!
Before beginning your project, you’ll need to gather a few essential materials. For your Necked Duck Wear Hat Crochet Pattern, choose soft yarns in cheerful colors — typically yellow for the body, orange for the beak and feet, and any color of your choice for the hat. Cotton or acrylic yarns work best for amigurumi projects since they hold their shape and are easy to clean.
Select a crochet hook that matches your yarn’s weight, usually between 2.5 mm and 3.5 mm for small toys. Using a smaller hook helps create tighter stitches, preventing stuffing from showing through. You’ll also need a yarn needle for sewing pieces together, scissors for trimming yarn ends, and fiberfill stuffing to give your duck a soft and plump appearance.
Safety eyes are optional but highly recommended to give your duck a lively look. If you’re making the toy for a young child, consider embroidering the eyes instead for safety. You may also want to prepare some stitch markers to keep track of your rounds while crocheting the head and body. Having all your materials ready before you start makes the process smooth and enjoyable.
Once you have your supplies organized, find a comfortable place to work and good lighting. Crocheting small amigurumi pieces requires attention to detail, and a well-lit space helps you see stitches clearly. Now that everything is ready, let’s move on to creating the basic shapes for your crochet duck.
The Necked Duck Wear Hat Crochet Pattern is created by making separate parts — the head, neck, body, wings, feet, and hat — and then sewing them together. Each step builds on the previous one, resulting in a perfectly proportioned and cute duck.
Start by crocheting the head. Use yellow yarn and work in continuous rounds, beginning with a magic ring and single crochets. Increase stitches evenly until the head reaches the desired size. Once complete, lightly stuff it with fiberfill and close the top neatly. The face can be embroidered or finished later with safety eyes and a stitched beak.
Next, crochet the neck. This is what gives the pattern its signature charm. The neck should be slightly thinner than the head but long enough to give your duck an elegant and funny appearance. Keep the stitches tight so the neck stands upright when attached.
Then, make the body. The body follows a similar method to the head but larger and slightly elongated. Work in continuous rounds, increase gradually, and stuff as you go. The body can be shaped rounder or longer, depending on whether you prefer a classic duckling or a cartoon-style look.
For the wings and feet, use orange yarn. Crochet two small wings and two webbed feet using simple rounds and chain stitches. Attach them symmetrically on each side of the body. Once all parts are ready, assemble them carefully using your yarn needle and secure stitches tightly to avoid looseness.
One of the highlights of this Necked Duck Wear Hat Crochet Pattern is the adorable hat. You can create a simple beanie-style hat, a sun hat, or even a top hat for a fun twist. To make the hat, start with a magic ring and increase until it fits comfortably on your duck’s head. Adjust the height of the hat depending on the style you prefer.
Use a contrasting color to make the hat pop against the duck’s yellow body. Add decorative elements such as a crocheted bow, small flower, or stripe to give the hat personality. Once finished, the hat can either be sewn on or left removable, so you can change your duck’s style whenever you want.
To add more charm, you can crochet a small scarf or tie for your duck. These little details make your crochet duck even more unique. You might also want to add blush to the cheeks using a bit of pink yarn or fabric paint for a softer look.
Finally, double-check all seams and ensure the toy is evenly stuffed. Trim any loose yarn ends, and your necked duck is ready to show off! It’s a wonderful project that reflects creativity, patience, and the joy of handmade crafting.
What makes Necked Duck Wear Hat Crochet Pattern even more exciting is how customizable it is. You can experiment with yarn textures, colors, and accessories to give your duck a different mood or theme. For example, use pastel tones for a baby version or bright, bold colors for a cartoon-style character.
Try using fuzzy yarn for a fluffy effect or cotton thread for a smooth, defined finish. You can also create multiple ducks with different hat styles — maybe one with a beanie, another with a sun hat, and one with a winter cap and scarf. This turns your collection into a charming display of handmade art.
If you enjoy themed crafts, make a duck family! A parent duck with a smaller baby duck beside it makes a lovely decorative set. You can even crochet small accessories like a flower, umbrella, or tiny bag for your duck to hold.
For those who love storytelling, each duck can have a name or character backstory — perfect for kids or collectors. Add embroidered initials or small details to personalize your toy further. This level of customization turns your crochet creation into something truly special and one-of-a-kind.
1. Is this crochet pattern suitable for beginners?
Yes! The Necked Duck Wear Hat Crochet Pattern uses basic stitches like single crochet, increase, and decrease. With a little patience, even beginners can complete it successfully.
2. What type of yarn works best for this pattern?
Cotton or acrylic yarns are ideal because they hold shape well and are easy to wash. Choose soft yarns that won’t irritate the skin if the toy is meant for children.
3. How long does it take to make the duck?
Depending on your skill level, it can take 4–8 hours to complete the project. It’s a relaxing weekend or evening craft.
4. Can I make the hat removable?
Absolutely! You can either sew the hat onto the duck’s head or leave it removable for added fun and variety.
5. Can I sell my finished duck?
Yes, you can sell handmade ducks you create using this pattern, as long as the design is your original interpretation and not copied from restricted sources.
6. Can I adjust the size of the duck?
Yes, simply use thicker yarn and a larger hook to make a bigger duck, or thinner yarn and a smaller hook for a mini version.
The Necked Duck Wear Hat Crochet Pattern is an adorable and fun crochet project that lets you express creativity while making something meaningful.
You’ve learned how to gather materials, crochet each part, and assemble your duck with care and personality. This project is perfect for relaxing, improving your crochet skills, and creating handmade gifts that bring joy to others.
Now that you know the process, grab your yarn and hook and start your own fashionable duck! We’d love to hear your thoughts — leave a sincere opinion or suggestion about this tutorial and share your creative ideas for future projects. Your feedback helps keep the crochet community full of inspiration and imagination!


