Crochet Pig In A Granny Square Blanket Pattern


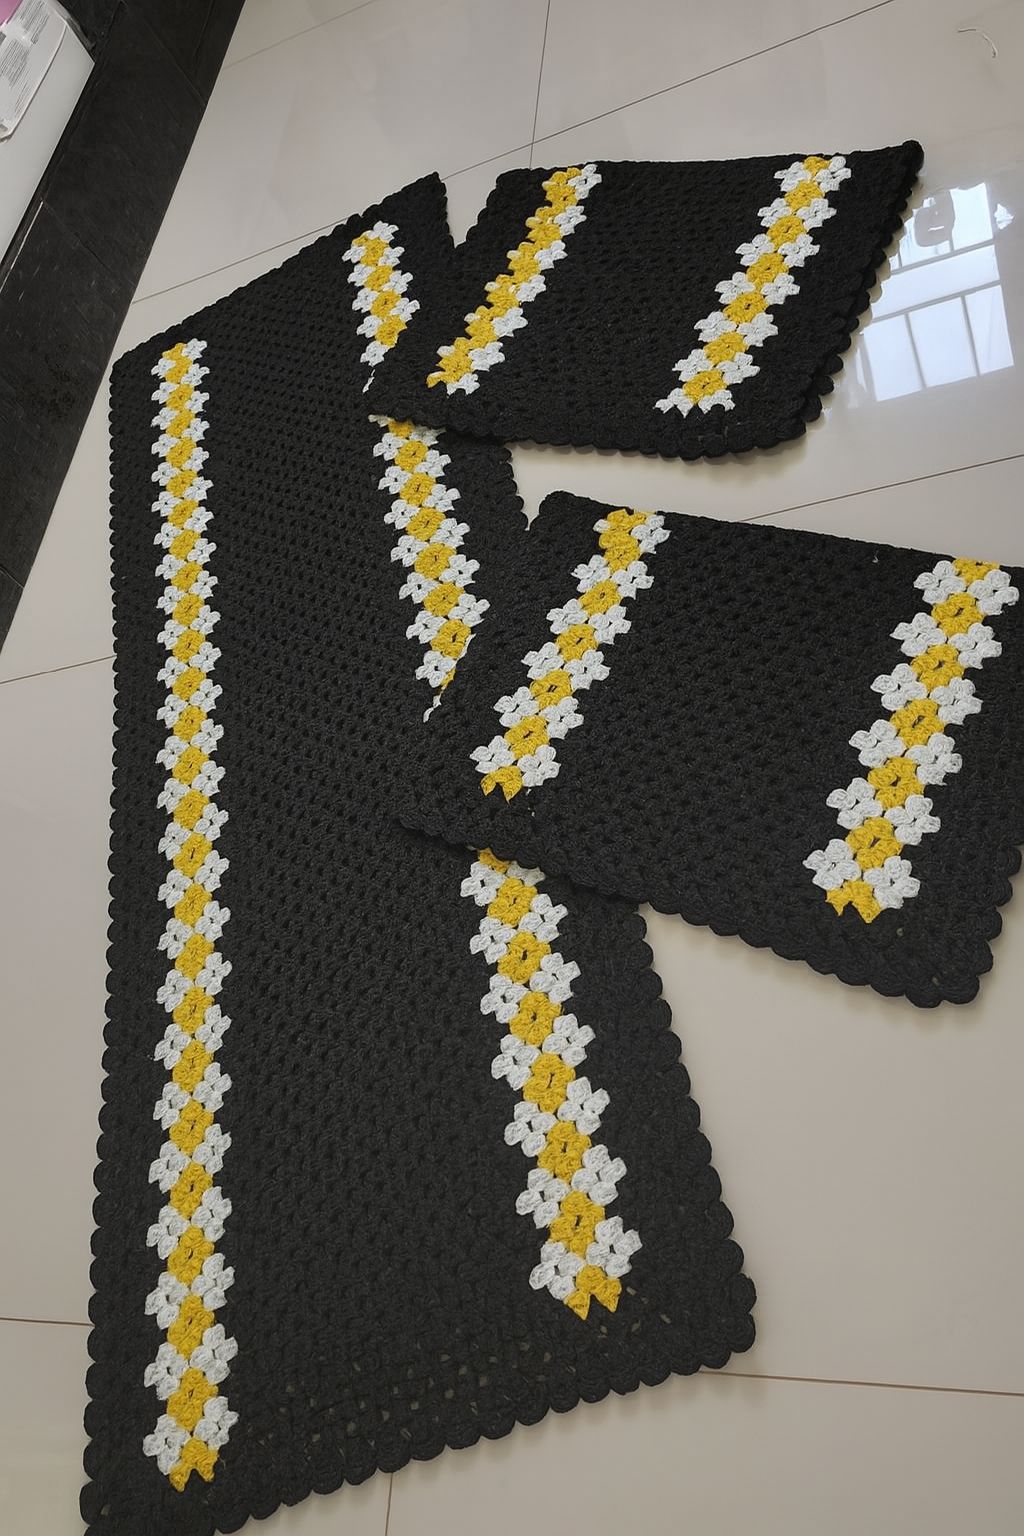
The Practical Crochet Block Runner – Complete Step by Step is a versatile and stylish addition to any home décor. This crochet runner is perfect for placing on tables, dressers, or sideboards, adding a handmade touch that combines beauty and functionality.
Following this step-by-step guide allows crafters of all levels to create a polished piece that can be customized with colors, textures, and stitch patterns to match any interior style.
The Practical Crochet Block Runner – Complete Step by Step not only enhances your space visually but also gives you the satisfaction of creating a high-quality, durable piece by hand.
Creating a crochet block runner is both practical and enjoyable. The Practical Crochet Block Runner – Complete Step by Step teaches essential techniques for constructing individual crochet blocks, connecting them seamlessly, and finishing edges neatly.
Each block in the runner is designed to align perfectly with others, forming a coherent and attractive pattern. This project is ideal for both beginners eager to improve their skills and experienced crocheters seeking a creative yet manageable project. With careful attention to detail, your finished runner will look professionally made and offer long-lasting utility.
One of the best aspects of the Practical Crochet Block Runner – Complete Step by Step is its adaptability. You can select yarns that suit your home décor, whether cotton for a clean and soft look, wool for warmth, or acrylic for durability. The stitch patterns can be simple or intricate, depending on your skill level and preference. Additionally, the length and width of the runner can be easily customized to fit a specific table or surface. By following this complete step-by-step guide, you gain confidence in crochet techniques while producing a piece that is both functional and decorative.
To create the Practical Crochet Block Runner – Complete Step by Step, you will need basic crochet supplies. The essential materials include yarn, a suitable crochet hook, scissors, stitch markers, and a yarn needle for weaving in ends. Selecting high-quality yarn ensures that your runner maintains shape and texture over time. Cotton yarn is recommended for its softness and ease of cleaning, while blends can add subtle texture or sheen.
The crochet hook should match the recommended size for your yarn to achieve the correct gauge. Gauge is critical for ensuring that all blocks align properly, creating a smooth, consistent runner. Stitch markers help maintain stitch counts and alignment, especially for beginners, while a yarn needle is necessary for finishing ends neatly. Additional optional tools, such as blocking mats and pins, can help shape and secure the runner during finishing.
Before beginning, gather your materials in a comfortable workspace with good lighting. This ensures precision in each block and reduces strain during longer crochet sessions. Preparing all tools and materials beforehand allows the Practical Crochet Block Runner – Complete Step by Step to proceed smoothly from start to finish.
Begin the Practical Crochet Block Runner – Complete Step by Step by making the foundation chain for the first block. Ensure that the chain is straight and of the correct length, as this will determine the size of each individual block. Maintaining a consistent tension is key to achieving uniform blocks.
Next, work the base rows following the chosen stitch pattern. Common options for this runner include simple double crochet, half double crochet, or intricate stitch combinations for added texture. Each block is built row by row, with careful attention to stitch count and alignment.
Once the first block is complete, repeat the process for additional blocks. Consistency is essential so that when the blocks are joined, the edges align perfectly and the overall runner looks polished. The Practical Crochet Block Runner – Complete Step by Step ensures that each block maintains its shape and symmetry.
After completing all blocks, arrange them in the desired pattern. Options include a linear row, alternating colors, or creating a subtle gradient effect. This arrangement allows you to customize the runner to your space and personal style.
Joining the blocks can be done using various techniques, such as slip stitch seams, single crochet joins, or mattress stitch. Each method offers a slightly different appearance and flexibility, allowing you to choose based on your preference for aesthetic or durability.
Finally, finish the edges of the runner by adding a border. Borders frame the piece, provide stability, and add an extra layer of elegance. The Practical Crochet Block Runner – Complete Step by Step recommends simple single crochet borders, scalloped edges, or other decorative finishes that complement the block design.
The Practical Crochet Block Runner – Complete Step by Step allows for numerous creative variations. One option is experimenting with color schemes. Use monochromatic tones for a minimalist look or contrasting colors for a vibrant, eye-catching runner.
Another variation is combining different stitch patterns within blocks. Mixing textures like bobble stitches, lace stitches, or shell patterns creates a more dynamic and interesting runner. You can also alternate plain blocks with intricate designs to balance complexity and simplicity.
Adjusting the size and shape of the blocks can further customize the runner. Small blocks create a detailed mosaic effect, while larger blocks make a bold statement with minimal effort. The overall length and width of the runner can also be tailored to suit the table or surface it will decorate.
Adding embellishments, such as beads or small appliqués, enhances the runner’s aesthetic. These details can match seasonal décor or personal taste, making each runner a unique handmade treasure.
Blocking the finished runner is an important step that ensures all blocks lay flat, edges are straight, and the overall piece has a professional appearance. This final step is crucial for achieving a polished look for the Practical Crochet Block Runner – Complete Step by Step.
Experimenting with yarn types is another way to personalize your project. Cotton provides softness and durability, wool adds warmth, and silk blends offer a luxurious sheen. The possibilities are endless for creating a runner that reflects your creativity.
Is this crochet block runner suitable for beginners?
Yes, the Practical Crochet Block Runner – Complete Step by Step is beginner-friendly, with clear instructions and repeated block construction to practice essential techniques.
What type of yarn is recommended?
Cotton is ideal for ease of use and durability, but you can also use blends or acrylic depending on the desired texture and look.
Can I adjust the size of the runner?
Absolutely. Both the size of individual blocks and the overall number of blocks can be modified to fit your table or intended space.
How should the blocks be joined?
Blocks can be joined using slip stitch seams, single crochet joins, or mattress stitch. Choose the method that suits your preferred finish and flexibility.
Do I need to block the runner?
Yes, blocking ensures that all blocks lay flat, edges are even, and the finished runner has a professional appearance.
Can I add embellishments?
Yes, beads, appliqués, or embroidery can be added to personalize and enhance the runner.
The Practical Crochet Block Runner – Complete Step by Step is a rewarding project that combines practicality, creativity, and beauty. It allows crafters to improve their crochet skills while producing a functional piece that enhances home décor.
With endless possibilities for color combinations, stitch patterns, and finishing techniques, each runner becomes a unique reflection of personal style and creativity.
Whether you are making this runner for yourself or as a thoughtful handmade gift, it is a project that provides satisfaction and pride. Follow this complete step-by-step guide to create a stunning, professional-looking crochet block runner and share your honest feedback and suggestions to inspire others in the world of crochet.


