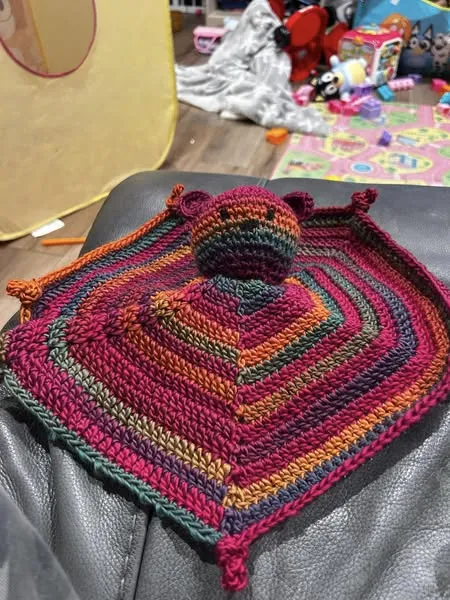
Crochet Pig In A Granny Square Blanket Pattern


If you’re looking for a charming and festive crochet project, this Shamrocks in a Row Crochet Hat tutorial is the perfect choice. Whether you’re preparing for St. Patrick’s Day or just love adding a bit of luck and whimsy to your wardrobe, this pattern combines comfort, creativity, and cheerful design.
In this guide, you’ll learn how to create this unique hat from start to finish, even if you’re a beginner. The Shamrocks in a Row Crochet Hat is a fun way to show off your crochet skills while creating something cozy and eye-catching for any season.
The beauty of the Shamrocks in a Row Crochet Hat lies in its versatility. You can adjust the size, colors, and yarn type to match your personal taste or make it as a thoughtful handmade gift.
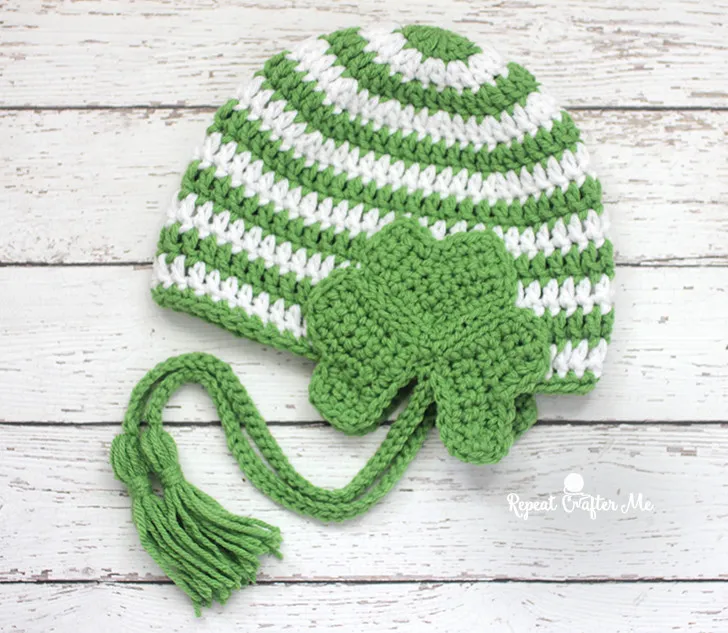
The rows of green shamrocks around the hat create a delightful pattern that’s both playful and elegant. Even better, this project works up quickly, making it ideal for crafters who enjoy seeing results fast. Plus, it’s an excellent opportunity to practice color changes and texture techniques in crochet.
Before diving into the step-by-step instructions, it’s important to note that this hat not only celebrates creativity but also offers warmth and comfort. It’s perfect for chilly spring mornings or outdoor festivities. By following this Shamrocks in a Row Crochet Hat – Step-by-Step Tutorial, you’ll not only make a stylish accessory but also improve your crochet skills and confidence. Let’s begin crafting your lucky charm!
To start your Shamrocks in a Row Crochet Hat, gather the right materials and tools. Using high-quality supplies ensures a smooth crocheting experience and a professional-looking result. You’ll need:
Before you begin, make a small swatch to check your gauge. Consistent tension is key to getting the right hat size. Once your supplies are ready, you can confidently start creating your Shamrocks in a Row Crochet Hat and bring those adorable clovers to life.
When choosing yarn colors, keep in mind that contrast matters. The shamrocks should stand out clearly from the background color, so lighter or neutral bases work beautifully. You can also add a touch of metallic thread for a sparkling effect, making your Shamrocks in a Row Crochet Hat even more festive.
Finally, have a comfortable workspace with good lighting. Crocheting small shamrocks requires attention to detail, and clear visibility helps you maintain clean stitches and even rows.
Start the Shamrocks in a Row Crochet Hat by working on the base, which forms the main body. Begin with a simple magic ring, chaining a few stitches to start your first round. Crochet evenly in the round, increasing gradually to shape the crown of the hat.
Once the crown reaches the desired diameter, continue without increases to form the sides. This part is repetitive but relaxing, allowing you to settle into the rhythm of the project. Use your stitch markers to help count rounds accurately. The base should fit snugly but comfortably.
You can choose between single crochet (sc), half double crochet (hdc), or double crochet (dc) depending on the texture you prefer. Many crafters find that hdc offers a perfect balance of softness and flexibility.
Continue working until the base measures the height you want before adding the decorative shamrock band. This step provides a clean canvas where the shamrock motifs will truly shine. The smoother and more even your base, the better your Shamrocks in a Row Crochet Hat will look.
If you’re making this hat for a child or adult, remember to adjust your stitch count accordingly. A measuring tape will help you get a precise circumference. This ensures your hat fits perfectly and stays in place.
Finally, don’t forget to check your tension periodically. Consistency will make the next step—adding shamrocks—much easier and visually appealing.
This is the most exciting part of the Shamrocks in a Row Crochet Hat – Step-by-Step Tutorial: creating and joining the shamrock motifs. Each shamrock is crocheted separately using green yarn, then attached around the hat’s midsection to form a continuous, eye-catching band.
To crochet a shamrock, start with a small circle of chains. Add petals using double crochets and slip stitches. Each petal should have a soft, rounded shape resembling a clover leaf. Once finished, leave a long tail for sewing the motif onto the hat.
You can make all shamrocks first, then arrange them in a row before attaching. This helps ensure symmetry and consistent spacing. For extra luck, some crocheters like to add a tiny gold or yellow accent in the center of each shamrock.
Use a yarn needle to securely stitch each shamrock in place. Make sure they line up evenly so the pattern looks neat and professional. The shamrocks should overlap slightly or touch each other to create a “row” effect.
If you prefer, you can crochet the shamrocks directly onto the hat using tapestry or colorwork crochet techniques. This approach requires more experience but produces a seamless look. Either way, this row of shamrocks adds charm and a burst of color to your Shamrocks in a Row Crochet Hat.
Once all the motifs are attached, weave in any remaining yarn ends neatly on the inside of the hat. You’ll see your creation start to come together beautifully.
After the shamrock band is complete, it’s time to finish your Shamrocks in a Row Crochet Hat with flair. Add a few rounds of single crochet around the brim to create a neat, polished edge. This not only improves the structure but also helps the hat stay in shape.
You can customize your hat further by adding a small pom-pom or tassel on top. A white or green pom-pom ties the design together perfectly. For a more subtle finish, simply leave the hat plain and let the shamrocks take center stage.
Consider blocking your finished hat gently. This process helps smooth out stitches and gives it a professional appearance. Dampen the hat slightly, shape it carefully, and let it dry naturally.
If you plan to gift or sell your Shamrocks in a Row Crochet Hat, you can package it nicely with a handmade tag or label. Handmade items with personal touches always stand out and make people feel special.
When styling, pair this hat with cozy scarves or neutral sweaters to let the green clovers pop. It’s perfect for festive outings or casual everyday wear.
Lastly, admire your work! Crocheting something from scratch—especially a detailed pattern like the Shamrocks in a Row Crochet Hat—is an achievement worth celebrating.
1. Can beginners make the Shamrocks in a Row Crochet Hat?
Yes! This pattern is beginner-friendly. The stitches are simple, and even the shamrock motifs can be learned with basic crochet knowledge.
2. What type of yarn works best for this hat?
Medium-weight acrylic yarn is ideal for flexibility and comfort, but cotton yarn can also be used for a more breathable finish.
3. How long does it take to complete the hat?
Depending on your skill level, you can finish the Shamrocks in a Row Crochet Hat in 3–5 hours.
4. Can I change the color of the shamrocks?
Absolutely! While green is traditional, you can use pastel or metallic tones for a unique and modern twist.
5. How do I make the hat larger or smaller?
Adjust the number of increase rounds in the crown section to resize your hat for children or adults.
6. Is blocking necessary?
While optional, blocking helps the hat keep its shape and makes the stitches look cleaner and more professional.
The Shamrocks in a Row Crochet Hat is a delightful project that combines creativity, texture, and charm. From forming the base to stitching the lucky shamrocks, each step adds personality and style to your handmade accessory. Following this Step-by-Step Tutorial, you’ve learned how to make a cozy, festive hat that can brighten any outfit or occasion.
We hope this guide inspired you to pick up your hook and yarn today. Try making your own Shamrocks in a Row Crochet Hat, experiment with colors, and share your results proudly.
Don’t forget to leave your honest opinion and suggestions below—your feedback helps improve future tutorials and inspires more crochet lovers to join the fun!


