
Ballerina pencil case with zipper Pattern


The Beast’s Rose – QUILT TUTORIAL is a stunning guide for quilters who want to combine elegance and storytelling in their projects. Inspired by the iconic enchanted rose, this quilt pattern blends floral motifs with intricate geometric designs to create a visually captivating piece.
Whether you are a beginner or an experienced quilter, this tutorial provides a step-by-step approach to crafting a quilt that is both charming and functional.
Creating a Beast’s Rose Quilt allows you to explore color theory, fabric textures, and precision piecing. Each block contributes to the overall design, building a quilt that tells a story through its intricate patterns.
Following this tutorial, you’ll learn how to combine traditional quilting techniques with creative design elements to produce a quilt that is as beautiful as it is meaningful.
The Beast’s Rose – QUILT TUTORIAL also emphasizes personalization. By selecting your own fabrics, colors, and finishes, you can make a quilt that reflects your individual style. Whether you prefer muted pastels, rich jewel tones, or a mix of contrasting shades, the pattern adapts beautifully to your vision, resulting in a unique handcrafted piece for your home or as a gift.
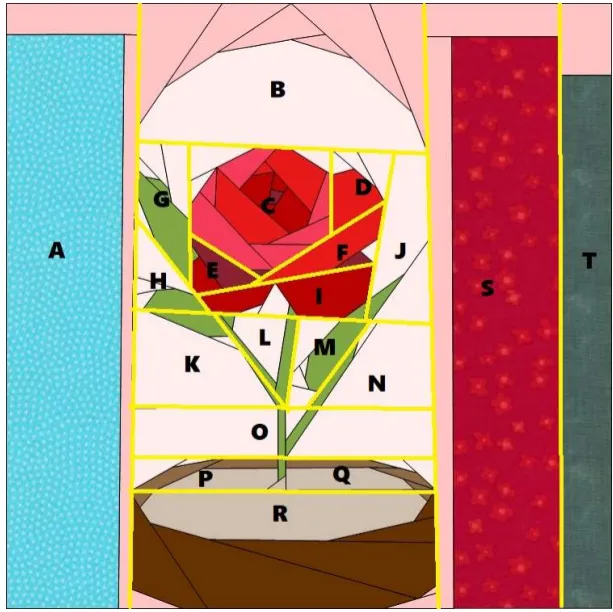
The Beast’s Rose Quilt is inspired by the classic story and features a central rose motif surrounded by geometric shapes. The rose represents love and magic, making it a perfect centerpiece for a thematic quilt. Each surrounding block complements the rose with symmetry and color harmony.
The quilt design typically combines multiple piecing techniques, including applique for the rose and patchwork for the surrounding blocks. This blend allows quilters to practice a variety of skills while achieving a cohesive look.
Color planning is essential in the Beast’s Rose – QUILT TUTORIAL. Light and dark shades are used to create depth, while complementary colors highlight the rose motif. Planning your fabric placement in advance ensures that each block contributes to the overall visual impact.
The quilt can be scaled to any size, from a small wall hanging to a full bedspread. The flexibility of the design makes it accessible for different skill levels and project goals.
The rose motif can be created using traditional applique, reverse applique, or paper piecing. Each technique offers a different texture and style, allowing crafters to experiment with their preferred method.
Finally, the geometric blocks surrounding the rose provide structure and balance, framing the central motif beautifully. This combination of organic and geometric elements gives the Beast’s Rose Quilt its distinctive charm.
Begin by selecting your fabrics. Choose a dominant color for the rose, complementary colors for the surrounding petals, and neutral tones for background blocks. Cutting pieces accurately is critical for clean assembly.
Step 1: Create the central rose motif using your preferred applique or piecing method. Ensure the rose is symmetrical and centered, as it will anchor the entire quilt design.
Step 2: Assemble the first round of blocks around the rose. Follow the pattern provided in the tutorial, paying close attention to seam allowances to maintain consistent sizing.
Step 3: Continue adding rounds, alternating colors and shapes according to the pattern layout. Each round enhances the depth and dimension of the quilt, building a visually striking design.
Step 4: Press seams after sewing each block. Accurate pressing keeps the quilt flat, prevents distortion, and ensures precise alignment between blocks.
Step 5: Assemble all blocks to complete the quilt top. Check for alignment and symmetry, making small adjustments as needed before sewing final seams.
Step 6: Add borders or sashing if desired. Borders frame the quilt and provide a polished finish, while sashing can create additional contrast and separation between blocks.
Step 7: Layer the quilt top with batting and backing fabric. Smooth out wrinkles and baste the layers together using pins or temporary stitching.
Step 8: Quilt your layers together using your preferred technique. Straight-line quilting enhances geometric elements, while free-motion quilting adds texture and movement.
Step 9: Bind the quilt edges with a coordinating fabric. A clean binding ensures durability and completes the overall appearance.
Step 10: Final finishing touches, such as hand stitching or decorative embroidery, can be added to highlight the rose or accentuate the geometric blocks.
To achieve professional results with the Beast’s Rose Quilt, careful preparation is key. Start by accurately measuring and cutting all fabric pieces before beginning assembly.
Use pins or clips to hold blocks in place during sewing. This ensures alignment, especially around complex shapes like the rose motif.
Maintain consistent seam allowances. A quarter-inch seam is standard and keeps blocks uniform, allowing them to fit together perfectly.
Experiment with fabric textures. Combining smooth cottons with slightly textured fabrics adds depth and interest to the quilt.
Consider thread color carefully. Matching thread to the fabric creates a seamless look, while contrasting thread can be used to emphasize certain motifs.
Take your time with applique techniques. The rose is the focal point, and neat stitching will make the motif stand out beautifully.
While the Beast’s Rose – QUILT TUTORIAL follows a traditional layout, there are many creative ways to customize the design.
Use gradient fabrics for the rose to create a realistic shading effect. This technique gives the flower a three-dimensional appearance.
Try modern color palettes for a contemporary twist. Bold, unexpected colors can transform the classic design into something unique and eye-catching.
Add embroidery details around the rose for extra texture. Small floral stitches, vines, or leaves enhance the overall design and personalize the quilt.
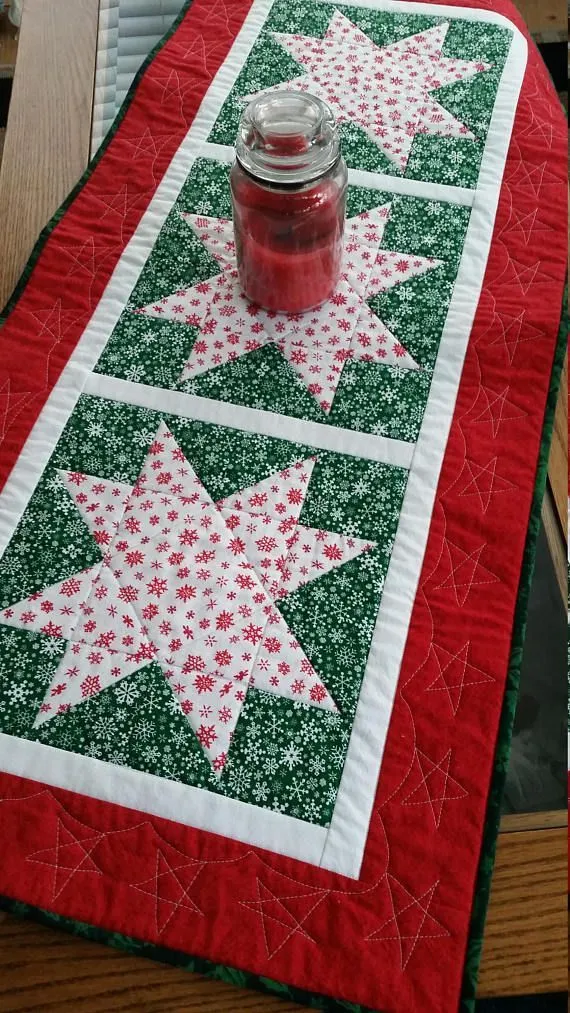
Create smaller versions for decorative items such as pillow covers, table runners, or wall hangings. These mini-projects are perfect for gifting or for practicing the techniques before tackling a full-size quilt.
Experiment with asymmetrical layouts, placing the rose off-center to create a dynamic composition. This variation can give your quilt a modern and artistic flair.
Finally, combine the Beast’s Rose Quilt with other quilt blocks, such as star or log cabin motifs, to create a mixed-pattern quilt with visual diversity and storytelling elements.
Q: Is the Beast’s Rose Quilt suitable for beginners?
A: Yes, while the rose motif may require some practice, the step-by-step tutorial guides you through each stage. Beginners can start with simpler applique techniques.
Q: What type of fabric is best for this quilt?
A: High-quality cotton fabrics work best. They are durable, easy to sew, and allow crisp folding and piecing.
Q: Can I adjust the size of the quilt?
A: Absolutely. The pattern can be scaled for small wall hangings or large bedspreads. Adjust the number of blocks to fit your desired dimensions.
Q: How do I make the rose motif?
A: You can use traditional applique, reverse applique, or paper piecing. Each method produces slightly different textures and visual effects.
Q: Do I need special tools for this quilt?
A: Basic quilting tools like rotary cutters, rulers, pins, and a sewing machine are sufficient. Optional embroidery tools can enhance the design.
Q: Can I mix fabrics of different textures?
A: Yes, but keep fabric weights similar to maintain even stitching and flat blocks.
Q: How do I care for my finished quilt?
A: Wash gently in cold water on a delicate cycle and lay flat or tumble dry on low. Iron lightly if necessary, avoiding high heat on applique areas.
The Beast’s Rose – QUILT TUTORIAL offers quilters an opportunity to create a beautiful and meaningful quilt inspired by the timeless tale of love and magic.
From selecting fabrics to finishing touches, each step is designed to help you produce a stunning, professional-looking quilt that reflects your creativity.
Whether you stick to the traditional color palette or experiment with modern fabrics and layouts, this tutorial provides a clear roadmap for crafting a quilt that is both artistic and functional.


