
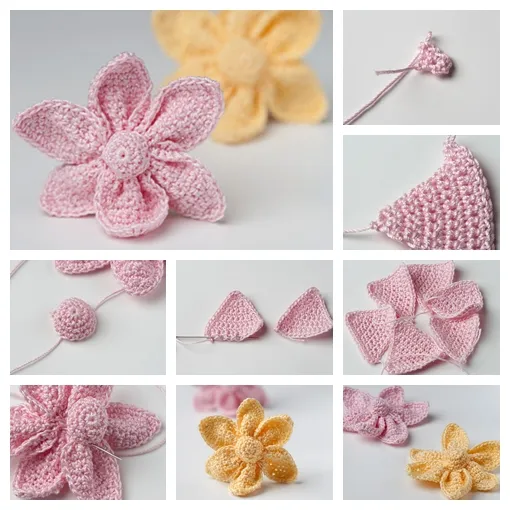
Ballerina pencil case with zipper Pattern


If you are looking for a fun and simple project, the Easy Brick Quilt Tutorial is perfect for both beginners and seasoned quilters. This tutorial will guide you through every step to create a beautiful quilt that combines style and comfort.
The charm of a brick quilt lies in its straightforward pattern and the visual impact it delivers, making it an ideal choice for anyone who loves quilt making. With the right fabrics, colors, and a little patience, you can craft a quilt that will become a treasured piece in your home or a heartfelt gift.
Many quilters are drawn to the Easy Brick Quilt Tutorial because it balances creativity with simplicity. Unlike complex patterns that require intricate piecing, the brick quilt uses rectangular blocks arranged in staggered rows, mimicking the appearance of a brick wall.
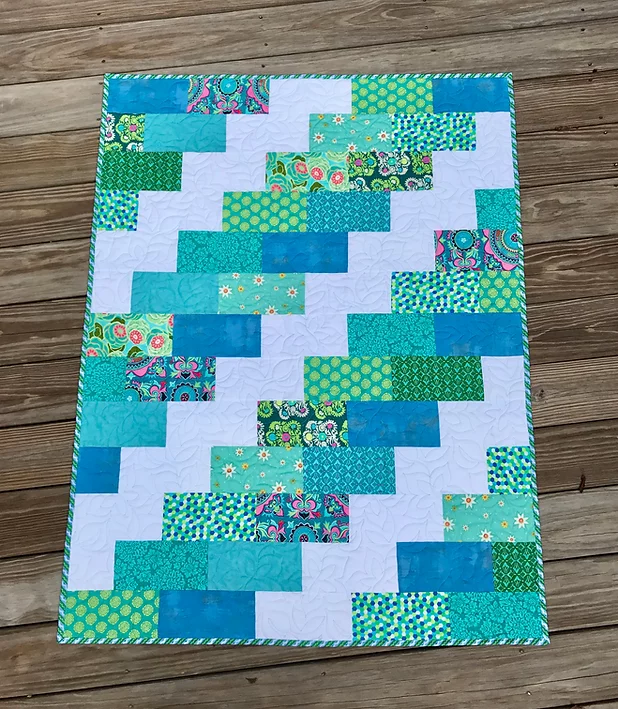
This structure allows you to experiment with different fabrics, textures, and colors without feeling overwhelmed. Whether you want a modern look or a cozy traditional style, the brick quilt adapts beautifully to your vision.
In this Easy Brick Quilt Tutorial, we will also discuss essential quilting techniques, tips for fabric selection, and sewing methods that make the process smoother. By understanding these fundamentals, you will gain confidence and improve your quilting skills. The tutorial emphasizes hands-on learning, providing step-by-step instructions so you can follow along with ease. By the end of this guide, you will have a quilt that not only looks stunning but also showcases your personal touch and craftsmanship.
Selecting the right fabrics is one of the most crucial steps in the Easy Brick Quilt Tutorial. The type, color, and texture of fabric can greatly affect the final appearance of your quilt. Quilters often recommend using 100% cotton fabrics because they are easy to sew and durable over time. Cotton fabrics hold up well during washing and maintain their shape, making them ideal for creating neat, crisp brick blocks.
When choosing colors, consider a combination that complements each other. A mix of solids, prints, and tonal fabrics can create depth and visual interest. For a classic brick quilt look, neutral shades like beige, gray, and white can be used alongside brighter accent colors. If you prefer a playful style, mix vibrant hues for a cheerful appearance. Using a consistent color palette will help maintain harmony across your quilt.
Texture is another factor to consider. While cotton is standard, you can also experiment with linen blends or flannels for a soft, cozy feel. Keep in mind that different fabric weights may affect your quilt’s overall thickness and drape. By planning your fabric choices carefully, you will ensure that your Easy Brick Quilt Tutorial results in a polished, professional-looking quilt.
Maintaining a cohesive theme is important when mixing patterns. Try to balance busy prints with solid fabrics to avoid overwhelming the design. Consider the scale of patterns; small motifs work well with larger blocks, while large patterns may get lost in smaller rectangles. Using a limited number of patterns, usually three to five, creates a clean and balanced look.
Pre-washing your fabrics before cutting is highly recommended. Pre-washing prevents color bleeding and shrinkage, ensuring your quilt maintains its shape and appearance over time. Ironing the fabric after washing will make cutting and piecing easier, resulting in more accurate blocks.
Finally, don’t forget to consider your quilt backing and binding. Choosing complementary fabrics for the back and binding enhances the overall presentation. Coordinating colors and patterns from your main quilt top will tie the entire piece together, giving it a finished, professional look.
The next step in the Easy Brick Quilt Tutorial is cutting and arranging your brick blocks. Precision is key here, as even small variations can affect the alignment of your quilt. Using a rotary cutter, cutting mat, and clear ruler will help achieve accurate cuts. Measure carefully and cut each rectangle consistently to maintain uniformity across all rows.
Once your blocks are cut, arranging them before sewing is essential. Lay out the pieces in a staggered brick pattern, just like a traditional brick wall. Staggering the blocks creates visual interest and ensures that seams don’t line up directly, which adds strength to your quilt. Take time to experiment with different layouts until you are satisfied with the design.
Pay attention to color distribution while arranging the blocks. Place darker and lighter fabrics alternately to create balance. If your quilt uses prints, distribute them evenly to avoid clustering similar designs together. This careful planning makes your quilt visually appealing and professional-looking.
Chain piecing can save time during the sewing process. By sewing multiple blocks in a continuous chain without cutting the thread each time, you reduce thread waste and speed up assembly. This method is especially useful for the repetitive nature of brick block quilting.
Marking the seam allowance on each block ensures consistency. A standard ¼-inch seam is commonly used in quilting. Use a fabric marker or chalk to draw guidelines if necessary. Consistent seams make piecing easier and result in a smooth, even quilt top.
Finally, don’t rush the layout process. Take breaks and step back occasionally to view your quilt from a distance. Seeing the overall pattern helps spot areas that may need adjustment and ensures a cohesive design.
With your blocks cut and arranged, it’s time to sew the quilt top. The sewing process in the Easy Brick Quilt Tutorial requires patience and attention to detail. Begin by joining blocks row by row, keeping the staggered pattern intact. Pinning blocks before sewing prevents shifting and misalignment.
Pressing seams correctly is crucial for a neat finish. Press seams to one side or open them according to your preference. Properly pressed seams reduce bulk and make it easier to match rows. Use a steam iron for a crisp result.
Sewing rows together comes next. Align seams carefully to maintain the staggered effect. Take your time, especially at intersections where seams meet, as precise alignment enhances the quilt’s professional look. Use pins or clips to hold seams in place while sewing.
Once all rows are sewn, inspect the quilt top for any inconsistencies. Make adjustments as needed to ensure all seams are straight and the pattern flows evenly. Correcting errors at this stage is much easier than after quilting the layers.
Adding borders is optional but can enhance the brick quilt’s appearance. A narrow border frames the design, while a wider border adds a bold statement. Choose border fabric that complements the quilt’s color scheme and patterns.
Finally, give your quilt top a final press to remove wrinkles and prepare it for layering with batting and backing. A smooth quilt top ensures easier quilting and a polished final piece.
Quilting is the final step in the Easy Brick Quilt Tutorial that transforms your quilt top into a completed masterpiece. Layer your quilt top with batting and backing, making sure all layers are smooth and wrinkle-free. Basting pins or spray adhesive can hold the layers in place.
Choose a quilting method that suits your style. Straight-line quilting follows the brick pattern, while free-motion quilting allows for creative stitching designs. Straight-line quilting is simple for beginners and complements the geometric brick layout.
Quilt from the center outward to avoid puckering. This technique distributes fabric tension evenly and helps maintain smooth layers. Use consistent stitch length for an even, professional finish.
After quilting, trim excess batting and backing fabric to align with the quilt top. Square the corners for a neat, clean edge. Accurate trimming makes binding easier and enhances the quilt’s overall appearance.
Binding the quilt is the final touch. Cut binding strips, sew them together, and attach them around the quilt edges. Fold the binding over the edge and hand-stitch or machine-stitch it in place. This secures the quilt and gives a polished finish.
Finally, give your quilt a gentle press and inspect all stitching. Your Easy Brick Quilt Tutorial is now complete, ready to provide warmth, style, and joy.
Q: What fabrics are best for a brick quilt?
A: 100% cotton fabrics are recommended due to durability, ease of sewing, and ability to hold shape. You can also experiment with flannel or linen blends for different textures.
Q: Can I use scraps for this quilt?
A: Absolutely. The brick pattern works well with mixed fabrics, making it a perfect project for using up fabric scraps.
Q: What size should I cut the bricks?
A: Sizes vary depending on quilt dimensions, but standard rectangles like 2.5 x 5 inches work well. Maintain uniformity for neat rows.
Q: How do I prevent seams from shifting?
A: Pin or clip each block before sewing, and use a consistent ¼-inch seam allowance. Press seams carefully for smooth alignment.
Q: Do I need a specific quilting pattern?
A: You can choose straight-line quilting for simplicity or free-motion quilting for decorative effects. Both work well with brick layouts.
Q: Can beginners make this quilt?
A: Yes, the Easy Brick Quilt Tutorial is beginner-friendly. Following the step-by-step instructions and taking time with each stage ensures success.
The Easy Brick Quilt Tutorial offers a delightful, approachable project for anyone passionate about quilting. From choosing fabrics to cutting, arranging, sewing, and finishing, each step contributes to a beautiful, functional quilt. By following this guide, you can confidently create a quilt that showcases your creativity and craftsmanship.
We encourage you to share your results, offer honest feedback, and suggest improvements or variations for this tutorial. Your experiences and ideas can inspire other quilters and help refine this Easy Brick Quilt Tutorial for future projects. Happy quilting!


