
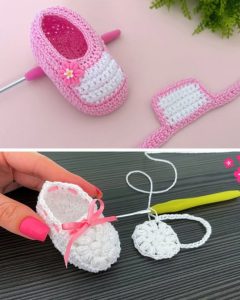
Ballerina pencil case with zipper Pattern


The Fish Quilt Block Tutorial – A Beginner’s Guide is a perfect starting point for anyone interested in quilting. This charming block design, inspired by the graceful shapes of fish, combines simplicity with visual appeal, making it ideal for both beginners and experienced quilters.
By following this tutorial, you will learn how to create a quilt block that can be used for larger quilts, table runners, or decorative wall hangings.
Quilting is a creative and relaxing hobby, and the Fish Quilt Block adds a playful yet classic touch to any project. Using this beginner-friendly guide, you can transform simple fabric pieces into an eye-catching design that reflects your personal style.
The Fish Quilt Block is versatile, allowing for a variety of color combinations, fabric textures, and arrangements. By experimenting with different tones and prints, you can make each block unique, giving your quilt a lively, dynamic appearance.
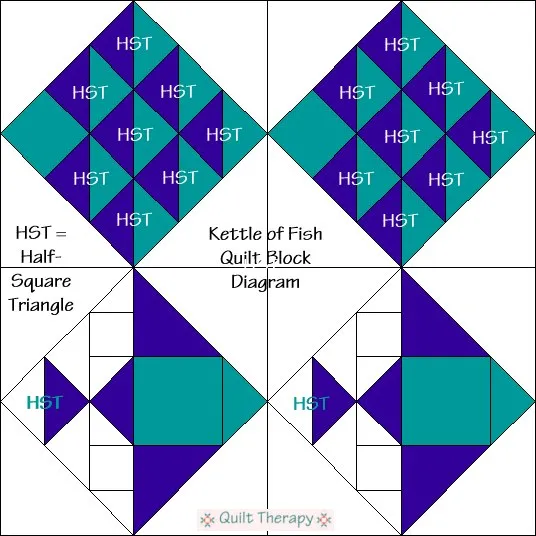
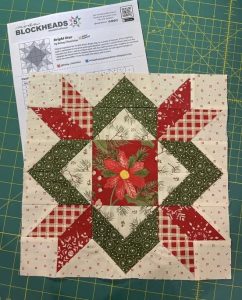
The Fish Quilt Block is inspired by the streamlined silhouette of a fish, typically constructed using triangles, rectangles, and squares. The block is known for its symmetry and ability to create interesting patterns when multiple blocks are joined.
Traditionally, fish blocks are made using contrasting fabrics to highlight the shape of the “fish” against the background. Light and dark fabrics work well to create definition and draw the eye to the central motif.
For beginners, it’s essential to understand the structure of the block before cutting fabric. The Fish Quilt Block Tutorial provides clear diagrams showing how each piece fits together, which minimizes mistakes and ensures your block is uniform.
The block’s size can be adjusted depending on your project. Smaller blocks work well for detailed lap quilts, while larger blocks create bold statements in bed-sized quilts. The guide explains how to calculate measurements accurately to achieve your desired dimensions.
Using quality fabric with crisp edges ensures that seams align neatly. Pre-washing fabrics is recommended to prevent shrinkage after quilting and washing the finished piece.
The Fish Quilt Block is a versatile element that can be combined with other blocks or repeated to form a cohesive theme across the quilt. Once you understand its construction, it becomes a foundational skill in your quilting repertoire.
The pattern often uses half-square triangles (HSTs) to create the tail and fins, giving it a dynamic look.
This block is ideal for beginners because:
Many quilters love using this block for ocean-inspired projects or children’s quilts. With endless color combinations, you can personalize each fish to make it truly special!
Start your Fish Quilt Block by selecting fabrics in contrasting colors. For example, choose a light fabric for the background and a darker, patterned fabric for the fish shape.
Cut your fabric pieces according to the measurements provided in the tutorial. Accurate cutting is crucial for aligning seams and maintaining symmetry in the finished block.
Begin by assembling the fish body. Typically, this involves sewing a triangle to a rectangle, forming the main silhouette of the fish. Ensure your seams are precise and pressed flat for a polished look.
Next, attach the background pieces around the fish shape. This step frames the fish and provides contrast, making the motif stand out. Check the alignment after each seam to avoid distortion.
Once all pieces are sewn together, press the entire block carefully. Consistent pressing helps maintain shape and makes it easier to join multiple blocks when assembling a quilt.
Finally, square up the block to the correct dimensions. Use a ruler and rotary cutter to trim edges evenly, ensuring that each block will fit perfectly with others in your quilt layout.
Maintaining consistent seam allowances is key. The Fish Quilt Block relies on symmetry, and uneven seams can distort the design. Use a quarter-inch seam guide for accuracy.
Organize your fabrics before starting. Grouping light and dark fabrics separately helps visualize the final design and prevents accidental mismatching.
Pin pieces before sewing to hold them in place, especially when joining angled triangles. This ensures precision and reduces shifting during stitching.
Practice on a single block before starting multiple pieces. This helps you understand the construction process and reduces errors in subsequent blocks.
Experiment with color combinations. Using patterned fabrics for the fish and solids for the background, or vice versa, can dramatically change the look and personality of your quilt.
Take your time pressing each seam. Neatly pressed blocks create professional-looking results and make it easier to join blocks later without gaps or puckering.
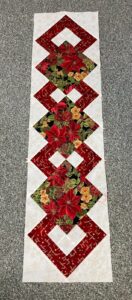
The Fish Quilt Block can be used in a variety of quilting projects. Create a full quilt by repeating the block, or combine it with other simple blocks for a mixed-pattern quilt.
Miniature versions of the block work well for table runners, placemats, or coasters. These smaller projects allow beginners to practice techniques without committing to a large quilt.
You can arrange blocks to create different effects, such as diagonal schools of fish or alternating directions, giving your quilt a playful and dynamic look.
Combine fish blocks with borders and sashing for a more polished quilt layout. This enhances the overall design and frames each block beautifully.
Using themed fabrics, such as ocean prints, can make the Fish Quilt Block even more engaging and decorative, perfect for children’s rooms or beach-inspired décor.
Blocks can also be adapted for wall hangings or cushion covers, providing decorative touches that highlight your quilting skills.
Q: Is the Fish Quilt Block suitable for beginners?
A: Yes, it’s designed to be beginner-friendly. Clear instructions and diagrams make it easy to follow, even for first-time quilters.
Q: What fabrics work best for this block?
A: Cotton fabrics with crisp edges are ideal. Pre-wash all fabrics to prevent shrinkage and maintain color consistency.
Q: Can I adjust the block size?
A: Absolutely. Simply scale the measurements while keeping proportions consistent to fit your project.
Q: How do I maintain accurate seams?
A: Use a consistent quarter-inch seam allowance and pin pieces before sewing to ensure precision.
Q: Can I combine fish blocks with other patterns?
A: Yes, fish blocks can be mixed with other simple quilt blocks to create a custom quilt design.
Q: How do I prevent puckering?
A: Press seams carefully and ensure accurate cutting. Proper seam allowance and pinning also help prevent puckering.
Q: What projects can I make with these blocks?
A: Full-size quilts, table runners, wall hangings, cushion covers, and even small decorative pieces are all possible.
The Fish Quilt Block Tutorial – A Beginner’s Guide provides a simple yet rewarding way to explore quilting. From selecting fabrics to assembling and pressing your block, this guide equips you with the skills needed to create charming, playful designs.
Whether you plan to make a full quilt, a table runner, or decorative pieces, mastering the fish block opens the door to creativity and personal expression. Each block you complete builds confidence and lays the foundation for more advanced quilting projects.
Share your thoughts and experiences after completing your blocks. Your insights, color choices, and layout ideas can inspire others to dive into quilting and explore their creativity with the Fish Quilt Block.


