
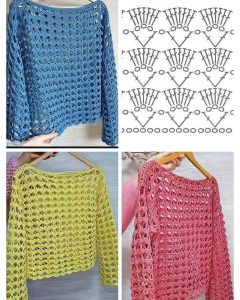
Ballerina pencil case with zipper Pattern


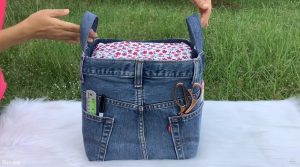
How to Make a Cute Zipper Tote Bag – Free Pattern is an easy and fun project for anyone looking to add a personal touch to their daily accessories.
With this free pattern, you can create a stylish tote bag perfect for carrying essentials like notebooks, cosmetics, or even groceries.
Whether you are a beginner or an experienced sewer, this step-by-step guide will walk you through the process, helping you create a durable and adorable bag that stands out.
Creating your own tote bag gives you the freedom to choose fabrics, colors, and patterns that reflect your personal style.
Unlike store-bought bags, a handmade tote is unique, practical, and can be customized for size, compartments, or additional features like pockets. Using this free pattern, you can make a bag that’s not only functional but also a statement piece for everyday use.
Sewing a zipper tote bag can be a rewarding project that improves your sewing skills and allows you to explore different techniques such as installing zippers, reinforcing seams, and finishing edges neatly. By following this tutorial, you’ll gain confidence in creating structured bags and learn tips for achieving a professional-looking result at home.
To start your cute zipper tote bag, gather all necessary materials. You will need fabric for the exterior and lining, a zipper, thread, scissors, pins, and a sewing machine. Choosing durable fabric ensures your tote bag lasts longer and handles everyday use without wear and tear. Common options include cotton, canvas, or denim for the exterior and lighter cotton for the lining.
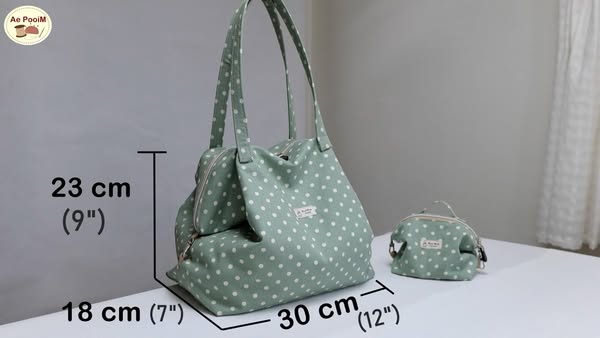
Next, measure and cut your fabric according to the dimensions specified in the free pattern. Accurate cutting ensures your bag pieces fit together perfectly and the final result looks polished. Take your time with this step to avoid mistakes that could affect assembly.
When selecting a zipper, consider the length in relation to your bag’s opening. A matching or contrasting zipper can add either a subtle or decorative touch to your tote. Make sure the zipper slides smoothly to prevent frustration during use.
Prepare your sewing machine by threading it with matching or complementary thread. Ensure the tension is correctly set for both your chosen fabric and zipper. This step helps prevent puckering or uneven stitching, resulting in a professional finish.
Pin the pieces together before sewing, especially around curves or the zipper area. Pinning keeps the layers aligned and prevents shifting while stitching. This is particularly important for maintaining straight edges and symmetrical sides.
Finally, review the free pattern instructions carefully. Familiarizing yourself with each step before sewing helps you anticipate tricky areas and ensures a smoother process. Keeping the pattern accessible during the project allows you to reference measurements and assembly directions quickly.
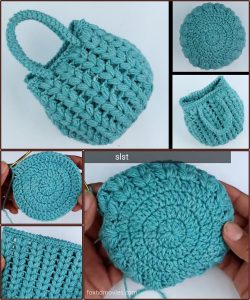
Begin by sewing the zipper to the top edges of the exterior fabric and lining separately. This technique, known as a zipper insertion, ensures a clean look and functional closure. Press the seams to lay flat, which enhances the overall appearance of your zipper tote bag.
Next, assemble the exterior bag by sewing the sides and bottom together. Reinforce corners with backstitching to improve durability. Take your time aligning edges to maintain straight seams, which contributes to a professional finish.
Repeat the same assembly for the lining, leaving a small opening at the bottom to turn the bag inside out later. This hidden opening allows you to neatly finish the interior without visible raw edges.
Once both pieces are assembled, place the lining inside the exterior bag with right sides facing each other. Align seams and edges carefully before sewing around the top, attaching the lining to the exterior fabric securely.
Turn the bag right side out through the opening in the lining. Push out corners gently to achieve a crisp, square shape. Hand-stitch or machine-sew the lining opening closed, ensuring it’s neat and nearly invisible.
Finally, press the entire tote bag to smooth out wrinkles and shape the zipper area. Optionally, add decorative elements such as fabric flowers, appliques, or personalized embroidery to enhance the cuteness factor. Your cute zipper tote bag is now ready to use or gift.
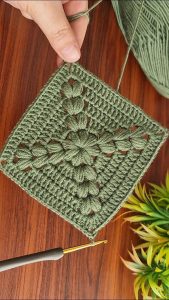
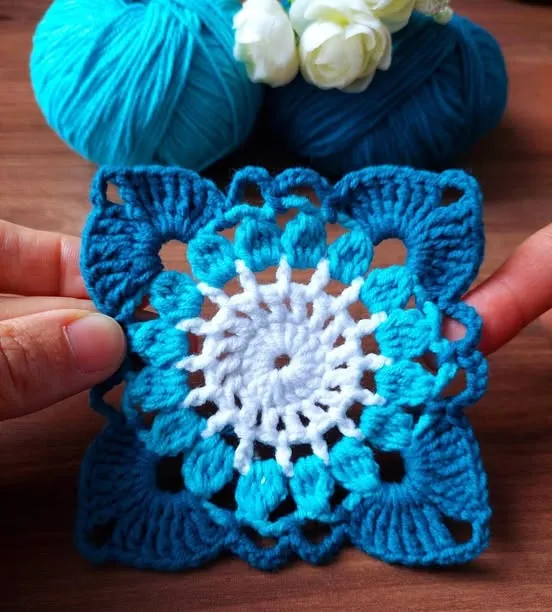
Choosing fabrics with fun patterns or textures can transform a simple tote into a fashionable accessory. Combining solids with prints or using quilted fabric can add dimension and interest.
Consider adding interior or exterior pockets for functionality. Pockets keep essentials organized and make your zipper tote bag more versatile for everyday use.
Experiment with zipper styles. A contrasting color zipper can act as a statement piece, while a matching zipper keeps the design subtle. Metal zippers add durability and a polished look.
Adjust the tote bag dimensions based on your needs. For example, larger bags are ideal for carrying books or groceries, while smaller sizes make cute casual handbags or gift bags.
Use interfacing for extra structure. Adding lightweight or medium-weight interfacing helps your bag maintain its shape and supports heavier items without sagging.
Embellishments such as buttons, patches, or appliques can personalize your tote. Adding your initials or a favorite motif makes the project uniquely yours and perfect for gifting.
Skipping the pinning step can lead to uneven seams and misaligned edges. Always pin layers carefully before sewing.
Using a weak or stretchy fabric without reinforcement can cause sagging. Choose a sturdy material or add interfacing to support the structure.
Sewing the zipper incorrectly can make it difficult to open or close. Take your time to ensure proper alignment and smooth stitching.
Ignoring seam allowances can result in a bag that’s too small or poorly shaped. Follow the free pattern instructions closely for accurate measurements.
Rushing through corners can cause uneven or bulky edges. Slow down at the corners to achieve clean and professional-looking results.
Neglecting to press seams can leave the bag looking unfinished. Ironing at each step helps maintain a crisp and neat appearance.
Q: What fabric is best for a beginner’s tote bag?
A: Cotton or canvas is ideal for beginners due to its stability, ease of handling, and wide availability.
Q: Can I make the tote bag without a sewing machine?
A: Yes, it’s possible by hand-sewing, though it may take longer and require careful stitching for durability.
Q: How do I choose the right zipper length?
A: Measure the bag opening and select a zipper slightly longer than that measurement for smooth functionality.
Q: Can I make the tote bag waterproof?
A: Using laminated cotton or adding a waterproof lining can help make the bag resistant to moisture.
Q: How can I add extra pockets inside the tote?
A: Cut additional fabric pieces, sew the edges, and attach them inside the lining before assembling the bag.
Q: Is it possible to resize the pattern?
A: Absolutely. Adjust the measurements in the free pattern according to your desired bag size, keeping proportions consistent.
Making a cute zipper tote bag with this free pattern is a fun and rewarding sewing project that combines creativity, functionality, and personal style.
From choosing fabrics to installing the zipper and assembling the bag, each step is designed to guide you toward a professional-looking result.
You now have the skills to create personalized tote bags that are perfect for everyday use or gifting. Share your experience, leave your honest feedback, and suggest any improvements for future tutorials. Happy sewing!


