
Ballerina pencil case with zipper Pattern


The Mini Tote Bag with Side Pockets is a practical, stylish, and highly customizable accessory that is perfect for daily use, shopping trips, or gifting. This project combines functionality with creativity, allowing you to craft a small yet versatile bag that includes side pockets for added convenience.
Following this step-by-step tutorial, you will learn how to create a durable and fashionable mini tote bag that reflects your personal style. Whether you are a beginner or an experienced crafter, this project is designed to guide you through each stage, ensuring a satisfying and successful result.
Making a mini tote bag with side pockets not only enhances your sewing or crochet skills but also provides a practical accessory that meets everyday needs.
The side pockets are ideal for storing items like a phone, keys, or small personal belongings, making the bag highly functional while maintaining a compact and stylish appearance.
With the Mini Tote Bag with Side Pockets – Step by Step, you can explore different materials, colors, and design elements, from fabric choices to decorative stitching, allowing your creativity to shine through in every detail.
The appeal of a mini tote bag goes beyond its practicality. It is also a beautiful way to showcase handmade craftsmanship and attention to detail. By creating this bag, you can experiment with different techniques, including sewing, reinforcing seams, and designing pockets that are both secure and visually appealing. This step-by-step tutorial offers detailed instructions to ensure that each mini tote bag you make is not only functional but also aesthetically pleasing, making it an accessory you will proudly carry or gift to loved ones.
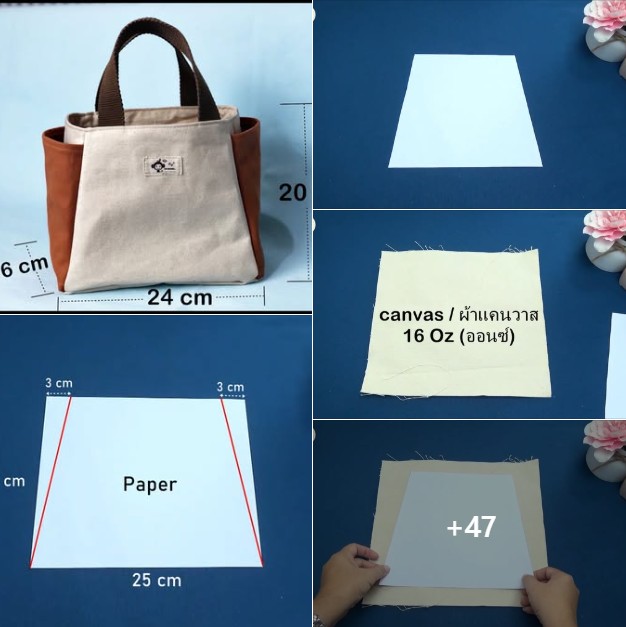
To make your Mini Tote Bag with Side Pockets, gather the following materials: high-quality fabric for the main body of the bag, which can be cotton, canvas, denim, or any sturdy textile suitable for daily use. For the side pockets, use the same fabric or a complementary material to add contrast. Thread that matches your fabric, along with scissors, pins, and a sewing needle or sewing machine, is essential for accurate and durable construction.
Additionally, consider adding interfacing to reinforce the bag’s structure, especially for the base and side pockets. Handles can be made from fabric, webbing, or leather, depending on your preferred style and strength requirements. Optional items include buttons, snaps, or magnetic closures to secure the bag opening, as well as decorative elements such as embroidery, patches, or appliqués for personalization. Preparing all materials before starting ensures a smooth workflow and helps maintain consistent quality throughout the project.
The Mini Tote Bag with Side Pockets – Step by Step begins with cutting the fabric pieces. For a standard mini tote, cut one main rectangle for the bag body, two smaller rectangles for the side pockets, and two strips for handles. If you are adding lining, cut corresponding pieces for the inner structure. Ensure all measurements are precise to avoid uneven seams or misalignment.
Next, prepare the side pockets. Fold the top edge of each pocket piece and stitch a hem to create a clean finish. Then, position the pockets on the sides of the bag body, pin them in place, and sew along the sides and bottom edges. The pockets should be securely attached while allowing enough flexibility to hold small items. Check alignment and adjust if necessary to maintain symmetry.
Once the side pockets are attached, assemble the main body of the mini tote bag. Fold the fabric to form the bag shape, ensuring corners are squared and seams are aligned. Stitch the side seams and bottom edge, reinforcing stress points for durability. If using interfacing, attach it to the base and sides for added structure, especially if you plan to carry heavier items.
Next, prepare the handles. Fold and stitch the handle strips, ensuring edges are secure and the width is consistent. Attach the handles to the top of the bag, evenly spaced for balance. Reinforce the stitching where the handles meet the bag to prevent tearing during use. Handles can be customized in length depending on whether you prefer a shoulder bag or a hand-carry tote.
After assembling the main body and handles, consider adding finishing touches. Attach closures such as buttons, snaps, or magnetic clasps for security, and reinforce all seams for longevity. Decorative stitching or embellishments can personalize your mini tote, making it a unique accessory that reflects your style.
Finally, check the bag’s overall structure. Make sure the pockets are functional, seams are secure, and handles are evenly attached. If adding a lining, sew it in carefully to hide raw edges and provide a polished look. Your mini tote bag is now complete, ready to carry essentials in a stylish and practical way.
The Mini Tote Bag with Side Pockets can be customized in countless ways. One variation involves using patterned or textured fabrics for the pockets to create contrast with the main body. Floral prints, geometric designs, or bold stripes can transform a simple bag into a fashion statement.
Another variation includes adjusting the size. A slightly larger version becomes a convenient everyday bag, while a smaller version serves as a compact accessory for quick errands. The number and size of pockets can also be customized depending on your needs.
You can further personalize your tote by adding closures or embellishments. Buttons, buckles, embroidery, appliqués, or patches give your bag a unique touch. Even subtle topstitching or decorative edges enhances the visual appeal.
Handles offer additional variation. Crocheted or braided handles provide texture and contrast, while leather straps lend a sophisticated look. Adjustable or detachable handles add versatility, allowing the bag to be worn in multiple ways.
Color combinations play a significant role in design. Neutral shades create a timeless look, while bright, bold colors make a fun statement. Combining different textures, fabrics, and colors results in a bag that is truly one-of-a-kind.
Lastly, lining options can enhance both durability and aesthetics. A contrasting lining adds surprise and style, while a padded lining can make the bag more functional for carrying delicate items like tablets or cosmetics.
Creating the Mini Tote Bag with Side Pockets has several advantages. On a practical level, it provides a functional accessory that meets everyday needs. The side pockets enhance usability, making organization easier and reducing clutter in your bag.
From a creative perspective, this project allows you to develop and refine sewing or crochet skills. Handling seams, reinforcing stress points, and designing pockets encourages precision and attention to detail. The satisfaction of finishing a handmade bag also provides a sense of accomplishment.
Additionally, handmade bags are eco-friendly alternatives to mass-produced items, reducing waste and allowing you to choose sustainable materials. Creating personalized bags for yourself or as gifts ensures each piece is unique and meaningful.
Q1: Can beginners make this bag?
Yes. This step-by-step tutorial is beginner-friendly, though basic sewing skills or crochet experience is recommended.
Q2: What fabrics are best for durability?
Canvas, denim, or cotton blends provide strength and structure, ideal for daily use.
Q3: How many pockets can I add?
As many as needed. The standard design features two side pockets, but you can add interior or additional exterior pockets for extra functionality.
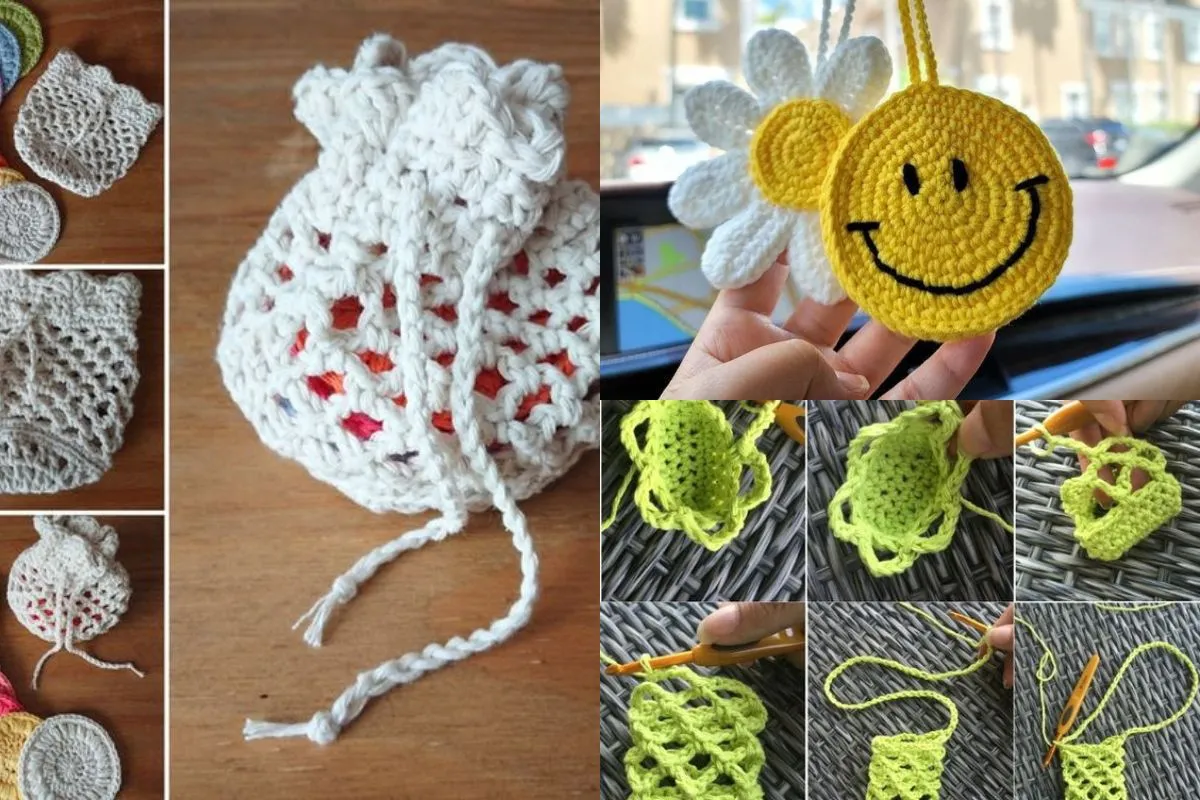
Q4: Can I crochet this bag instead of sewing?
Yes. Using crochet stitches such as single crochet or half-double crochet, you can create a fabric sturdy enough to form a mini tote bag.
Q5: How long does it take to complete?
Depending on complexity, sewing a simple mini tote bag can take a few hours, while crocheting may take longer depending on skill level.
Q6: Can I make the bag waterproof?
Yes. Choose waterproof fabrics, apply fabric sealants, or use a lining with water-resistant material.
Q7: How do I reinforce the handles?
Use double-layered fabric, strong stitches, or add interfacing to ensure the handles support the bag’s weight.
Q8: Can I customize the size?
Absolutely. Adjust the main body dimensions and pocket size to create a larger or smaller bag.
Q9: Can this bag be machine-washed?
Depending on fabric choice, most cotton or acrylic fabrics are machine-washable. Always check care instructions for durability.
Q10: Are closures necessary?
No, closures are optional. They add security but can be skipped for an open-top tote design.
From selecting materials to sewing or crocheting the main body, adding pockets, creating handles, and personalizing with embellishments, this tutorial guides you through every stage of the process.
The finished bag is not only practical but also stylish, making it perfect for daily use, gifting, or showcasing your handmade skills.
Experiment with fabrics, colors, and pocket arrangements to create a truly unique mini tote bag. Share your creations and suggestions to inspire other crafters and celebrate the joy of handmade accessories.


